- Thread starter
- #41
- Joined
- May 6, 2011
- Messages
- 505
- Reaction score
- 203
- Points
- 183
- Location
- Cluj-Napoca, Romania
- Printer Model
- Epson L800, 1400; ML-2165W
Tudor said:@lin:
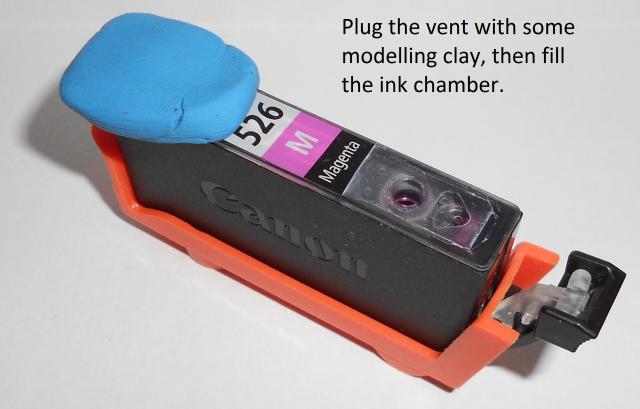
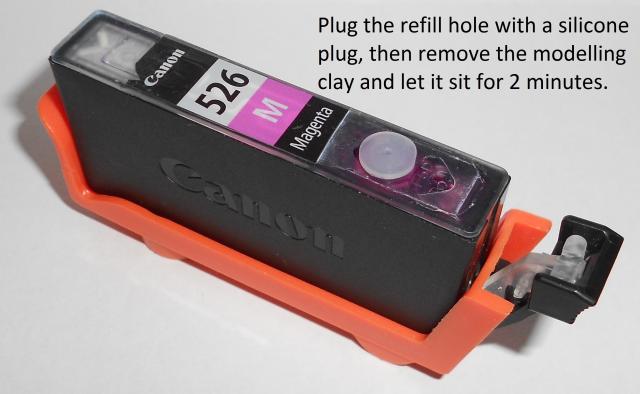
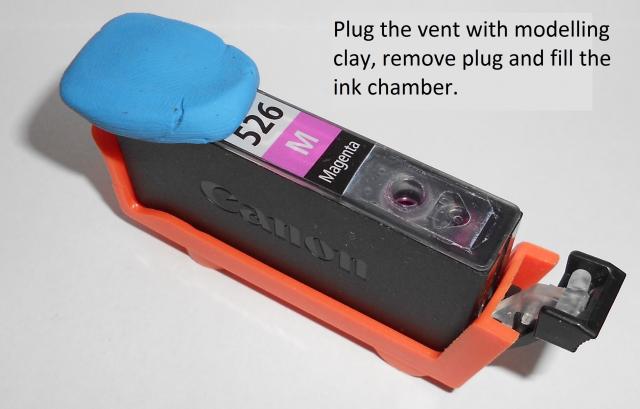
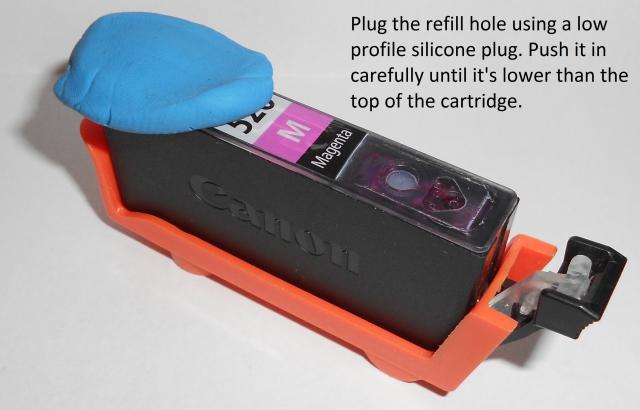
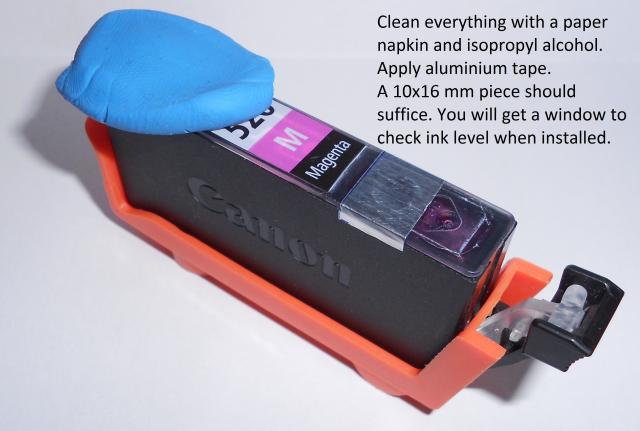
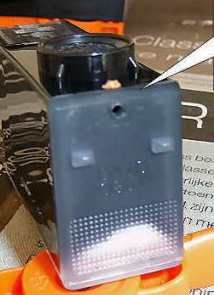
The idea was to not overfill the sponge. If you read the writing on the pictures you will find these steps:
a. Close the vent with the clay;
b. Unplug the refill hole (if plugged), fill the ink chamber and plug it;
c. Remove the clay and wait 2 minutes for the sponge to absorb as much ink as it needs. You can wait longer, but 2 minutes should be enough.
If needed you can repeat steps b and c until the cartridge reaches a weight of 20-20.5 gr.
first video removed, see post #60lin said:Air is needed to go into the ink chamber for the exchange of air and ink to be absorb by the sponge. Even by closing the refill hole with plug at point B as you mentioned #8 and thereafter point C removing of the clay, you are not allowing the exchanging of air and ink process to take place.
The video has no sound, play your favorite music.
")
I'll make a video of a cli-521 using the same steps so we can see the difference.