To Fit or not to Fit a Waste ink Tank on a Canon Printer ?

mikling

Printer VIP
Platinum Printer Member
Joined
Jul 2, 2006
Messages
3,239
Reaction score
1,471
Points
313
Location
Toronto, Canada
jtoolman said:
I'll simply have to test in various ways.
One would be to let it hang over the side of the table and see what happens. I would only test it on my old R340 to see how it behaves.
Two would be to drill a tiny vent hole on the cap pre inflate the bag and stand it up inside a tin can. When almost full, recap it with a unmodified cap and dispose of it.

No biggie, it's just a thought. Never stop thinking and trying.

Joe
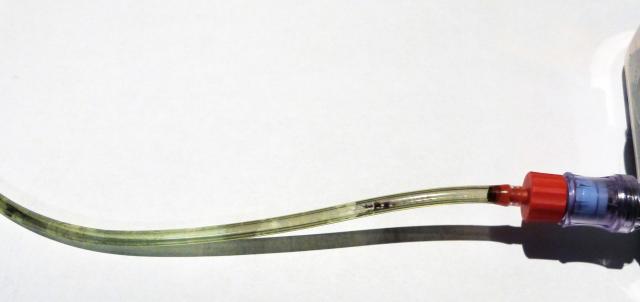
By the time you get around to supporting the bladder so that it does not collapse when it has a vent hole, you can make yourself a better solution really.
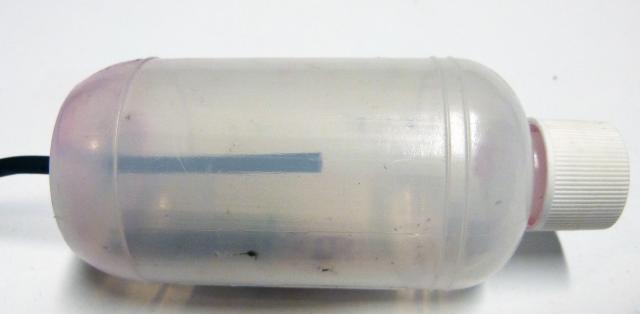
Use a bottle with a wide opening. Inside this bottle, float a piece of stytofoam. Stick a rod on the styrofoam like a sailmast. This rod will guide the styrofaom float up when the tank gets more ink. So the mast will stick out of the bottle when it is full. You could put a fluorescent flag on the mast or Here's the neat trick. Go to your dollar store and pick up one of those cheap button cell LED flashlights for a keychain.
Now wire the sailmast and styfoam so that when the tank fills up to a certain level it will light up the LED. Warning... the tank is geting full. If you want it on the front of the printer, Wire the LED so it comes to the front.

How to wire up the LED, Simple. On the float, place a conductive circular. pad you can use aluminum tape. When the float gets to the top, it touches two protruding wires that enter the tank. So it switches the circuit on. These two wires are just the broken circuit that the float shorts when it reaches to the top.
 

websnail

Printer VIP
Platinum Printer Member
Joined
Oct 27, 2005
Messages
3,661
Reaction score
1,345
Points
337
Location
South Yorks, UK
Printer Model
Epson, Canon, HP... A "few"
mikling said:
If this is considered, it will be seen that a catchment tank is more practical. If the ink empties into a catchment container then the air within the container will be 100% saturated eventually. This 100% saturation will prevent further evaporation of the ink within the container. The only exception is when there is air displacement via the vent hole in the catchment tank. This will occur during barometric pressure changes if the other end at the printer is sealed or if the temperature fluctuates casuing a pumping effect due to expansion and contraction of the air inside the container.
Translation:
One of the many existing rigid tanks like the Printer Potty kits. The inclusion of a very small diameter vent hole allows the ink and air to flow into the tank while allowing the air to exit leaving just ink and fairly static air.

Such a design allows for any fluctuations in air pressure in both directions. And just to deal with the issue of evaporation, there's virtually none taking place, nor does the vent hole allow for a current of air to pass through, so there's nothing to draw off the moisture laden air in the tank. The only time I've experience such an was with a tank I had sitting in direct sunlight (such as we have in the UK) for nearly 18 months with around 25ml (1oz-ish) of waste ink in the tank and even then the ink was just thicker, rather than dried out.


Both of these conditions can be mitigated if one introduces a serpentine system towards the vent just like a canon sponge cartridge has in its air vent system. The serpentine will be considered overkill (especially on an Epson because Epson has long purge cycles in general) but a long coiled tube through which the air escapes will fullfill that. The catchment tank only holds liquid and no provision and space is needed for the air that a bladder will require.
Perhaps in a perfect system but such a system exists in cartridges primarily because ink is being drawn off, rather than introduced, so any drying action is a bigger threat in cartridges where overkill is definitely a good idea given the shelf life requirement. Waste ink tanks on the other hand are constantly introducing yet more fluid to the tank every few days, weeks (if in low use) there's always a moisture laden atmosphere in the tank.


The issue of Canon printers and clogging is unresolved and inconclusive. Ironically the iP4000 I installed a kit on, had such a strong pump that it blew off connectors after something constricted, plugged or kinked the tubes. Whether it was ink drying, ink combination or poor/lengthy storage, or some other issue is an unknown because I didn't chase do a post mortem on the unit and it was some years ago. All advice from that experience is naturally based on the "take no ruddy chances" methodology, hence the various dire warnings to The Hat :p

The bottom line is that there is currently a big hole in terms of information on what actually happens with Canon printers and while theory is all well and good it really requires more practical experimentation and the occasional "inspired" (read: nuts) individual to give it a go and see what happens.
 

jtoolman

Printer Master
Platinum Printer Member
Joined
May 7, 2011
Messages
1,949
Reaction score
940
Points
277
Location
United States
Printer Model
All of them! LOL
I have made Waste ink "Systems" as simple as the tubing directed in the open mouth of a bottle taped to the round columns of my printing shelves. The tube is unsecured and simply stuck inside the bottle. Been working like that for months without a single problem.

I have some that are capped bottles with a tube attached to a threaded fitting and a small vent hole.
These I just place where ever is convenient. Again no problems for months of use. I empty them when there is about a inch or two in them.

And I also have the "Rolls: of waste ink systems, The Printer Potty.
Also working perfectly since I installed it.

Any one who has seen these little food bags have to realize that they are not the same consistency as an ink bladder in an EPSON cart like the T58 or the T60 110ml carts for the 4800.

The actually are a bit thicker material and if simply pre inflate them the bottom pleats open up and the will stand up perfectly steady.
The cap can be vented and it will act as any of my other systems. A simple gentle shake will give you an idea of how much ink is in them. When you think it's time, you hold them by their very sturdy neck, unscrew the cap and recap it with one that is not modified.
No mess at all.

The purge pump can do whatever it pleases and it should not affect the bag as it is vented.

All I need to do is test it. If it fails, then it fails. If it is a success then I will use them on other printers.

Joe
 

websnail

Printer VIP
Platinum Printer Member
Joined
Oct 27, 2005
Messages
3,661
Reaction score
1,345
Points
337
Location
South Yorks, UK
Printer Model
Epson, Canon, HP... A "few"
Only one thing to add...

A litre of flood water is a whole other kettle of fish from a litre of tap water... Apply Murphys Law to an open, squeezable bag of blackish dye and pigment ink and you have a recipe for potentially disastrous carpet refurbishment and wallpaper redecoration.


... Is is wrong that there's a small part of me that wants to be there when it happens? ;)
 

jtoolman

Printer Master
Platinum Printer Member
Joined
May 7, 2011
Messages
1,949
Reaction score
940
Points
277
Location
United States
Printer Model
All of them! LOL
That would be the perfect design, Mike!
Doesn't Martin's Printer Potty have a one way valve / filter of sorts as part of the outer fitting?

Martin?
 

mikling

Printer VIP
Platinum Printer Member
Joined
Jul 2, 2006
Messages
3,239
Reaction score
1,471
Points
313
Location
Toronto, Canada
The above is a very simple and effective connection for DIYers making their own tanks. It is an elegant solution as it requires only ONE hole and the vent hole is integrated into the connection. At the same time it can act loosely as a leaky check valve of sorts. Or a cover for the vent hole. Look closely.

here is what the connection shows.

The joiner joins two pieces of tubing.
A hole that is slightly larger than the diameter of the joiner is made into the tank or bottle cover.
The gap between the hole of the tank/cover and joiner will also serve as the vent hole. That is why I call it the coaxial connection.
The two tubes are joined but a small gap is also left so that the joint is leaky.
The inside tube will also STOP the tube from coming off the bottle and thus it is safe. No tape is required.
The strength of the connection will depend on how tightly the joiner that joins the tubes fit. Obviously if it is loose, don't use it. Look for something larger.

Enjoy. Simple, safe effective.

You want the tubing inside the bottle to be just long enough so that foam will never climb back up. About 1 - 1/2 inch is sufficient.
Ideally you will fit this connection to the top of a bottle in the center. When the cover is turned to be opened, the cover will rotate BUT the tube will NOT rotate with it. It will spin. When the cover is off, take a golf tee or pen and stick it into the exit tube under the cover. This will stop ink from leaking out. You can then remove the bottle and empty it and then reconnect it without causing twists in the tubing. With a jam / peanut nut butter jar, an excellent tank is created in minutes. The requirement for difficult to find and mount connectors is totally removed for the DIYEr. Remember always attach the waste ink bottle to something solid like your printer. If you want to be especially safe, fill the bottle with absorbent material.
 

websnail

Printer VIP
Platinum Printer Member
Joined
Oct 27, 2005
Messages
3,661
Reaction score
1,345
Points
337
Location
South Yorks, UK
Printer Model
Epson, Canon, HP... A "few"
jtoolman said:
Doesn't Martin's Printer Potty have a one way valve / filter of sorts as part of the outer fitting?

Martin?
Actually no. The Printer Potty's have an auto-closing valve (when disconnected from the kits extension tube) to avoid the problem of ink flowing out on the boxes (as the valves are low in the box wall). The design ensures ink doesn't leak when taking the tank to a sink to dispose of the waste. Such a valve is also in use on my old waste bag (and bag in a box) design.

One-way/check valves have been considered but the cracking pressure (the pressure required to close them) was a consideration and further complicated by the resinous state of pigment inks. The ones I played with provided an excellent potential point for the ink to glue the valve shut and causing backflow to the pump/printhead. Coupled with the high cost of such valves I ruled them out pretty quickly.

I have designs that allow for a vertical tank approach where the check valve would block a "squeeze" accident or overflowing scenario but that requires other design considerations related to the potential for a syphon to develop, etc...

You have to remember that a commercial kit has to balance the issues of cost and manufacturing process against a wide range of end-user abilities, budgets, etc. That said I have plenty of "perfect" ideas that I'd love to crank out someday.
 

The Hat

Printer VIP
Platinum Printer Member
Joined
Jan 18, 2010
Messages
15,618
Reaction score
8,691
Points
453
Location
Residing in Wicklow Ireland
Printer Model
Canon/3D, CR-10, CR-10S, KP-3
Far from me to advertise the fact that the Potty waste ink system work annoying simple and perfect is still not giving it justice.

I have seen 92 ml of ink been pumped into this little waste tank automatically over a period of a month and I have not had to interfere with it in any way, except watch with interest.

I dont know if the pigment acts any differently that dye inks but when the ink purge is completed inside my printer it then blows air out through the system which almost completely cleans the tubing of any ink so much so that the waste tank fills with bubbles in the process.

5128_waste_pipe.jpg


It hasnt leaked, overflowed or spilt a drop of black sludge even when I emptied the waste ink into a bottle to weight it, from what I can see I dont think I could have come up with anything better than this.

I had a bottle attached to my waste ink tubing on my 9500 before I gotten delivery of another potty kit, yes it would have work but it was not ideal and giving my track record it was another disaster just waiting to happen..

5128_waste_bottle.jpg
 

mikling

Printer VIP
Platinum Printer Member
Joined
Jul 2, 2006
Messages
3,239
Reaction score
1,471
Points
313
Location
Toronto, Canada
Here is an example with both techniques implemented on an Artisan and it takes up a very small footprint and the tank holds up to 10 ozs. The best thing is that the tank did not even need drilling. This is perhaps an ideal setup consisting of my CISS for Artisans and a waste ink tank requiring no additional space over what the CISS takes up.


These waste tanks can be mounted on the sides and rear of other printers as well. The tubes are colored silicone tubing that won't harden up over time and allows viewing of the ink flow.


The cover to bottle is attached to the tube. The cover snaps off together with the tube . Look at the body lotion bottles that your family uses. There might be something there for you to use. Total time to create this tank was under one minute! The most time was spent cleaning up the extra body lotion left over inside the bottle. Currently my Epson R200 has a similar tank mounted in the rear and below the rear feed tray. So it has a huge waste ink tank and takes up no extra space whatsoever.
Google "Method Bloq"
 

Latest posts

Top