- Joined
- Jan 18, 2010
- Messages
- 16,112
- Reaction score
- 9,065
- Points
- 453
- Location
- Residing in Wicklow Ireland
- Printer Model
- Canon/3D, CR-10, CR-10S, KP-3
This box is a lot smaller and it used a single centre axel for 4 reels of filament, it worked ok while printing but when it came to replacing any of the empty spools it was a Feckin nightmare, so no surprises I am upgrading.
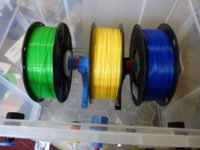
I went for the same concept of support (Centre axel) but I decided to only use 3 reels in the box this time with independent shafts for each reel, because I didn’t want to duplicate some of the same removal mistakes and difficulties I was having with the 4 reel system that was previous in place..
I spent a bit of time designing supports to accommodate the 3-shaft idea I had, which I reckon should gave loads of room for changing the individual reels, and have far less time with the top lid off the box.

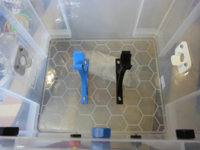 click to enlarge..
It was only a matter of drilling a few holes in the bottom to secure the supports in place with screw, then printing out 3 supports shafts with another tube over that to act like a spinner.
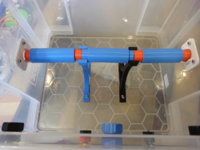
Once I had all the bits and pieces assembled I was able to install the new filament reels in place with complete ease, then I feed the filament into each of their outlet holes and replaced the bung to hold the filament and stop it retracting.
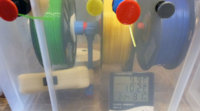
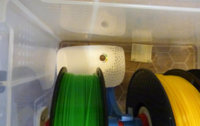
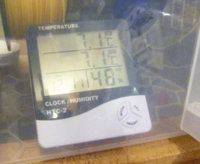
I also used two dehumidifiers on the bottom of the box along with humidity and temperature gauge, now all I have to do is wait till the humidity drops below 50 % and I will be ready to start using the new filament. Edit: (Typo corrected @stratman) Happy, YOW..
This box was a lot quicker and easier to convert than the previous one with the bearing rails and I didn’t have to wait on bearings to be delivered either, it’s amazing how easy a job like this is when you have a 3D printer on hand to make the parts you’re going to need..
Now onto the next and last box..
I went for the same concept of support (Centre axel) but I decided to only use 3 reels in the box this time with independent shafts for each reel, because I didn’t want to duplicate some of the same removal mistakes and difficulties I was having with the 4 reel system that was previous in place..
I spent a bit of time designing supports to accommodate the 3-shaft idea I had, which I reckon should gave loads of room for changing the individual reels, and have far less time with the top lid off the box.

 click to enlarge..
It was only a matter of drilling a few holes in the bottom to secure the supports in place with screw, then printing out 3 supports shafts with another tube over that to act like a spinner.

Once I had all the bits and pieces assembled I was able to install the new filament reels in place with complete ease, then I feed the filament into each of their outlet holes and replaced the bung to hold the filament and stop it retracting.


I also used two dehumidifiers on the bottom of the box along with humidity and temperature gauge, now all I have to do is wait till the humidity drops below 50 % and I will be ready to start using the new filament. Edit: (Typo corrected @stratman) Happy, YOW..
This box was a lot quicker and easier to convert than the previous one with the bearing rails and I didn’t have to wait on bearings to be delivered either, it’s amazing how easy a job like this is when you have a 3D printer on hand to make the parts you’re going to need..

Now onto the next and last box..


