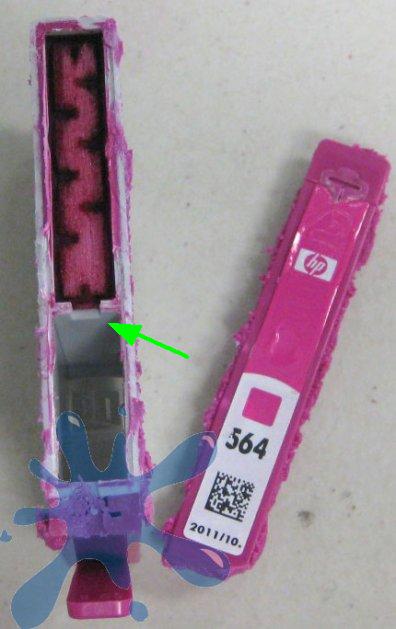
thanhhuy123 wrote:
Drill one high hole to glue the notch at the top.
Drill another lower hole to make the notch at the bottom.
It looks like the idea could work, but the cartridges are made from polypropylene, a plastic it is very difficult to get a reliable bond to. Some hot melt glues work, others don't. The slightest air leak into the ink chamber will cause the cartridge to leak.
Even if you manage to get a perfect seal, there is one more problem. At the bottom and around one centimetre up the partition has some grooves at the sponge side. They are vital in the exchange of ink and air, and regulation of ink pressure/flow. In a standard cartridge these grooves are not in the proper position, as the partition is turned upside down. So I don't recommend attempting the modification.
The HP 564 XL cartridges are very similar to some Canon cartridges, so check out this photo series by
paulcroft and specially note the grooves seen in pictures #4,5,and 6. Link here:
http://www.nifty-stuff.com/forum/viewtopic.php?id=6221&p=1
thanhhuy123 wrote:
Just fill in the chamber, once the cartridge is out of ink, take it out, put our finger at the vent hole and make the cartridge top-side-down so the ink in chamber can travell through the north on top into the spoung! What do you think?
If any ink is transferred from the ink chamber to the sponge chamber, it will be at the top of the sponges and in the vent area, where it certainly does not belong. And the ink transfer will not work when the cartridge is inserted in the printer in the normal position, so forget that idea.
If you want to know more about the workings of Canon and HP cartridges you should read the whole of this thread about the German refill,:
http://www.nifty-stuff.com/forum/viewtopic.php?id=4315 or perhaps you could also start around post #200 and read on. Especially note
ThrillaMozilla's posts about the HP 564 cartridges.