Freedom Refill Method for Canon BCI 3, 5, 6 & CLI 8 & PGI 5 and others

barfl2

Print Addict
Joined
Feb 22, 2010
Messages
481
Reaction score
65
Points
168
Location
Hampshire U.K.
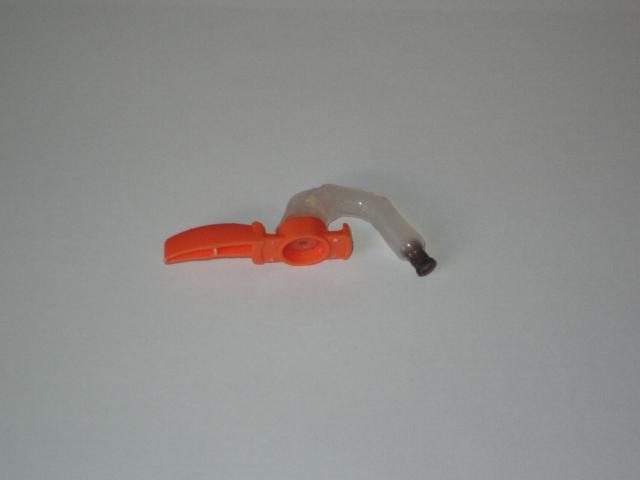
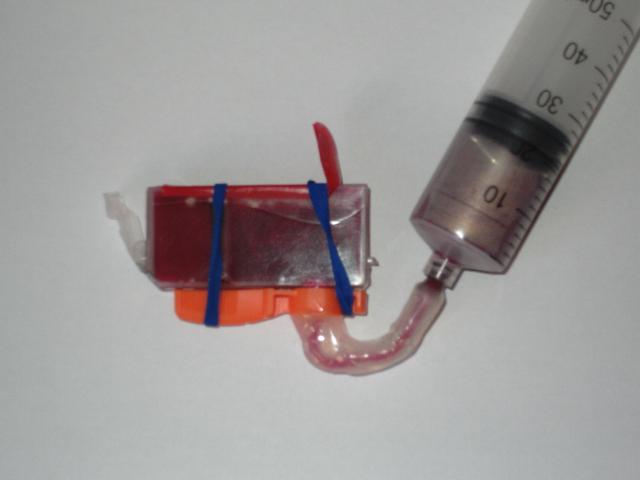
PeterBJ Could I ask a question about your adaptor. Does the needle cover connect directly with the syringe which I assume is a slip luer type ? or is there a piece of plastic tubing connecting the two. all my covers have 4 external ribs on and would not be suitable. So far I have stuck to luer lock to avoid and inky disasters, and also allows me to draw the required amount of ink from my squeezy bottle and return any surplus the same way. So far not needed any gloves but I am not holding the cartridge.

You were very fortunate to 1. buy a syringe from a Pharmacy and 2. get one with an O ring on. Cannot source syringes from Pharmacies here they only keep the small volume medical ones. I got my non-medical one from E-bay. Most sites sell in multiple quantities and postage can be expensive. They all seem to sell the BD ones and the seals are quite stiff.

Anyway great effort keep up the good work

barfl2
 

PeterBJ

Printer VIP
Platinum Printer Member
Joined
Nov 27, 2010
Messages
5,064
Reaction score
4,914
Points
373
Location
Copenhagen Denmark
Printer Model
Canon MP990
The syringe I used has a much wider nozzle than normal Luer-slip type. You can see that in my picture of the two syringes. It is very similar to that used by ghwellsjr in his first post, but unlike that one, mine didn't come with a Luer-slip adapter. I think the English name for that type of syringe is catheter syringe or Janet type syringe. I was lucky to find needle covers that fit perfectly directly to the syringe.

It is hard to see from the picture, but the brand of the syringe is ONCE, if that will be of any help finding a similar syringe?

Re the hot melt glue: It seems to be completely waterproof, but I cannot tell if it will be long term waterproof. The type of hot melt glue I used sticks very well to the plastic parts, it is hard to peel away when it has set. Some members use hot melt glue to seal top fill holes, so hopefully the seals stay intact.

I also used the glue to seal a German fill hole and like you did, I tested the seal by submerging it into water and pressurised the setup. The glue gave a perfect seal, my problem was to find a tape that sealed the vent perfectly.

But there are many types of hot melt glue, and not all types are suitable for bonding to polypropylene plastic. Maybe I was lucky that the glue sticks that came with my cheap glue gun are suitable for plastics? Here is a link to a list of different hot melt glues: http://www.gluegunsdirect.com/index.php?module=advice_10
 

The Hat

Printer VIP
Platinum Printer Member
Joined
Jan 18, 2010
Messages
15,628
Reaction score
8,698
Points
453
Location
Residing in Wicklow Ireland
Printer Model
Canon/3D, CR-10, CR-10S, KP-3
barfl2
I am getting some 50 ml syringes from octoink this week I hope, Email Martin for further details if your interested.
Then I'll be back working on my Refill method for the PGI-9's..:)
 

barfl2

Print Addict
Joined
Feb 22, 2010
Messages
481
Reaction score
65
Points
168
Location
Hampshire U.K.
PeterBJ Thanks for reply. Yes it is probably a catheter syringe. Mine is marked oral/enteral. Manufacturer medicina has mauve plunger which I thought meant non-medical. very stiff in use but managed OK. All my adaptors so far have been straight in line with the exit port, what advantage if any is there in having the right angle bend ? could cause constriction.No doubt there is. Thanks for the hotglue information

barfl2
 

PeterBJ

Printer VIP
Platinum Printer Member
Joined
Nov 27, 2010
Messages
5,064
Reaction score
4,914
Points
373
Location
Copenhagen Denmark
Printer Model
Canon MP990
Hi barfl2

I made a straight through adapter from a luer lock fitting pulled from a needle and glued to a drilled orange bottom cap. I found that using this adapter the water used in testing quickly filled the vent area. Using a 90 adapter the ink/water goes to the ink chamber without filling the vent area. You have to restrict the movement of the plunger though, don't just let it go, or else the ink will go towards the vent area, but hold the plunger back for instance by using your thumb as a brake. It looks like gravity plays a role in ink movement inside the cartridge. Nice and easy does it, and practise makes perfect.

I think ghwellsjr used the wide nozzle syringe to avoid problems with constriction. I think both the right angle bend and the use of a wide nozzle low friction 50 ml syringe are essential to the design. Your comments please ghwellsjr?

Peter.
 

ghwellsjr

Printer Master
Platinum Printer Member
Joined
Jun 16, 2006
Messages
3,645
Reaction score
85
Points
233
Location
La Verne, California
Printer Model
Epson WP-4530
You want to have a short and wide path from the cartridge to the syringe. If it's not short, you'll waste the effective vacuum and wide so that the air bubbles coming from cartridge won't restrict the ink flow from the syringe before you start releasing the plunger. In other words, if you had a long thin tube between the cartridge and the syringe, all that air would get sucked right back into the cartridge before the ink could get there.

The purpose of the right angle bend is to allow you to position the cartridge while you're pulling back on the plunger so that air from the reservoir can escape (the hole in the wall needs to be uppermost) and then while you're letting the plunger back in you rotate the apparatus so that gravity will help the flow of ink into the reservoir. If you had the syringe going straight into the cartridge, the air would escape fine but the ink would have more of a tendency to flow toward the air vent (and the top of the sponge, which I'm trying to prevent).
 

Tudor

Print Addict
Platinum Printer Member
Joined
May 6, 2011
Messages
505
Reaction score
202
Points
183
Location
Cluj-Napoca, Romania
Printer Model
Epson L800, 1400; ML-2165W


This is the device i built when I tried the "freedom method" on an inktec cartridge. The inner tubing is 2mm diameter and 5-6 cm long. The luer-lock part of a neddle, tube and cap are superglued together and covered with hot glue.
After I refill there is no air in the ink or sponge area and the ink bridge is fully functional, but I have a problem with ink getting in the vent area. Ink is begining to fill that area on the second release no matter how slow or fast I let go of the plunger. If I apply a lighter vacuum the problem appears later in the process. When the ink compartment is full, the vent area is full too. Because I never push on the plunger, the space above the sponge and about 2mm of the sponge clears when I remove the tape, but I am worried that on the pigment cartridge the maze will be blocked after a few refills.
Maybe on an OEM cartridge I wouldn't have this problem... Or maybe the sealing on the vent shouldnt be too perfect...
Any suggestions?
 

PeterBJ

Printer VIP
Platinum Printer Member
Joined
Nov 27, 2010
Messages
5,064
Reaction score
4,914
Points
373
Location
Copenhagen Denmark
Printer Model
Canon MP990
Hi ghwellsjr

Thank you very much for the info.

I'm glad to know I had understood the principles and important details correct, but I had overlooked the tilting motion in the filling. I watched your video again and noted the tilting. I had previously held the syringe and cartridge vertical when filling, but your method helps controlling direction of inkflow inside the cartridge, so there is less need for letting ink enter the cartridge very slowly.

Peter.
 

ghwellsjr

Printer Master
Platinum Printer Member
Joined
Jun 16, 2006
Messages
3,645
Reaction score
85
Points
233
Location
La Verne, California
Printer Model
Epson WP-4530
PeterBJ said:
I'm glad to know I had understood the principles and important details correct, but I had overlooked the tilting motion in the filling. I watched your video again and noted the tilting. I had previously held the syringe and cartridge vertical when filling, but your method helps controlling direction of inkflow inside the cartridge, so there is less need for letting ink enter the cartridge very slowly.
The tilting was mentioned in the Russian website you linked to here, although it wasn't perfectly clear:
PeterBJ said:
If you want to experiment with this technique, here is a link to a Russian site with a simple way of doing this.
...
I used Google translate to translate into English. I don't know if this link to the Danish Google Translate site will work outside Denmark ?
But ThrillaMozilla spelled it out explicity in post #23:
ThrillaMozilla said:
3. Figure out which side should be up. During the evacuation stroke, you want the air side up, i.e., you want air to feed through the opening between chambers. During the fill stroke, you want ink down (so it can run from the syringe).
 
Top