ThrillaMozilla
Printer Master
- Joined
- Jan 18, 2011
- Messages
- 1,244
- Reaction score
- 372
- Points
- 253
I can add some observations that may help. I was going to wait until I had all of this more thoroughly tested, but I think a timely response is better, as I'm pretty sure this is 99% correct.
1. I use a combination of tape and Duco Stik-Tak to seal the vent. I find that to attain reasonable efficiency, the vent needs to be completely sealed. If the vent lets in air, you won't have enough vacuum to fill the cartridge effectively, and you may have to detach the syringe repeatedly. (This is especially true in my case since I still don't have any good, large syringes.)
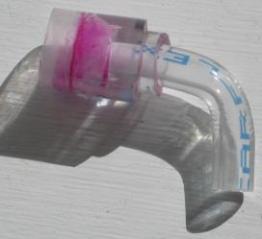
I find that tape leaks around the edges of the labels, no matter how carefully I press it down. LeeE pointed out that you need a plastic material to really fill the gaps. Stik-Tak works, but it fills the vent channels and is hard to clean out. So I put a small square of tape over the vent, and put the Stik-Tak over the tape to seal around the edges.
2. With dye ink I get foam in the syringe, and I simply ignore it. It mostly disappears when I release the vacuum, and in any case I only let liquid ink without foam) flow back into the cartridge, so it's not a problem. If the syringe contains only foam, I need to refill the syringe anyway.
3. I'm pretty sure the foam comes mostly from drawing air through the sponge. The smallest orifice in the equipment is probably in the syringe opening, and I doubt if this will create much foam. And in any case, the channels in the sponge are much, much smaller, so equipment design probably won't have much effect.
4. With the relatively small dye ink cartridges (CMY PK) I had trouble filling the ink chamber more than about half way with my 10-mL syringes. After that point the vacuum stroke would mostly remove ink from the sponge instead of air from the ink chamber. One of you reported the same problem, just pushing ink in and out of the cartridge.
Interestingly, I had no trouble completely filling the large, 30-mL (XL) black pigment cartridge with a 10-mL syringe. Evidently the filling characteristics depend in some way on the ink and cartridge.
If this problem is encountered, I'm pretty sure the solution to this problem is a bigger syringe. If a 10-mL syringe is filled with 5 mL ink, and you draw out another 4 mL from the sponge on the vacuum stroke, you obviously haven't withdrawn much air; but with a large syringe you can hardly avoid withdrawing air.
5. Canon cartridges have a different vent structure (with large spaces above the sponge), but for HP 564 cartridges (which have virtually no space above the sponge), it's almost impossible to get ink in the vent if you don't press on the syringe. EDIT: Not true. The HP non-XL cartridges are indeed constructed with essentially no air space, but I have since found out that the XL cartridges are very similar or possibly identical to Canon cartridges internally, and have a large space.
1. I use a combination of tape and Duco Stik-Tak to seal the vent. I find that to attain reasonable efficiency, the vent needs to be completely sealed. If the vent lets in air, you won't have enough vacuum to fill the cartridge effectively, and you may have to detach the syringe repeatedly. (This is especially true in my case since I still don't have any good, large syringes.)
I find that tape leaks around the edges of the labels, no matter how carefully I press it down. LeeE pointed out that you need a plastic material to really fill the gaps. Stik-Tak works, but it fills the vent channels and is hard to clean out. So I put a small square of tape over the vent, and put the Stik-Tak over the tape to seal around the edges.
2. With dye ink I get foam in the syringe, and I simply ignore it. It mostly disappears when I release the vacuum, and in any case I only let liquid ink without foam) flow back into the cartridge, so it's not a problem. If the syringe contains only foam, I need to refill the syringe anyway.
3. I'm pretty sure the foam comes mostly from drawing air through the sponge. The smallest orifice in the equipment is probably in the syringe opening, and I doubt if this will create much foam. And in any case, the channels in the sponge are much, much smaller, so equipment design probably won't have much effect.
4. With the relatively small dye ink cartridges (CMY PK) I had trouble filling the ink chamber more than about half way with my 10-mL syringes. After that point the vacuum stroke would mostly remove ink from the sponge instead of air from the ink chamber. One of you reported the same problem, just pushing ink in and out of the cartridge.
Interestingly, I had no trouble completely filling the large, 30-mL (XL) black pigment cartridge with a 10-mL syringe. Evidently the filling characteristics depend in some way on the ink and cartridge.
If this problem is encountered, I'm pretty sure the solution to this problem is a bigger syringe. If a 10-mL syringe is filled with 5 mL ink, and you draw out another 4 mL from the sponge on the vacuum stroke, you obviously haven't withdrawn much air; but with a large syringe you can hardly avoid withdrawing air.
5. Canon cartridges have a different vent structure (with large spaces above the sponge), but for HP 564 cartridges (which have virtually no space above the sponge), it's almost impossible to get ink in the vent if you don't press on the syringe. EDIT: Not true. The HP non-XL cartridges are indeed constructed with essentially no air space, but I have since found out that the XL cartridges are very similar or possibly identical to Canon cartridges internally, and have a large space.