- Joined
- Jun 16, 2006
- Messages
- 3,645
- Reaction score
- 85
- Points
- 233
- Location
- La Verne, California
- Printer Model
- Epson WP-4530
WARNING: Please do not attempt this procedure--read post #6 before continuing.
It is very easy to cut a hole in just the right location to extend the two tubes coming out of the purge pump on the MP780 or MP760 printers. You can raise the printer up on blocks and place a shallow jar, bowl or other container to receive the waste ink. You can do this as an alternative to taking the printer apart and replacing the waste ink pads or you can do both. You don't have to wait until the printer tells you that the waste ink is full, you can do it at any time. When I did it, I had already cleaned the inside of the printer and so it was not a messy job but if you do it without taking your printer apart after it has been used for a long time, you will encounter some messy ink which you will need to clean up before you can finish.
The trick to doing this job is knowing exactly where to make the hole. Fortunately, there is a clear indication of this on the bottom of the printer. You will need a couple short lengths (2.5 inches) of vinyl tubing 5/16"OD x 3/16"ID which you can get at most hardware stores.
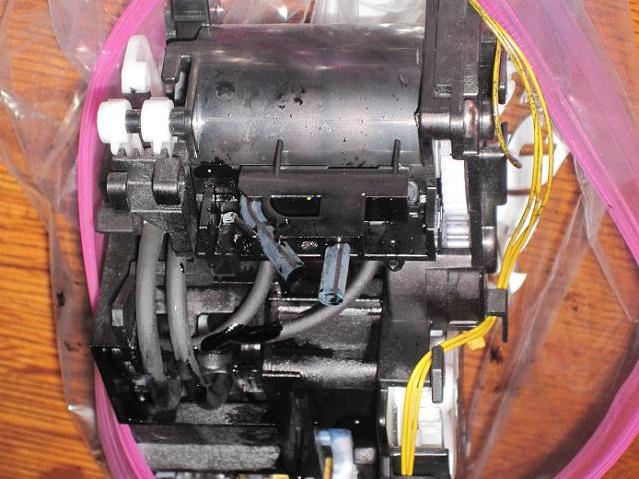
Here is a picture of the purge unit (out of a printer, in a ziplock bag to contain the mess):
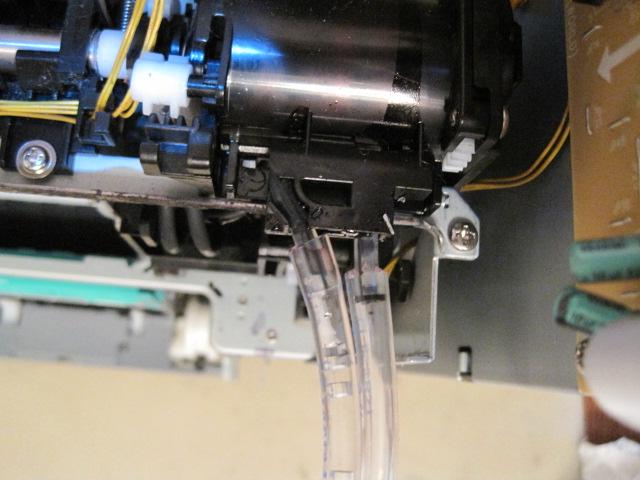
And here is a closeup of the tubes we want to connect to:

Before starting this task, you should remove the cartridges, do a deep head cleaning followed by a nozzle check and repeat until nothing prints. Then remove the print head and unplug the printer with the print head still in the center of the printer. Now tape the scanner unit down to the front door of the printer and tape the sides of the scanner to the sides of the printer. You don't want the scanner to fall open while you are doing this work. Also remove the paper tray at the bottom of the printer.
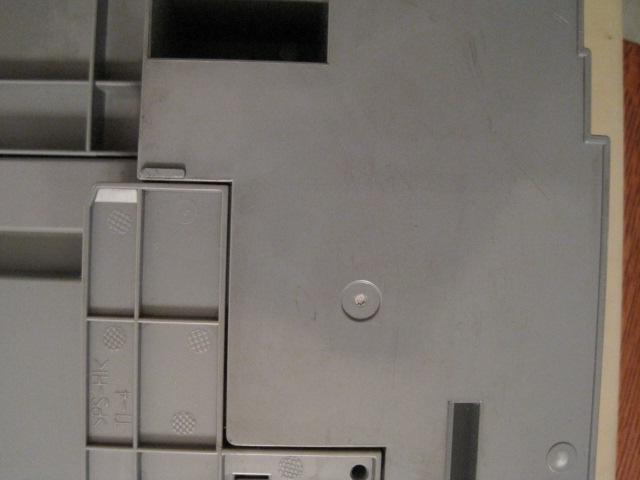
When you are ready to start, lay the printer on its back so that the bottom of the printer is upright before you. Look along the right side of the printer for this image:
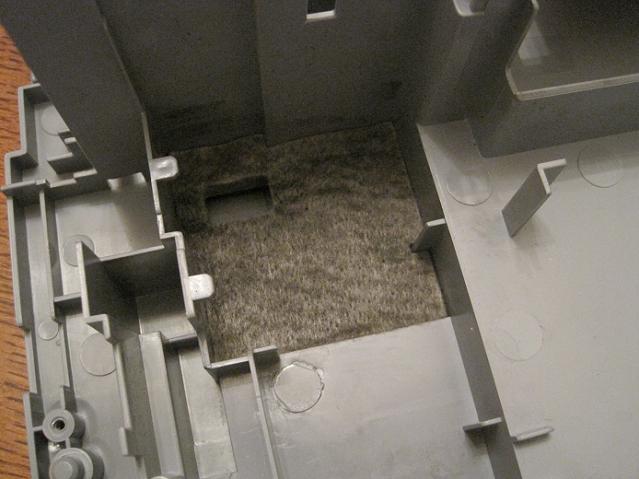
The flat dimple in the above image corresponds to a dome shaped dimple on the inside of the printer shown here (it's partially hidden by a rectangular wall):
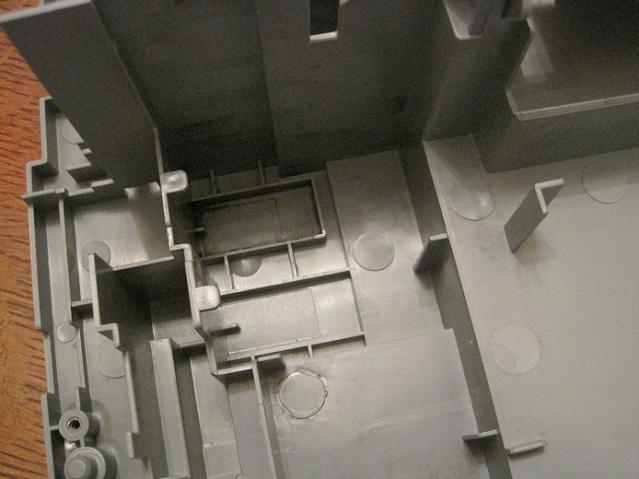
The faint outlined rectangular area above the dimple is where we want to cut a hole.
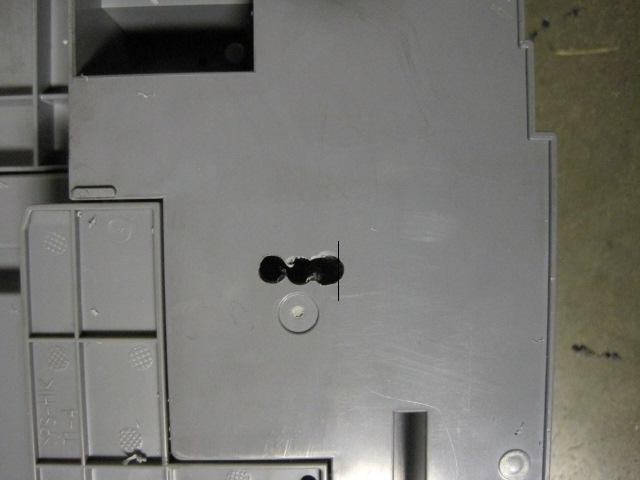
Drill three starter holes of a convenient size just above the dimple but try not to go as far right as I did. Make sure your drill bit does not go through the plastic by more than a half inch or you may drill into the bottom of the purge unit. You will encounter black ink as soon as you break through. Clean as much of this up with cottom swabs as soon as you can.
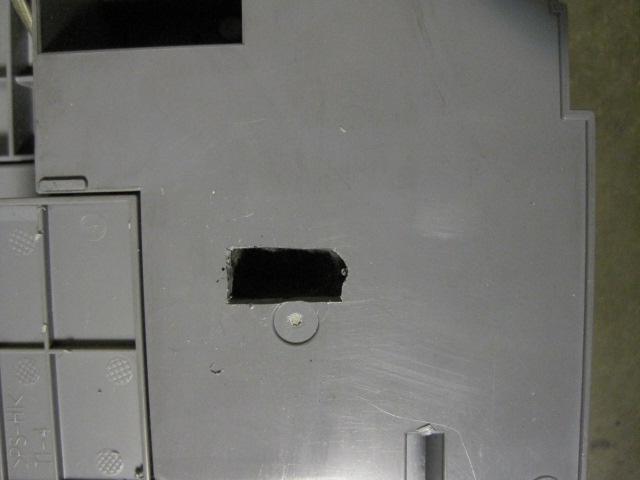
Use a box cutter or other sturdy sharp instrument to widen the hole into a rectangle. You are trying to match a rectangular hole in the waste ink pad that is raised about an eighth of an inch above the bottom of the printer as shown here:
And here is what the enlarged hole looks like:
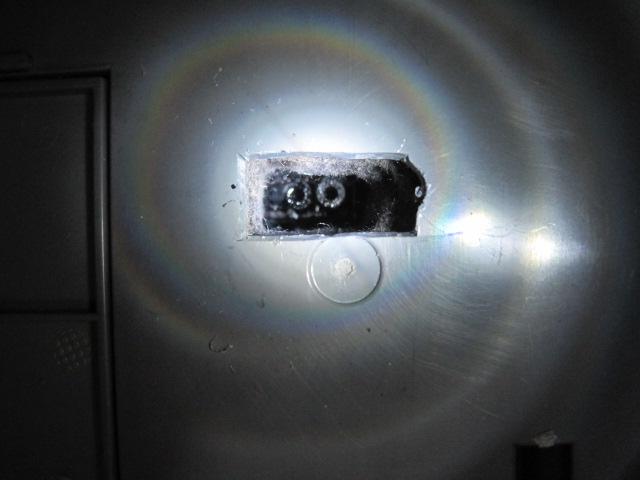
Here is the same view with a light shining into the hole so that you can see the ends of the two tubes that need to be extended. You can also see some of the padding material:
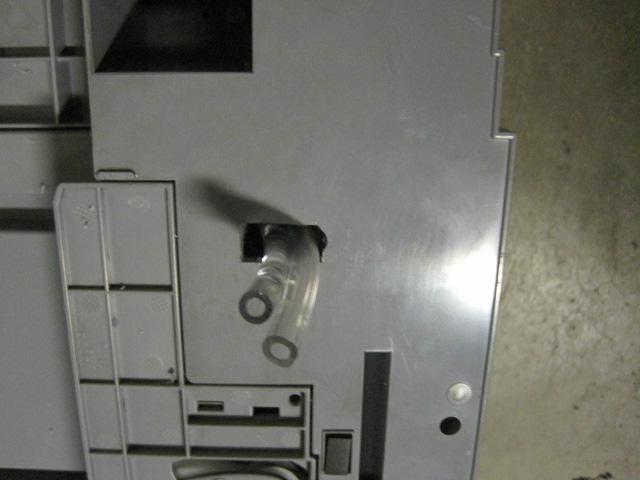
The 3/16"ID tubing is too small to fit on the purge tubes so you will need to expand it slightly by running hot water across one end and prying open the hole using long nosed pliers. It needs to be visibly enlarged. When it is the proper size, you can stick the tubes on to the existing tubes and they will stay with a snug fit. However, I used some Automotive GOOP adhesive to glue them to the bottom of the printer so they cannot fall out. Here's what it looks like after installing the tubes:
I took the printer apart to see how the tubes fit on the purge unit's tubes:
The final product after restoring the printer to its proper orientation and putting it on blocks:
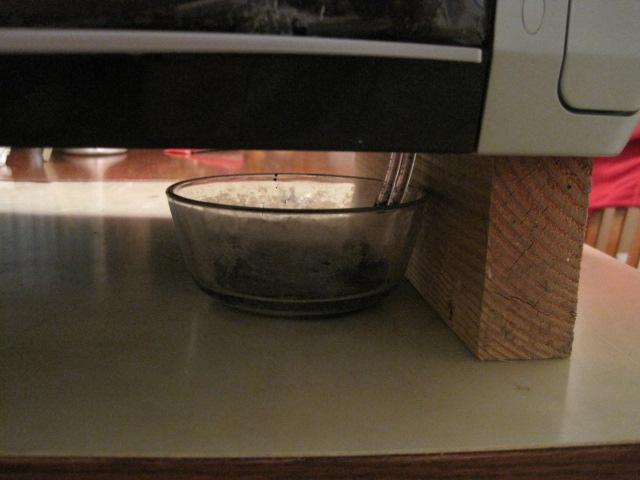
There is a similar 2x4 under the left side of the printer but I found that I also needed a third 2x4 under the front to keep the paper tray from falling on the bowl when it was pulled out.
It is very easy to cut a hole in just the right location to extend the two tubes coming out of the purge pump on the MP780 or MP760 printers. You can raise the printer up on blocks and place a shallow jar, bowl or other container to receive the waste ink. You can do this as an alternative to taking the printer apart and replacing the waste ink pads or you can do both. You don't have to wait until the printer tells you that the waste ink is full, you can do it at any time. When I did it, I had already cleaned the inside of the printer and so it was not a messy job but if you do it without taking your printer apart after it has been used for a long time, you will encounter some messy ink which you will need to clean up before you can finish.
The trick to doing this job is knowing exactly where to make the hole. Fortunately, there is a clear indication of this on the bottom of the printer. You will need a couple short lengths (2.5 inches) of vinyl tubing 5/16"OD x 3/16"ID which you can get at most hardware stores.
Here is a picture of the purge unit (out of a printer, in a ziplock bag to contain the mess):
And here is a closeup of the tubes we want to connect to:
Before starting this task, you should remove the cartridges, do a deep head cleaning followed by a nozzle check and repeat until nothing prints. Then remove the print head and unplug the printer with the print head still in the center of the printer. Now tape the scanner unit down to the front door of the printer and tape the sides of the scanner to the sides of the printer. You don't want the scanner to fall open while you are doing this work. Also remove the paper tray at the bottom of the printer.
When you are ready to start, lay the printer on its back so that the bottom of the printer is upright before you. Look along the right side of the printer for this image:
The flat dimple in the above image corresponds to a dome shaped dimple on the inside of the printer shown here (it's partially hidden by a rectangular wall):
The faint outlined rectangular area above the dimple is where we want to cut a hole.
Drill three starter holes of a convenient size just above the dimple but try not to go as far right as I did. Make sure your drill bit does not go through the plastic by more than a half inch or you may drill into the bottom of the purge unit. You will encounter black ink as soon as you break through. Clean as much of this up with cottom swabs as soon as you can.
Use a box cutter or other sturdy sharp instrument to widen the hole into a rectangle. You are trying to match a rectangular hole in the waste ink pad that is raised about an eighth of an inch above the bottom of the printer as shown here:
And here is what the enlarged hole looks like:
Here is the same view with a light shining into the hole so that you can see the ends of the two tubes that need to be extended. You can also see some of the padding material:
The 3/16"ID tubing is too small to fit on the purge tubes so you will need to expand it slightly by running hot water across one end and prying open the hole using long nosed pliers. It needs to be visibly enlarged. When it is the proper size, you can stick the tubes on to the existing tubes and they will stay with a snug fit. However, I used some Automotive GOOP adhesive to glue them to the bottom of the printer so they cannot fall out. Here's what it looks like after installing the tubes:
I took the printer apart to see how the tubes fit on the purge unit's tubes:
The final product after restoring the printer to its proper orientation and putting it on blocks:
There is a similar 2x4 under the left side of the printer but I found that I also needed a third 2x4 under the front to keep the paper tray from falling on the bowl when it was pulled out.
")