- Joined
- May 29, 2007
- Messages
- 2,734
- Reaction score
- 1,536
- Points
- 313
- Location
- Ghent, Belgium
- Printer Model
- SC-900 ET-8550 WF-7840 TS705
This morning I finally received my Epson R3000 refillable cartridges and I immediately started to test them. Have a look closer at this review. Any questions and suggestions are wellcome.
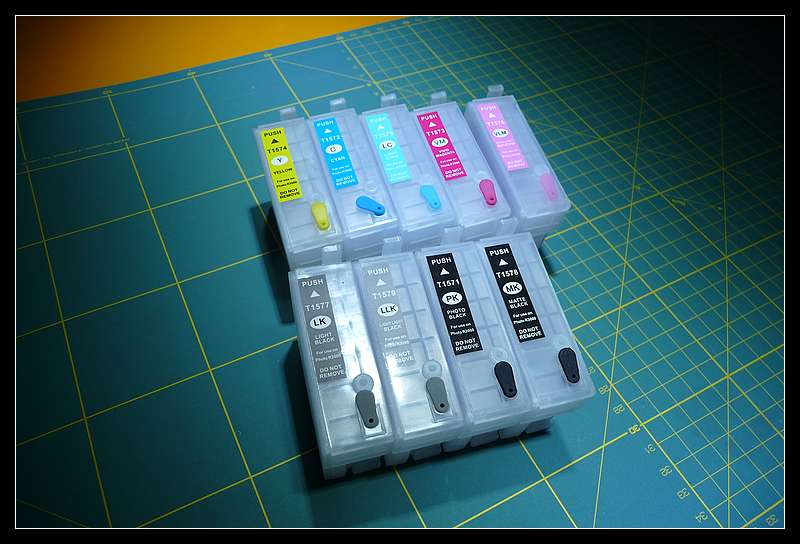
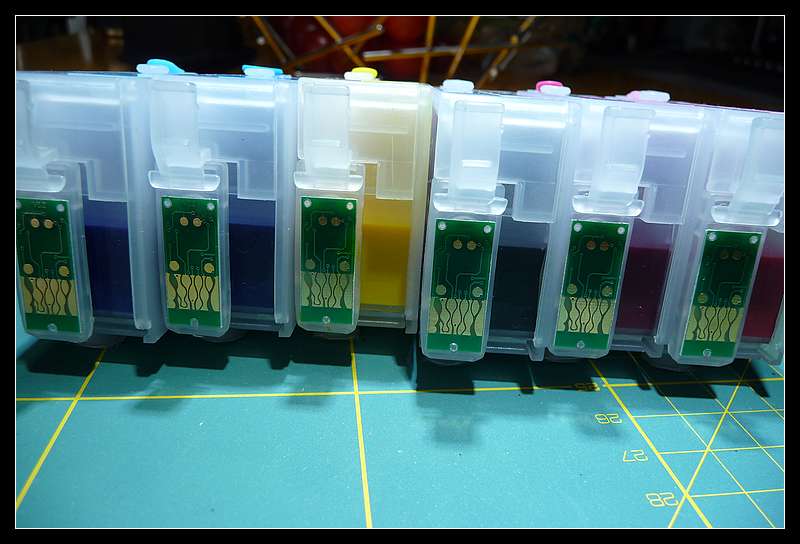
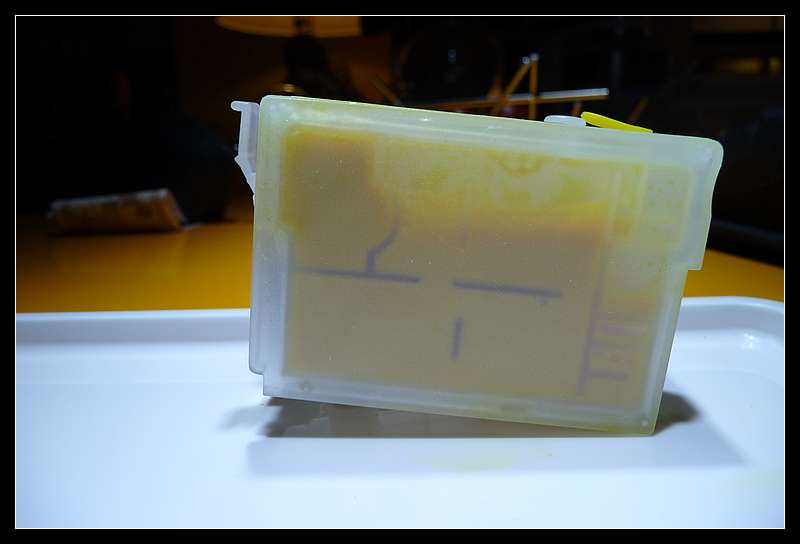
Have a close look at these cartridges. They seem to be similar to the ones Mikling showed to us.
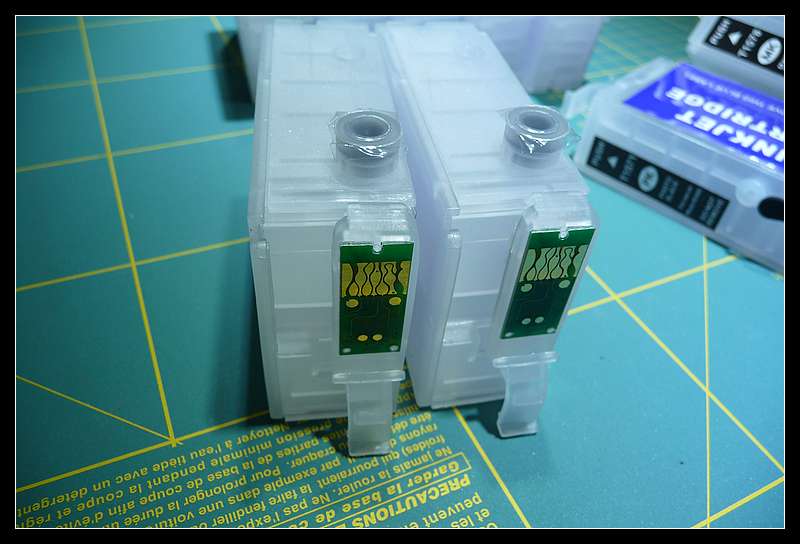
The chips on the cartridges are powered by a small cell battery and can be reset by short circuiting the two small copper notches.
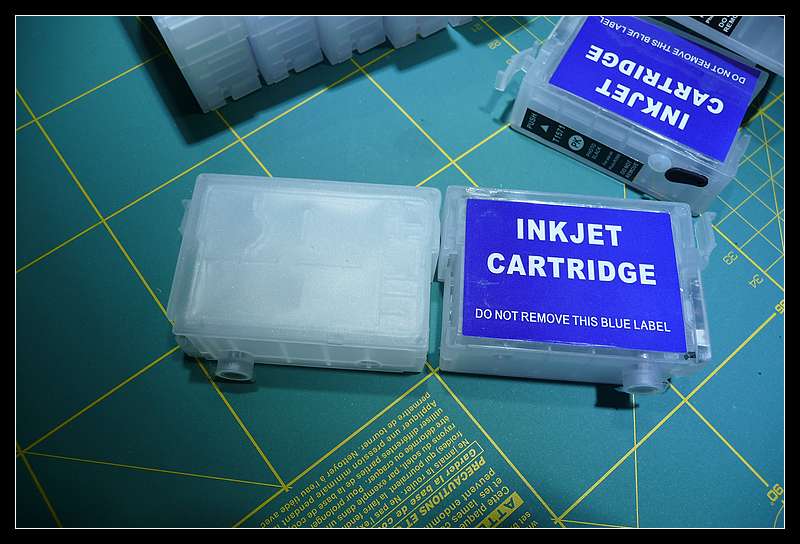
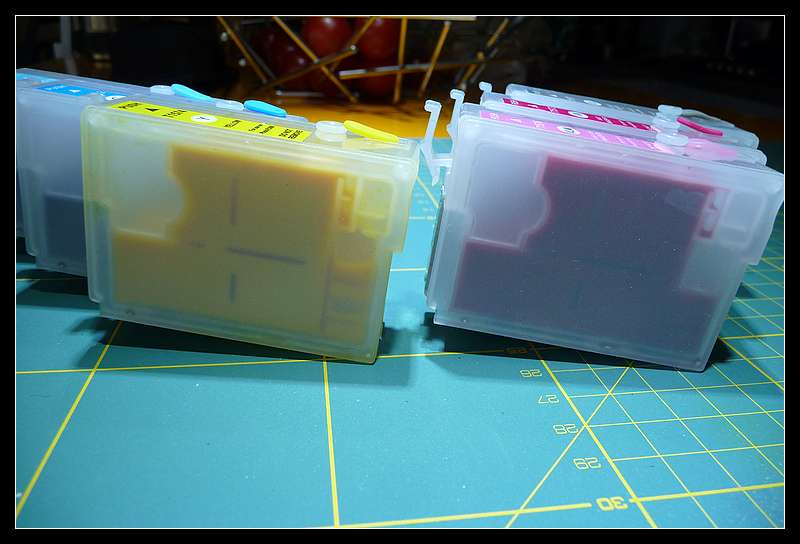
To refill the cartridges one has to remove the white silicone plug. The coloured plug with the flap should stay in place during the refill and priming stage, but must be removed when it has been installed in your printer:
Note the left compartment of the printer immediately after filling: it contains air, which must be removed by priming the cartridge. Just installing the catridges will cause massive banding due to the large amount of air in this ink buffering compartment prior to the ink outlet valve.
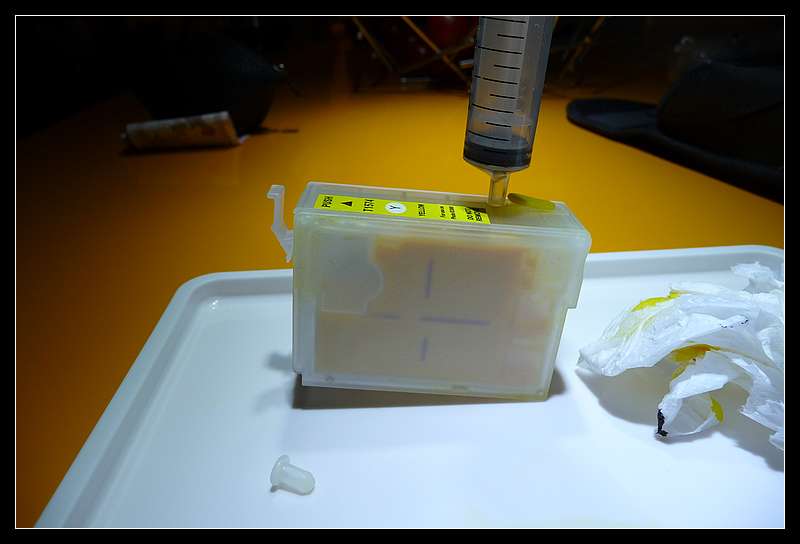
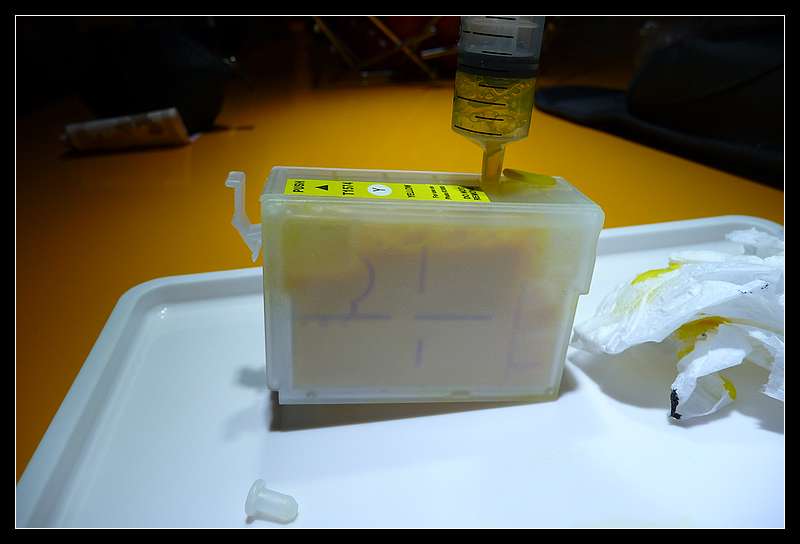
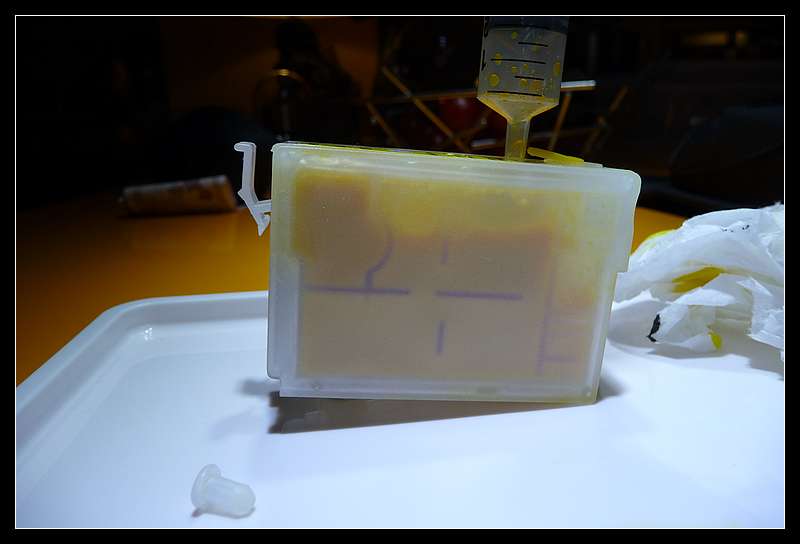
The procedure of priming the cartridge is as follows: refill the cartridge with about 10-15 ml's ink by injecting the cartridges and then put the syringe without the needle firmly on the refill hole, with the plug on the breathing hole still in place. Now pull the syringe up for about 10 ml's and let the plunger return to its native position by the vacuum. Repeat this several times until the upper left compartment is full. Then refill the cartridge using the normal needle method. This is how it is done:
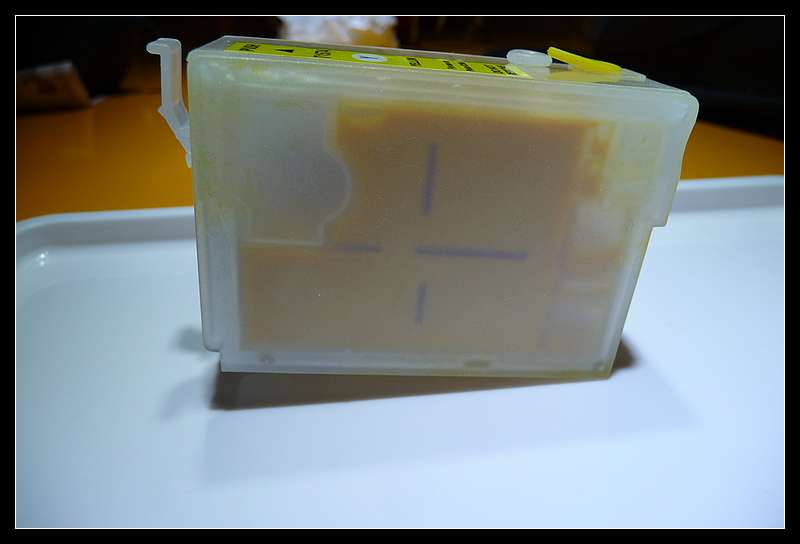
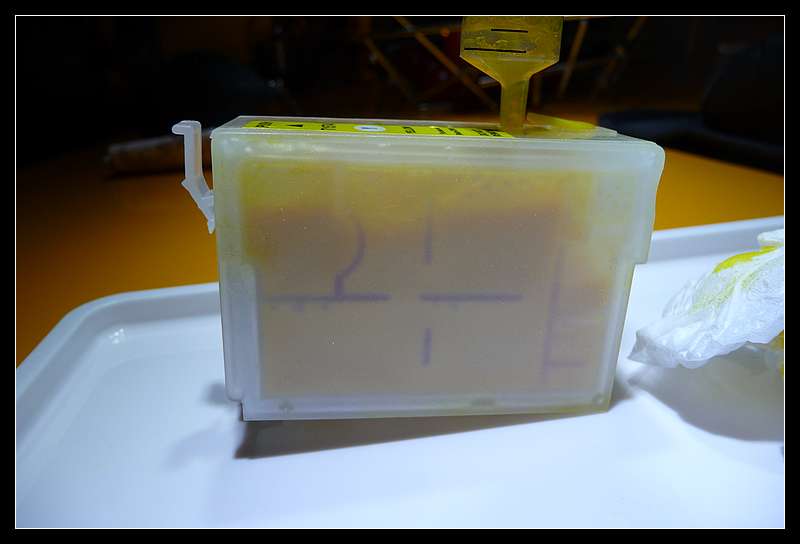
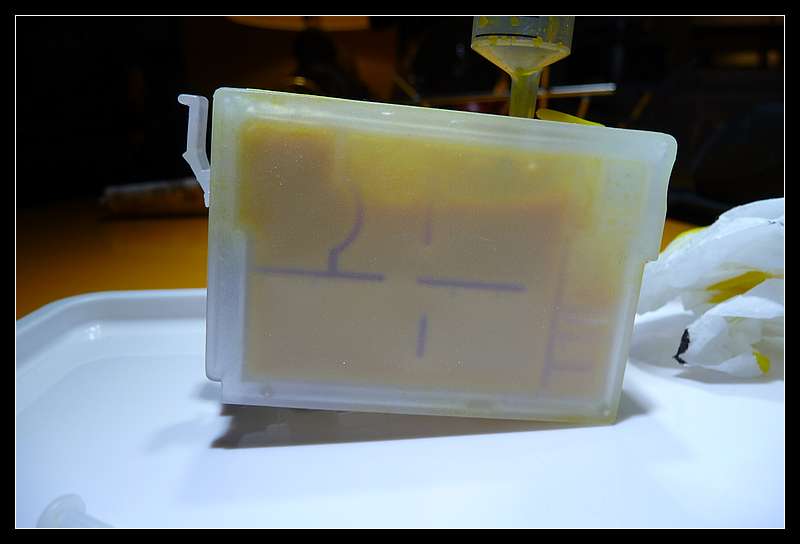
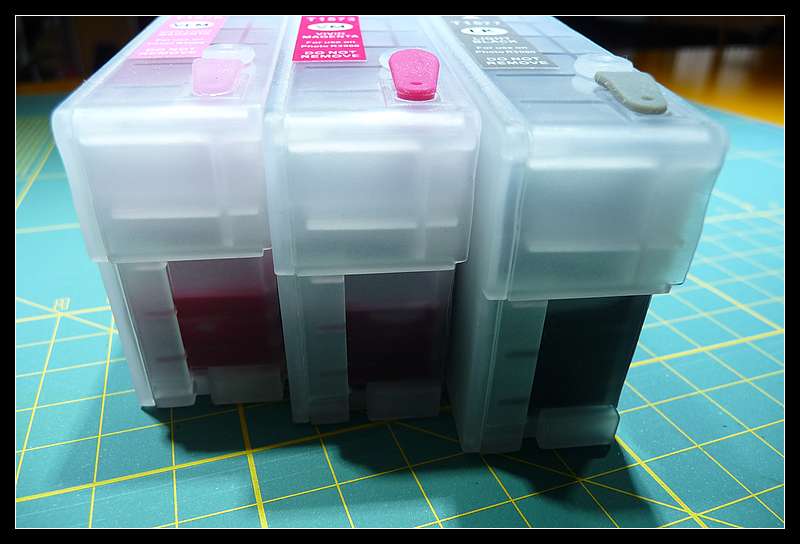
This is how the cartridge look, when the cartridge is properly primed to remove the air from the ink buffering compartment. A significantly amount of ink is sucked into this compartment. Without priming the amount ink is about 25 mls, after priming and topping the cartridge the amount raises to 34 mls (estimated by the difference in weight between a full and an empty cartridge). NEVER install the cartridges into your printer without proper priming.
After refilling and priming, it is time to install the printer. I have removed the original cartridges from the system:
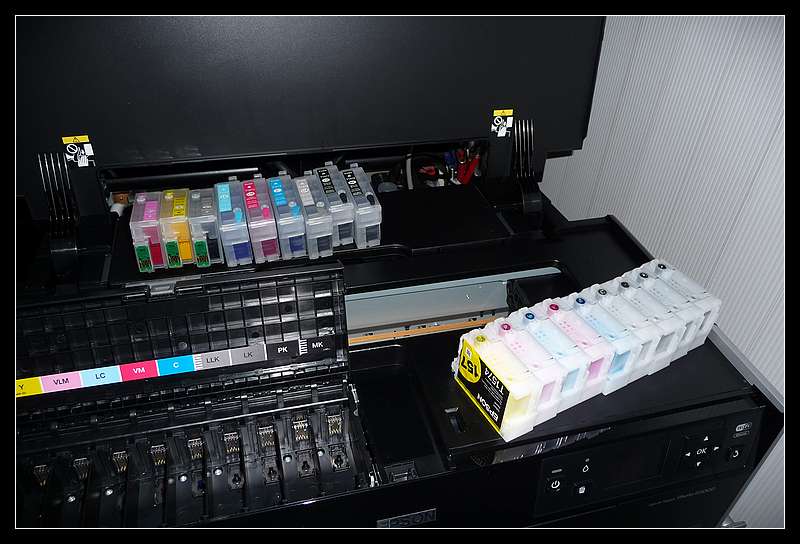
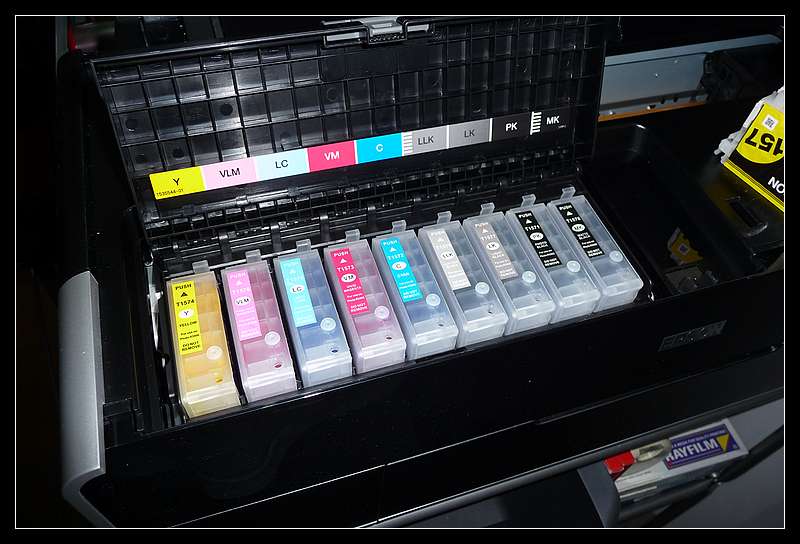
The cartridges fit easily into the printer:
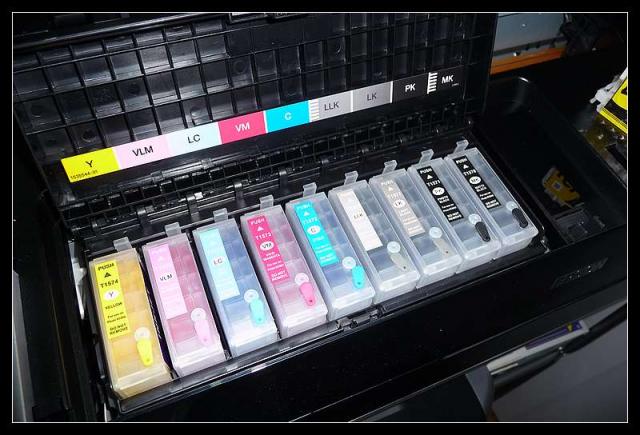
Before closing the cartridge lid, you have to remove the coloured plugs covering the breathing hole to facilitate a good ink flow:
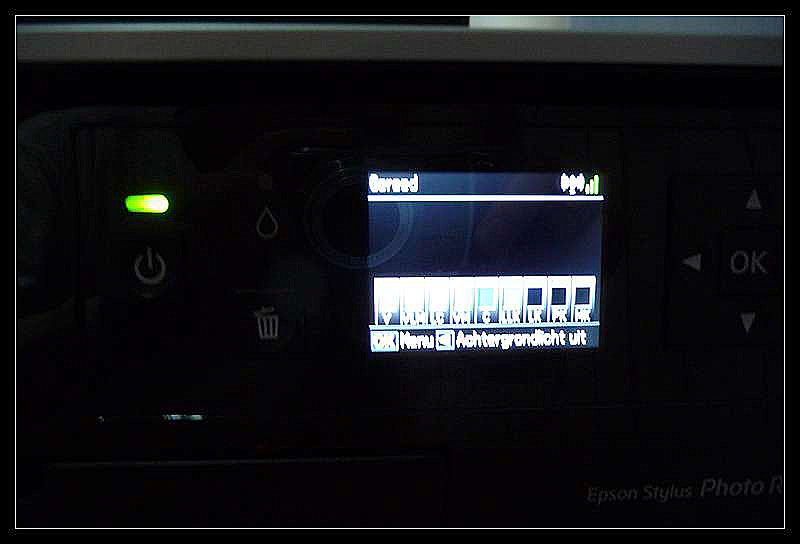
The next pictures shows the display shows full level for all cartridges, so the cartridge chips seem to work very well. Sorry for the bad quality.
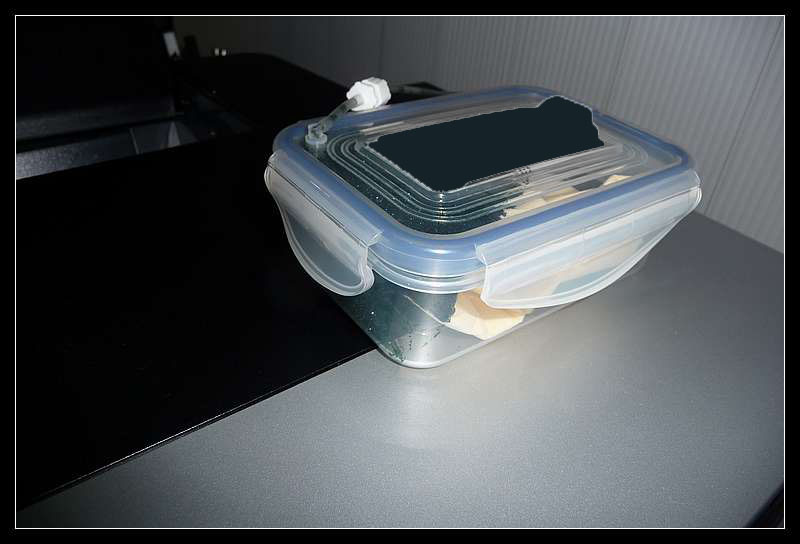
After installing the cartridges a purge cycle is triggered by the printer, so have a look at the ink waste tank. The amount poured into the tank is considerable (about 15 mls based on the increase in weight) and shows the importance to install a waste ink tank.
I am currently testing the printing quality of the ink (Inkjetfly IMA 24/36 V3 normal strength magenta/light magenta) from my previous test on the Epson Pro 3800 and the first results are really astonishing.....The reason why I have chosen the normal strength magenta and not the vivid version is the rather strong magenta cast in the ABW-mode, which intuitively made me go for this "standard version" and the first results shows a remarkedly similar results with the same profiles I made for the original Epson K3 Vivid ink.
Even the ABW-mode in the neutral setting, there is NO colour cast at all. It is dead on neutral !!! I think my guess and gamble to use the normal strength magenta/light magenta of the Inkjetfly IMA 24/36 V3 pigment ink is a absolute winner. I have a strong magenta cast using this ink in my Epson Pro 3800 and the Inkrepublic.com IRK4-nano gives you a slight greenish cast in the neutral setting of the ABW-mode. Because I made prints with the original ink on the same paper and printed the same pictures with this refill ink I could compare them. I couldn't believe this is made with the new refill ink and to be sure I executed 3 extra cleaning cycles to force out the original Epson K3 ink from the tubing system, to be sure it was the Inkjetfly IMA 24/36 V3 ink. The resulting prints after these 3 cleaning cycle still are dead on the same as my previous prints and the prints made with the original Epson K3 inkset. Similar gloss differential (almost none), extremely low bronzing, exactly the same colour rendition as I would have used the original Epson K3 Vivid ink.
Again: I think Inkjetfly should reconsider to sell there standard version IMA 24/36 V3 ink for the Epson K3 Vivid Magenta printer line, because the intensity of their standard version magenta and light magenta matches the original Epson K3 Vivid versions so well. I will contact Leo Chang and tell him about this discovery of using the standard version magenta in these cartridges is a winner.
Now for the none believers, I made a youtube-video showing my new refillable cartridges printing the Kinkaku-ji golden temple on a piece of TPI 240 gsm glossy paper:
http://www.youtube.com/watch?v=-FsEuOh8cvw
For those interested. The cartridges can be obtained at www.equnxin.com and others.
Have a close look at these cartridges. They seem to be similar to the ones Mikling showed to us.
The chips on the cartridges are powered by a small cell battery and can be reset by short circuiting the two small copper notches.
To refill the cartridges one has to remove the white silicone plug. The coloured plug with the flap should stay in place during the refill and priming stage, but must be removed when it has been installed in your printer:
Note the left compartment of the printer immediately after filling: it contains air, which must be removed by priming the cartridge. Just installing the catridges will cause massive banding due to the large amount of air in this ink buffering compartment prior to the ink outlet valve.
The procedure of priming the cartridge is as follows: refill the cartridge with about 10-15 ml's ink by injecting the cartridges and then put the syringe without the needle firmly on the refill hole, with the plug on the breathing hole still in place. Now pull the syringe up for about 10 ml's and let the plunger return to its native position by the vacuum. Repeat this several times until the upper left compartment is full. Then refill the cartridge using the normal needle method. This is how it is done:
This is how the cartridge look, when the cartridge is properly primed to remove the air from the ink buffering compartment. A significantly amount of ink is sucked into this compartment. Without priming the amount ink is about 25 mls, after priming and topping the cartridge the amount raises to 34 mls (estimated by the difference in weight between a full and an empty cartridge). NEVER install the cartridges into your printer without proper priming.
After refilling and priming, it is time to install the printer. I have removed the original cartridges from the system:
The cartridges fit easily into the printer:
Before closing the cartridge lid, you have to remove the coloured plugs covering the breathing hole to facilitate a good ink flow:
The next pictures shows the display shows full level for all cartridges, so the cartridge chips seem to work very well. Sorry for the bad quality.
After installing the cartridges a purge cycle is triggered by the printer, so have a look at the ink waste tank. The amount poured into the tank is considerable (about 15 mls based on the increase in weight) and shows the importance to install a waste ink tank.
I am currently testing the printing quality of the ink (Inkjetfly IMA 24/36 V3 normal strength magenta/light magenta) from my previous test on the Epson Pro 3800 and the first results are really astonishing.....The reason why I have chosen the normal strength magenta and not the vivid version is the rather strong magenta cast in the ABW-mode, which intuitively made me go for this "standard version" and the first results shows a remarkedly similar results with the same profiles I made for the original Epson K3 Vivid ink.
Even the ABW-mode in the neutral setting, there is NO colour cast at all. It is dead on neutral !!! I think my guess and gamble to use the normal strength magenta/light magenta of the Inkjetfly IMA 24/36 V3 pigment ink is a absolute winner. I have a strong magenta cast using this ink in my Epson Pro 3800 and the Inkrepublic.com IRK4-nano gives you a slight greenish cast in the neutral setting of the ABW-mode. Because I made prints with the original ink on the same paper and printed the same pictures with this refill ink I could compare them. I couldn't believe this is made with the new refill ink and to be sure I executed 3 extra cleaning cycles to force out the original Epson K3 ink from the tubing system, to be sure it was the Inkjetfly IMA 24/36 V3 ink. The resulting prints after these 3 cleaning cycle still are dead on the same as my previous prints and the prints made with the original Epson K3 inkset. Similar gloss differential (almost none), extremely low bronzing, exactly the same colour rendition as I would have used the original Epson K3 Vivid ink.
Again: I think Inkjetfly should reconsider to sell there standard version IMA 24/36 V3 ink for the Epson K3 Vivid Magenta printer line, because the intensity of their standard version magenta and light magenta matches the original Epson K3 Vivid versions so well. I will contact Leo Chang and tell him about this discovery of using the standard version magenta in these cartridges is a winner.
Now for the none believers, I made a youtube-video showing my new refillable cartridges printing the Kinkaku-ji golden temple on a piece of TPI 240 gsm glossy paper:
http://www.youtube.com/watch?v=-FsEuOh8cvw
For those interested. The cartridges can be obtained at www.equnxin.com and others.
")