OK, well I guess if anyone is still following this they deserve a medal... welcome back

Warning: long post, and lots of pictures.
If you recall, I started off with an incomplete nozzle check, which looked like this:
And having soaked the head, and line with cleaning solution for weeks(!), printed lots of purge images (draining my LM in the process) and having taken out the capping station and given that a good cleaning, I ended up sticking a magenta cartridge back in to see what would happen. And got this:
So, problem not solved. Consider this thread as a cautionary tale, I think, but with pictures! I decided I should replace the magenta damper, and I had a single new damper, so off I went.
Half disassembled printer. Remain impressed with the build, although you must watch those thin wires when taking off the top cover.
Finally got to the print head assembly.
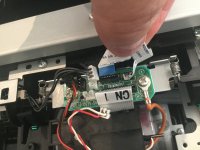
Removed the connectors.
Removed the damper assembly from the print head, here's the damper assembly.
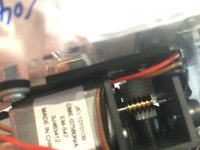
I didn't understand how the motor on the damper assembly worked. There are a small set of gears that move a "pincer" that presses on one side of the damper or the other.
I concluded this is how the switching mechanism works for MK / PK. Seems really complicated to me, and if anyone is reading this, I'd appreciate understanding the need for such complexity when (in my mind) it's just another colour...
Anyway, I took this off, as I needed to get to the magenta damper. If anyone does this in the future, a couple of key points. In order to get this "pincer" off the damper, I needed to manually turn the motor spindle until the pincer was in a neutral position. Lesson number 1 - make a note of the current position for when you're putting it back together!
Lesson number 2 - there's a microswitch which rests against the white circular cam that is turned by the motor. The microswitch is the thing that tells the printer that the "pincers" have reached a certain position.
When dismantling the components I lost the position of where that microswitch should be sitting, and re-assembled it at the wrong angle. Then when trying to switch black inks later as a test, I got a nasty noise as the motor tried to keep turning the gears when they couldn't go any further. So, don't do that. For reference, it actually has a little lug on it, and Epson was good enough to drill a reference hole to locate it.
It is then secured by a single screw. Here it is in the correct position:
Anyway, that wasn't why I was taking the printer apart. I now had access to the dampers (and the print head!).
Next step I removed the ink lines from the dampers, so I could work on the component on the bench.
Taped up the ink lines so they wouldn't drain out.
Assembly on the bench.
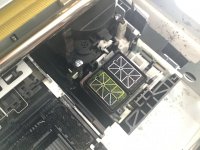
And how the print head now looked:
An opportune time to gently push some cleaning solution through the magenta channel, having placed kitchen towel underneath the print head in readiness.
Foil covered ink tunnels need to be removed before you can get the damper out.
Carefully prise off.
Leaving two components.
Thought it would be worthwhile shoving a bit of cleaning solution through the magenta ink line.
Original magenta damper removed.
Here's the old and new damper side by side, not quite identical, but same function I guess.
I wanted to pull some cleaning solution through the line and through the damper, I had read an excellent guide on this on another website (inkjetmall), due credit to jkschreiber's post which was really helpful. This indicated that in order to make the valve open in the damper, the cleaning cart needed to be pressured with 20ml of air. Something along the lines of this:
Lesson number 3 - my 10ml syringes weren't enough!
Here's a photo of me trying to pull the fluid through the damper. It looks like I'm pushing, but I was pulling - I was using an ipad and I think I pressed the photo button with my nose, not enough hands!
I ended up buying some 80ml syringes off amazon, and using the same technique finally I managed to pull the solution through into the damper.
Reassembly was fairly non-eventful, but I did want to test it before closing everything up. The display can be reconnected via the ribbon cable, pile of tissue boxes and books is not essential, but helpful. The problem with that is there is a sensor in the top cover that detects if the ink cover is open or not, and the printer won't play nicely if it's not closed. The mechanism is the bit near my set of screwdrivers at the bottom right of this picture:
Closeup:
And here's how you fool it (I suggest a bit of paper folded over):
So, having re-assembled, then taken it all apart again to fix the MK/PK switching problem I created, I finally put it all back together and discovered I DIDN'T HAVE ENOUGH INK TO RUN A CLEAN. So I await a light magenta cartridge, after which I'll run a power clean, and hopefully things will be improved.
I'll post again once I've got some ink in the machine, along with my test results. Any comments about stuff I've done wrong, or things I've not done and should do, are all appreciated. Hopefully I'll get a clear nozzle check once I've replaced the empty ink cartridge.
Cheers
Nige