- Joined
- Dec 27, 2014
- Messages
- 6,360
- Reaction score
- 7,576
- Points
- 373
- Location
- Germany
- Printer Model
- L805, WF2010, ET8550, T3100X
I think I got astray when looking for printhead refurbishing - I would need some equipment I don't have
Spot Welder
Introduction
This is a very useful machine for the printer head repair...................
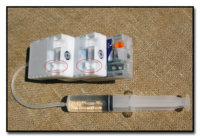
You may try to do some airbrushing with the printhead and your compressor.
Spot Welder
Introduction
This is a very useful machine for the printer head repair...................
You may try to do some airbrushing with the printhead and your compressor.
")