leaking cartridges

mrelmo

Print Addict
Joined
Apr 1, 2007
Messages
427
Reaction score
36
Points
161
Location
Buffalo, New York
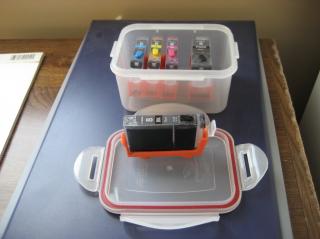
ok i will try the hot glue trick, and thanks for the link about sealing the cartridge completely for shipping, not to get side tracked, as far as shipping goes what about placing the refilled cartrides in a small tupper ware style box you can see in the attached image that there is a gasket on the cover, would that counter the change in air pressure?

2123_img_0089.jpg
 

joseph1949

Getting Fingers Dirty
Joined
Jan 24, 2011
Messages
188
Reaction score
0
Points
49
Location
Albany, Oregon, USA
To: mrelmo

Tomorrow I will give some inside baseball stuff on what I have learned about using my coin/paper disc method for creating hot glue plugs.

A quick thought on pressure changes when you ship carts.

Question: What does Canon do when they ship their carts?

Concerning your Tupperware style box: I will get back to you tomorrow.

Thanks
 

ghwellsjr

Printer Master
Platinum Printer Member
Joined
Jun 16, 2006
Messages
3,645
Reaction score
85
Points
233
Location
La Verne, California
Printer Model
Epson WP-4530
joseph1949 said:
Question: What does Canon do when they ship their carts?
See:

http://www.nifty-stuff.com/forum/viewtopic.php?pid=46892#p46892

Tupperware does not provide a genuine hermetic seal nor does a flexible plastic box protect the contents from pressure changes. A pressure cooker is an example of a genuine hermetic seal.

Please don't seal the air vent. You'll be inviting trouble if you do.
 

The Hat

Printer VIP
Platinum Printer Member
Joined
Jan 18, 2010
Messages
15,640
Reaction score
8,707
Points
453
Location
Residing in Wicklow Ireland
Printer Model
Canon/3D, CR-10, CR-10S, KP-3
I have never used anything other than the usual orange clips on the cartridges I have posted out in the past,
Id just pop them into a bubble-wrap envelope and theyve always arrived safely (no leaks)..:)
 

ghwellsjr

Printer Master
Platinum Printer Member
Joined
Jun 16, 2006
Messages
3,645
Reaction score
85
Points
233
Location
La Verne, California
Printer Model
Epson WP-4530
The Hat said:
I have never used anything other than the usual orange clips on the cartridges I have posted out in the past,
Id just pop them into a bubble-wrap envelope and theyve always arrived safely (no leaks)..:)
Are you talking about the ones that come with Canon cartridges? How do you hold them in place, with rubber bands? And you leave the air vents unsealed, correct?
 

The Hat

Printer VIP
Platinum Printer Member
Joined
Jan 18, 2010
Messages
15,640
Reaction score
8,707
Points
453
Location
Residing in Wicklow Ireland
Printer Model
Canon/3D, CR-10, CR-10S, KP-3
ghwellsjr said:
Are you talking about the ones that come with Canon cartridges?
How do you hold them in place, with rubber bands? And you leave the air vents unsealed, correct?
Thats correct all OEM orange clips held on with just rubber bands with the air vent unsealed and 75% filled reservoirs..
 

joseph1949

Getting Fingers Dirty
Joined
Jan 24, 2011
Messages
188
Reaction score
0
Points
49
Location
Albany, Oregon, USA
To: mrelmo

First things first----

Assumptions:

A. We are working on OEM carts.

B. We are using the top fill method.

C. The fill hole is just to the right (air vent on the left) of the Canons fill hole. The hole is placed where you see the depression.

D. We are using squeeze bottles to place ink into the ink reservoir.

Here is what I have learned about performing my coin/paper disc method:

1. Size of hole. The hole can be from 3/32 dia. to 5/32 dia. If you intend to use silicone plugs in the future make the hole fit the plug. I have found that the 3/32 hole is easier to seal. Also, if there is glue in the hole (not using the coin/paper method) the glue can be removed with no problem. A problem using the 3/32 hole is that when you place the bottles needle into the reservoir and squeeze on the bottle the ink will start to bubble around the hole. This causes a mess. It makes it difficult to fill the reservoir in a timely manner. You are always having to clean the ink around the hole.

The 5/32 hole is not as easy to seal as the 3/32 hole and removing glue from the 5/32 hole can be difficult. My coin/paper method makes it easier to get a good seal when using a 5/32 hole and the paper disc keeps glue out of the hole. One advantage with the 5/32 hole is that there is more room for air to escape. And thus, there is less of a chance that you will have ink bubbles around the hole.

2. The area around the hole should be free of marks. Scratches around the hole may make it more difficult to get a good seal. If you have scratches or whatever you can use fine sandpaper and smooth down the scratches. Just dont over do it. The glue will fill-in any minor scratches.

3. The paper disc. I use a hole punch to create my discs. I punch my printer paper. The paper is 22 lb. business weight. I get my paper at Costco and it is the ADVANTAGE brand made by Georgia-Pacific. I would not hurt to use heavier paper. The printer paper discs have a tendency to curl-up. I have to flatten the disc before I use it. A heavier paper disc will have less of a chance to curl-up. There is no reason to use a larger paper disc unless you have a larger hole (>5/32). Size the disc to fit the hole. My hole size is 5/32 and the size of the disc is 9/32. You can make a disc smaller than 9/32. My hole puncher creates 9/32 discs. I go with the flow.

4. The glue gun. If the gun has two heat settings, use the Hot(er) setting. This setting will give you more time to work with the glue.

5. The glue. Use whatever you have.

6. The coin. I use a penny. A nickel would be fine. A dime may be a bit too hard to pick-up. Your call.

7. To remove a glue plug. You can use your fingernail to remove the plug or you can use any soft tool like a toothpick (wood or plastic). I use isopropyl alcohol on the plug to help with its removal. Do not use a metal tool. You do not want to create scratches.

8. The steps:

a. Place a small (and I mean small) amount of glue next to the hole.

b. Place the paper disc over the glue and press down on the disc. While you are pressing down on the disc slide the paper disc over the hole. The center of the disc should be over the center of the hole.

Note: It would be best if the ink does not soak the paper disc. A soaked disc may keep the glue from creating a good seal. The best way to keep the disc from being soaked is to keep the cart in the horizontal position (like it is in the print head) while it is being filled and while you are creating the glue cap. Also, fill the reservoir to 3/4 full. If the disc does get soaked, you can still cover the disc with glue. Chances are you will not get a bad seal.

c. Wait for the glue to set. Maybe a minute. Longer is better.

d. Next add Vaseline to both sides of the coin. Why both sides? It is difficult to not get the Vaseline on both sides of the coin. Also, it is possible to place the dry side of the coin on top of the glue. Any guesses how I know this? I would place a goodly amount of Vaseline on both sides of the coin. Do not over do it. No big globs of Vaseline on the coin, please.

e. With the disc in place and Vaseline on the coin you can place a glob of glue over the hole. The glob should just cover the disc. The height of the glob should be at least 1/8 to 3/16 high. Yes, this is picky. You will learn why latter.

f. Next place the coin on the glue and press down. A nice easy pressure is just fine. Keep the coin on the glue for around 15 seconds. The longer the coin is on the glue the harder it is to remove the coin. A coin that is hard(er) to remove may disturb the glue and thus the glue will not seal properly. You will need to use the trial and error method to know when to remove the coin.

g. Remove the coin with your fingers. You should find that the glue has covered the disc so that the glue has reached past the edge of the disc. You should have around 1/16 of an inch of glue past the edge of the disc. For a 9/32 disc the glue cap should be around 13/32 in dia. If you do not have this diameter it is not a big deal. What is a big deal is that the glue cap should cover the disc and then some. Remember, the purpose of the disc is to keep glue out of the hole. The disc does not seal the hole; that is the job of the glue.

Now you see why I was so picky with the amount of glue over the disc. If you place too little glue on the disc the glue will not cover the disc properly and YOU WILL GET A LEAKBIG TIME!!!!!!!!!!!!!!!!!!!!!!!!

You may find that after you have removed the coin the glue has gone past the edges of the cart. This is O.K. Give the glue plenty of time to set (five minutes?) and using a sharp pair of scissors you can trim off the excess glue.

h. Test for a good seal. With the orange cap on the ink outlet and the tape (if there) on the air vent turn the cart upside down and keep the cart in this position for about a minute. After the minute is up place the cart in the horizontal position and place a tissue on the glue cap and press down lightly. If you have a good seal you will find no ink on the tissue. If you find ink, you can add more glue where it is leaking or you can remove the glue cap and create a new capisnt this fun!!!!! You can then do a seal test.

If you have a good seal you can remove the orange cap and air vent tape (if there) and do another seal test. If you find no ink on the tissue you can keep the cart in the horizontal position for two minutes and give it another seal test. If the seal test is good you can then place the cart into the print head.

Question: Why so many seal tests? I have found that when you work with glue it is best to be anal. Every time you do something to the cart you need to do a seal test. If you remove an orange cap, do a seal test. If you set the cart down, do a seal test. Etc. It is lot better to find a leak outside of the printer then to find a leak inside the cart.

You may be thinking that there are a lot of steps and it will take some time to use my coin/paper disc method. Yes, there are a few steps, but they are small steps and with practice you should be able to create a glue cap using my method in less than ten minutes.


If there are any questions please feel free to contact me.

Thank you.
 

mrelmo

Print Addict
Joined
Apr 1, 2007
Messages
427
Reaction score
36
Points
161
Location
Buffalo, New York
all of your assumptions are correct, using squeeze bottles, i will be trying the glue method soon it looks interesting, if the us mail is only doing ground shipping on my cartridges i should not have a problem with air pressure, so i will find out about the mail thanks to all and i will not cover the vent hole


update i checked with the post office all i have to do is request ground transport for any package and that will insure that no air shipping will be used so i will not have to worry about atmospheric pressure changes, they said it would just take longer for delivery
 

miraus

Printing Apprentice
Joined
Aug 21, 2012
Messages
2
Reaction score
0
Points
11
Tape should keep ink from leaking. If you hold the cartridge
at a 45' degree angle while refilling, Ink can't leak out even
without the tape.
Tape is not good for sealing the fill hole.
Tap the fill hole with a 10-32 tap and use a screw to seal the
hole.
another option is, but just refillable cartridges which has plug and resistible chip.
 

mrelmo

Print Addict
Joined
Apr 1, 2007
Messages
427
Reaction score
36
Points
161
Location
Buffalo, New York
joseph before i try this method, i understand that you have glue under and on top of the paper circle, if you just used a circle punched from a label you would have glue already to cover the hole and then seal from the top with the hot glue and coin, or have you tried this before
 
Top