- Joined
- Jun 16, 2006
- Messages
- 3,645
- Reaction score
- 85
- Points
- 233
- Location
- La Verne, California
- Printer Model
- Epson WP-4530
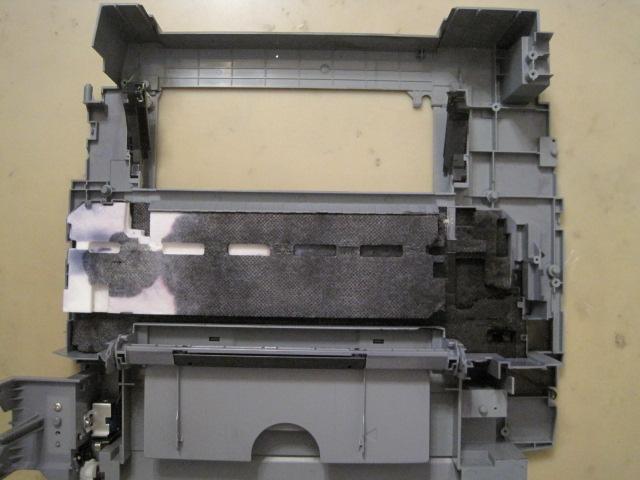
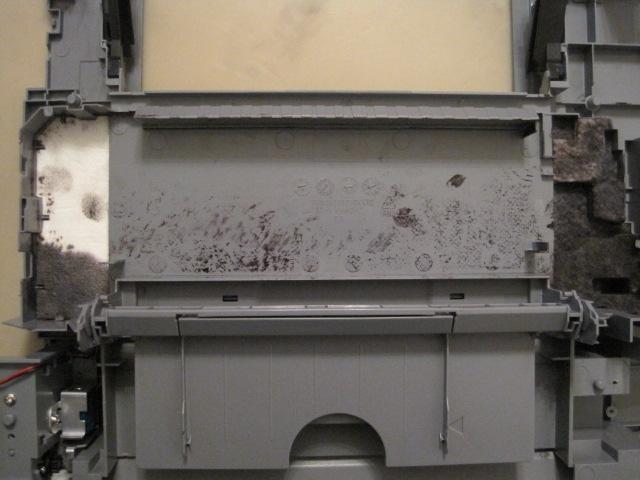
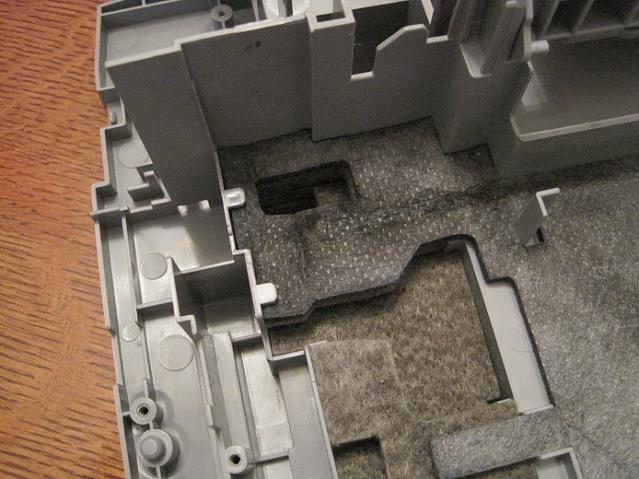
I recently took apart a Canon MP780 and MP760 to see what the waste ink pads looked like. This post shows what you can only see if you take one of these printers completely apart, that is, you have to take off both side panels, the scanner, the top of the printer and finally the entire printer mechanism plus the electonics board. Here is what the MP780 looked like:
In the above view, the front of the printer is at the bottom of the picture. This printer did not have many borderless photos printed on it because the wide pad is almost devoid of ink. The stain at the left is from the small waste unit that you can see when you look inside one of these printers off to the left. The black area to the right is just below where the purge pump resides. This area will be shown in detail later.
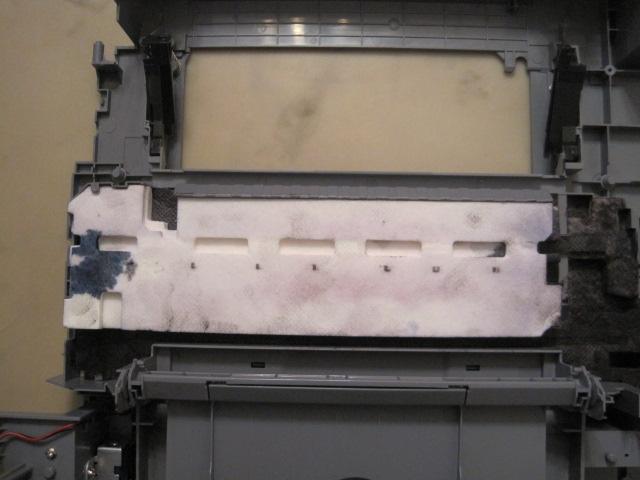
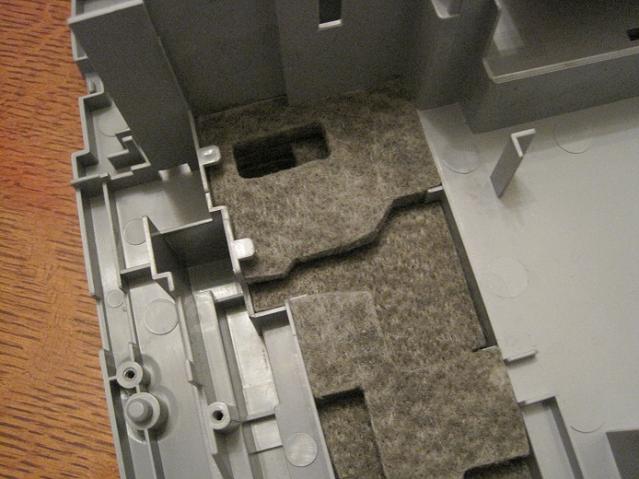
Removing the top waste ink pad we can see the pad below it:
Notice that the right side of this pad has soaked up ink from the pad below it which is shown here:
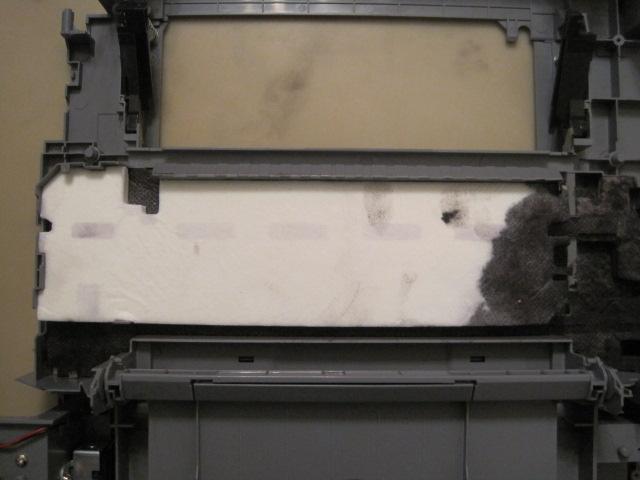
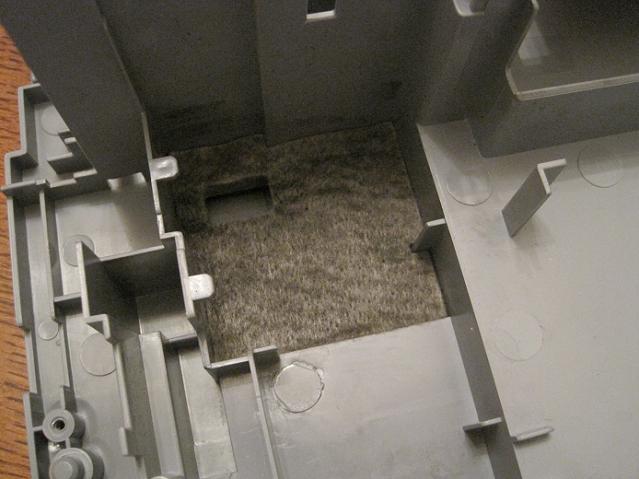
Notice how the pad (above) extends on the left toward the front of the printer and on the right with two small pieces which actually soak up ink from the pads below it:
Note that the pads on the right supply ink to the pad above it which transfers the waste ink all the way across it to the pad on the left. The pads on the right will be shown in detail from another view but here is what we see when we remove the smaller pad on the left:
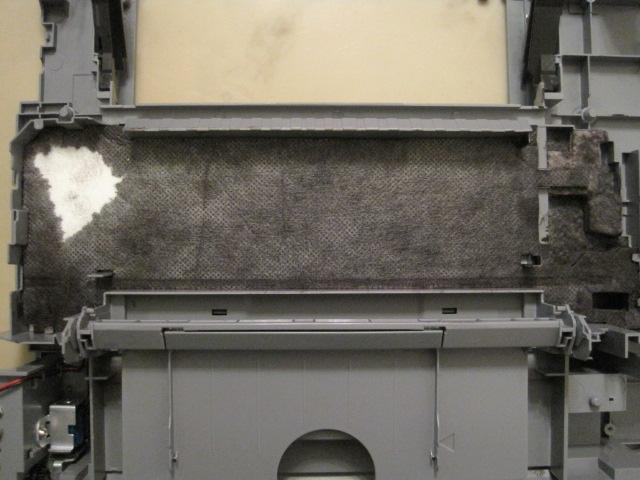
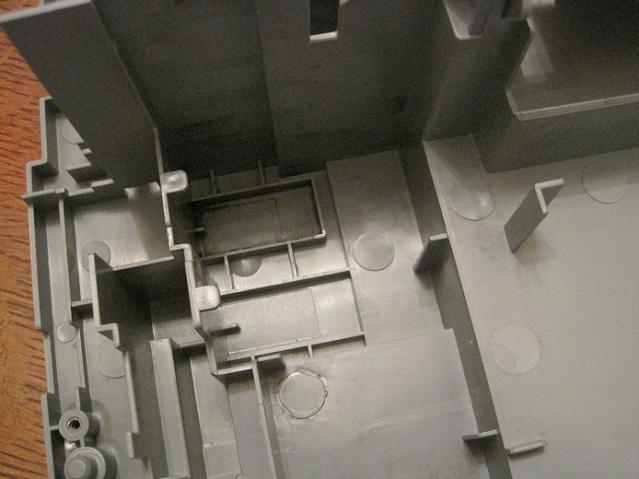
This pad has not soaked up any ink yet and there is another identical one beneath it. In all, there are three identically shaped pads on the left.
Now we turn our attention to the pads on the right, the ones that are below the purge pump as viewed from the right of the printer. These pictures are from the MP760 which had gone beyond 100% full:
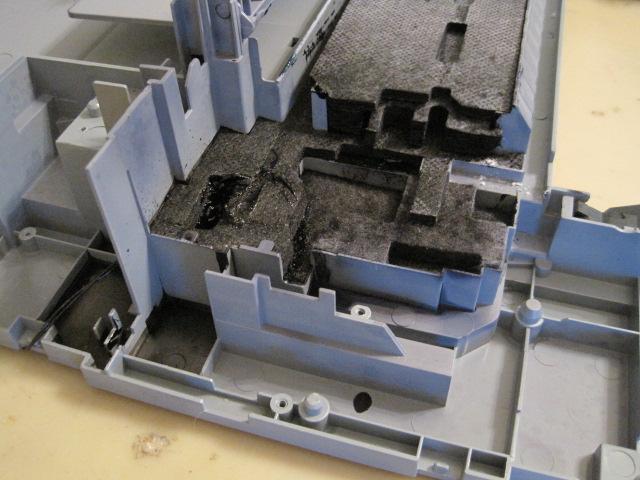
In the above image, we can see how completely saturated all the pads under the purge pump were and how the ink overflowed the plastic barriers and stained the plastic base outside the area of the pads. There are two tubes (one for pigment ink and one for dye ink) coming out of the bottom of the purge pump that go into the small rectangular black hole near the left most edge of the pads in the above picture. That hole was full of thick black ink. The remaining pictures were taken after the waste ink pads were removed, cleaned and replaced in the printer base. We start with the same area but looking down:
Note in the above image that the top two pads (on the right) do not extend over any of the pads on the left. Next we remove those top two pads:
Notice the small section of pad just to the left of the right-angle piece sticking up in this pad. All the ink deposited from the purge pump must pass through this small area on its way to the larger pads.
Now we remove the widest pad and see:
These two top pads have strange shapes to fit the purge pump and the other mechanisms inside the printer where the print head parks and other maintenance on the print head is done.
Removing these two pads we have:

And underneath that we see the lowest and last pad:
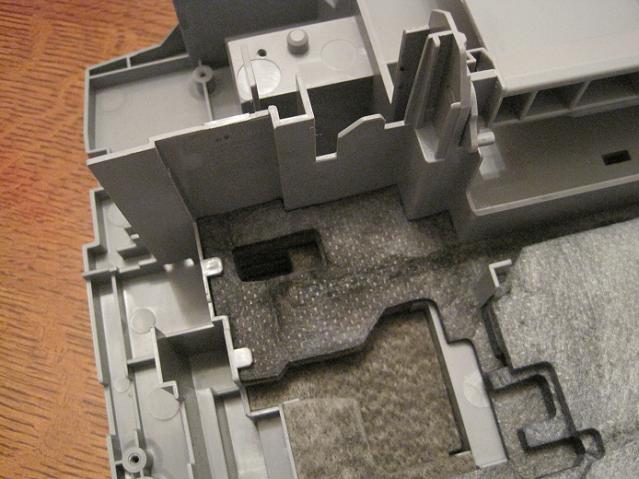
And underneath the last pad we see some strange compartments:
The small rectangular trough at the top of this image is where the purge pump deposits the ink. It doesn't immediately contact the bottom pad until it has formed a shallow pool. I don't know why it is designed like this but in the MP780, there was no residual ink in this trough so somehow it got soaked up into the pads.
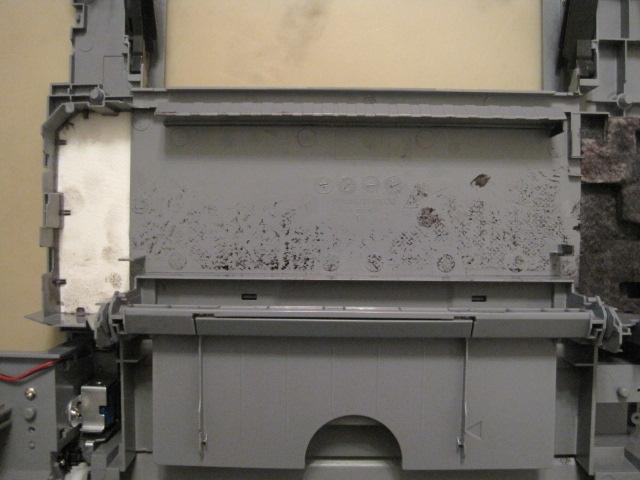
In the above view, the front of the printer is at the bottom of the picture. This printer did not have many borderless photos printed on it because the wide pad is almost devoid of ink. The stain at the left is from the small waste unit that you can see when you look inside one of these printers off to the left. The black area to the right is just below where the purge pump resides. This area will be shown in detail later.
Removing the top waste ink pad we can see the pad below it:
Notice that the right side of this pad has soaked up ink from the pad below it which is shown here:
Notice how the pad (above) extends on the left toward the front of the printer and on the right with two small pieces which actually soak up ink from the pads below it:
Note that the pads on the right supply ink to the pad above it which transfers the waste ink all the way across it to the pad on the left. The pads on the right will be shown in detail from another view but here is what we see when we remove the smaller pad on the left:
This pad has not soaked up any ink yet and there is another identical one beneath it. In all, there are three identically shaped pads on the left.
Now we turn our attention to the pads on the right, the ones that are below the purge pump as viewed from the right of the printer. These pictures are from the MP760 which had gone beyond 100% full:
In the above image, we can see how completely saturated all the pads under the purge pump were and how the ink overflowed the plastic barriers and stained the plastic base outside the area of the pads. There are two tubes (one for pigment ink and one for dye ink) coming out of the bottom of the purge pump that go into the small rectangular black hole near the left most edge of the pads in the above picture. That hole was full of thick black ink. The remaining pictures were taken after the waste ink pads were removed, cleaned and replaced in the printer base. We start with the same area but looking down:
Note in the above image that the top two pads (on the right) do not extend over any of the pads on the left. Next we remove those top two pads:
Notice the small section of pad just to the left of the right-angle piece sticking up in this pad. All the ink deposited from the purge pump must pass through this small area on its way to the larger pads.
Now we remove the widest pad and see:
These two top pads have strange shapes to fit the purge pump and the other mechanisms inside the printer where the print head parks and other maintenance on the print head is done.
Removing these two pads we have:
And underneath that we see the lowest and last pad:
And underneath the last pad we see some strange compartments:
The small rectangular trough at the top of this image is where the purge pump deposits the ink. It doesn't immediately contact the bottom pad until it has formed a shallow pool. I don't know why it is designed like this but in the MP780, there was no residual ink in this trough so somehow it got soaked up into the pads.