A basic guide (see post #1) to setting up ARGYLL CMS profiling on your computer

ClarenceL

Fan of Printing
Joined
Nov 3, 2021
Messages
76
Reaction score
51
Points
55
Location
Taiwan
Printer Model
Canon G570, EPSON L800/L3150
The size of a thin mate paper is added I guess is 0.15mm not sure that is what makes the difference. In my opinion is more due tu the refection of the light in the guide (even if it’s black) that might somehow have an impact.
The case of the CM adds at least 0.7cm to the size of the device and this is used to hold on a screen, I guess the hight does not have a huge impact. But it might be a possibility.
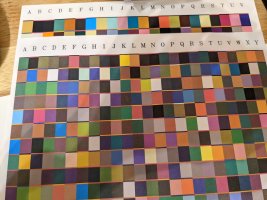
Is there any other white papers under the test chart during each.
Some paper might be too thin to be affected by the color under the paper.

But I did suspect the measure results might be a little difference when apply the ruler on CM.
 

marco565

Getting Fingers Dirty
Joined
Jan 4, 2022
Messages
57
Reaction score
16
Points
45
Location
Munich, Germany
Printer Model
Canon pro 10, Epson ET8550
Yes, I always use a white sheet of paper that does not have OBAs under my targets, but the sheet is the same on the measurements with or without a ruler.

To be honest, I think this is just data to consider. The profiles look perfect so I would not bother too much with this. I just wanted to mention that is something that everyone using a custom ruler should measure.
 

ClarenceL

Fan of Printing
Joined
Nov 3, 2021
Messages
76
Reaction score
51
Points
55
Location
Taiwan
Printer Model
Canon G570, EPSON L800/L3150
Tried to SPOT measure two of the i1Studio patch on row 2 by CM Photo ColorPicker .
I have 2 CM rulers(0.55/0.6mm was thickness between CM & target), one short version for i1studio 1/4 A4 size, another for Argyllcms 484 patches(based on CAP480).
Measure LAB value as below table.
Might need to consider rebuild a thinner ruler.
PXL_20220120_231423887.jpg
cm_ruller.jpg
 
Last edited:

marco565

Getting Fingers Dirty
Joined
Jan 4, 2022
Messages
57
Reaction score
16
Points
45
Location
Munich, Germany
Printer Model
Canon pro 10, Epson ET8550
Did you use "spotread.exe" to mensurate the values of the patches? I would say mesures are within margin error...

0.55mm aperture is quite small! but it looks like there is not too much impact.

I tried an 812 patch vs the CAP480 (addressed in this thread). I see a very tiny improvement of the overall gamut that for me can be in the margin of error and definitely not perceptible by nacked eye. I will post tests later on.
 

marco565

Getting Fingers Dirty
Joined
Jan 4, 2022
Messages
57
Reaction score
16
Points
45
Location
Munich, Germany
Printer Model
Canon pro 10, Epson ET8550
I did another test today, comparing my standard 483 patches vs 812 patches with some profiles as reference:
483 Command:
targen -v -d2 -G -e6 -B5 -g128 -f483 "test"

812 Command:
targen -v -d2 -G -e6 -B5 -g64 -s16 -f812 -c SOME_GLOSSY_PROFILE_FROM_MY_PRINTER "test

Both tests were tested on the same glossy cheap paper and 1 sheet (They 812 is quite difficult to scan and take 2x more, so I would suggest not going more than 600 patches per a4 with a very good guide and the Color Munky)

As we can see the 812 patches get a better distribution
 

Attachments

  • 812 patches vs 483 -2.png
    812 patches vs 483 -2.png
    485.1 KB · Views: 162
  • 812 patches vs 483.png
    812 patches vs 483.png
    543 KB · Views: 162
  • Patches LAB spread.zip
    213.5 KB · Views: 169

Ink stained Fingers

Printer VIP
Platinum Printer Member
Joined
Dec 27, 2014
Messages
5,838
Reaction score
6,965
Points
363
Location
Germany
Printer Model
L805, WF2010, ET8550
0.55mm aperture is quite small!
The aperture is fixed by the spectro hardware, and a wider aperture should be better to average patch inhomogenities, color patches are printed with ink drops , that's not as smooth as a color paint, the color patches are a kind of noisy from the printing process, that's visible when you scan color patches high res and look to the histogram of the scan.

I tried an 812 patch vs the CAP480 (addressed in this thread). I see a very tiny improvement of the overall gamut
You cannot expect a larger gamut by using more color patches , and be aware that the most frequently used rendering intents - perceptual or rel. col. - will adjust colors much more than very small increases in accuracy with a higher patch count.
 

ClarenceL

Fan of Printing
Joined
Nov 3, 2021
Messages
76
Reaction score
51
Points
55
Location
Taiwan
Printer Model
Canon G570, EPSON L800/L3150
I did another test today, comparing my standard 483 patches vs 812 patches with some profiles as reference:
483 Command:
targen -v -d2 -G -e6 -B5 -g128 -f483 "test"

812 Command:
targen -v -d2 -G -e6 -B5 -g64 -s16 -f812 -c SOME_GLOSSY_PROFILE_FROM_MY_PRINTER "test

Both tests were tested on the same glossy cheap paper and 1 sheet (They 812 is quite difficult to scan and take 2x more, so I would suggest not going more than 600 patches per a4 with a very good guide and the Color Munky)

As we can see the 812 patches get a better distribution
Oh , the 0.55mm , 0.6mm was talking about the material thickness on my CM guide ruler.
I forgot to describe it on above, sorry to add some misunderstanding.(edited)
Not yet try the spotread, I use the ColorPicker from CM Photo to measure the LAB value.

But, how could it be 812 patches in one A4. It might be too hard and too small isn't it?
The patch size?

My patch size for cap480 is about 11mm long by 8.5mm width
The CM bottom hole is around 8mm dia.
PXL_20220120_233042781.MP.jpg

PXL_20220120_232915434.jpg
 
Last edited:

marco565

Getting Fingers Dirty
Joined
Jan 4, 2022
Messages
57
Reaction score
16
Points
45
Location
Munich, Germany
Printer Model
Canon pro 10, Epson ET8550
Oh , the 0.55mm , 0.6mm was taking about the material thickness on my CM guide ruler.
I forgot to describe it on above, sorry to add some misunderstanding.(edited)
Not yet try the spotread, I use the ColorPicker to measure the LAB value.

But, how could it be 812 patches in one A4. It might be too hard and too small isn't it?
The patch size?
It works with 812, you need colored separators, crop a bit the image to have perfect use of the paper, and move rather slow. But that does not give you more benefit than the 600 patch target which is much easier to scan(like 5min vs 15min), even the 483 is very good compared to OEM profiles.


EDIT:
Commands for the 600 patch:
targen.exe -v -d2 -G -e3 -B5 -g96 -f600 -w "target"
printtarg.exe -v -ii1 -a0.98 -A0.75 -T300 -m2 -M5 -m5 -P -L -p215x290 "target"
 
Last edited:

ClarenceL

Fan of Printing
Joined
Nov 3, 2021
Messages
76
Reaction score
51
Points
55
Location
Taiwan
Printer Model
Canon G570, EPSON L800/L3150
It works with 812, you need colored separators, crop a bit the image to have perfect use of the paper, and move rather slow. But that does not give you more benefit than the 600 patch target which is much easier to scan(like 5min vs 15min), even the 483 is very good compared to OEM profiles.


EDIT:
Commands for the 600 patch:
targen.exe -v -d2 -G -e3 -B5 -g96 -f600 -w "target"
printtarg.exe -v -ii1 -a0.98 -A0.75 -T300 -m2 -M5 -m5 -P -L -p215x290 "target"
Maybe 600 worth a try if I can get big enough patch & can pass the measure method I am using.
As post #391 mentioned, I use mmmunki to replace the chartread.
So, I get the result selected from at least 3 times read on each charts.

Seems like very critical, my 600patch size is 10mm long x 7.8mm width(even smaller than CM bottom hole dia)
 

Attachments

  • PXL_20220121_161319631.jpg
    PXL_20220121_161319631.jpg
    145.2 KB · Views: 166
Last edited:

websnail

Printer VIP
Platinum Printer Member
Joined
Oct 27, 2005
Messages
3,661
Reaction score
1,345
Points
337
Location
South Yorks, UK
Printer Model
Epson, Canon, HP... A "few"
Couple of things that may already be in this thread (but I missed) and others that aren't so I thought I'd share while I have the info in my noggin.

1. Getting hold of the AdobeRGB1998.icc is an exercise in groundhog day frustration if you try the official channels. This workaround via the webarchive does work:
https://web.archive.org/web/2016032...files/win/AdobeICCProfilesCS4Win_end-user.zip

2. Little Argyll GUI works great to get you up to speed initially but doesn't appear to load up ini files using the ALT Click method suggested. I might be doing things wrong but ultimately I ended up using batch files instead.

3. In another thread it was suggested that creating profile targets using Portrait mode is a great way to avoid problems with the guide limitations on tools like the i1Pro, etc... To do this use R in the -p flag (eg: A4R) in printarg.exe

4. I've provided a modified of the CAP957 Grey 335 batch file to product A4 portrait mode targets and also allow you to input:
  • Printer manufacturer
  • Printer model
  • Profile description
...for the final custom profile. Useful for helping you lookup the profile in Colour Management in Windows.

NB: rename to .bat once downloaded to allow it be run as a batch file.
 

Attachments

  • CAP957greys335-pub.txt
    4.8 KB · Views: 131

Latest posts

Top