A basic guide (see post #1) to setting up ARGYLL CMS profiling on your computer

Tudor

Print Addict
Platinum Printer Member
Joined
May 6, 2011
Messages
505
Reaction score
202
Points
183
Location
Cluj-Napoca, Romania
Printer Model
Epson L800, 1400; ML-2165W
@Emulator : I am not an expert, my understanding of what this software can do and color management in general is very limited. I feel like I only began to scratch the surface of what argyllcms can do and it will take time and work to get to a "expert" state. Lots of time and work!...


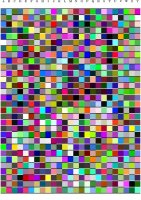
Anyway here's what I use for one A4 page with 750 patches:


targen -v -c "conditioning_profile.icc" -d2 -G -e4 -B4 -g128 -f750 A4

printtarg -v -ii1 -a1.05 -A0.85 -b -t600 -C -L -M6 -P -p230x380 A4

chartread -v -H -T0.4 A4

colprof -v -qh -i D50 -o 1931_2 -S sRGB.icm -cmt -dpp -D"printer_ink_paper_sRGB" -C"comments" -O"printer_ink_paper_sRGB.icc" A4


@crenedecotret did a profile for me last year and I use it as a conditioning profile.

Before printing I modify the image

from this: A4.jpg to this: A4_print.jpg using PS
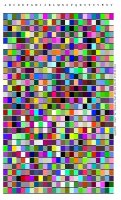
To print the target I use Qimage with Prtr icc, Interpolation and Sharpening all off.

To read the target I use a homemade glider and the ColorMunki.

I'm still not sure if it's better to use sRGB or AdobeRGB, more testing necessary.
 
Last edited:

pharmacist

Printer VIP
Platinum Printer Member
Joined
May 29, 2007
Messages
2,565
Reaction score
1,269
Points
313
Location
Ghent, Belgium
Printer Model
Epson SC-P800,WF-7840,XP-15000
Actually: If you don't have a preconditioning profile, it is perfectly ok for most printers to use the above target and get very good profiles. As I have stated: most commercial profile targets use less patches to generate good profiles, so 750 tiles is very high, as most printers are pretty linear in behavior.
 

Emulator

Printer Master
Platinum Printer Member
Joined
Jan 4, 2012
Messages
1,675
Reaction score
1,308
Points
277
Location
UK
Printer Model
Canon Pro9000 II
I have decided to edit the first post in this thread at regular intervals, updating the content to show the progress that a user installing Argyll CMS could have achieved from the information available. As this editing will not attract a position at the head of recent posts, anyone interested should check post#1 at intervals. :he , :).
 

PeterBJ

Printer VIP
Platinum Printer Member
Joined
Nov 27, 2010
Messages
5,061
Reaction score
4,908
Points
373
Location
Copenhagen Denmark
Printer Model
Canon MP990
That is a good idea. I have also updated the first post in the Canon service tool thread several times, so you don't need to read the whole thread if you only want a link and possibly an instruction.
 

pharmacist

Printer VIP
Platinum Printer Member
Joined
May 29, 2007
Messages
2,565
Reaction score
1,269
Points
313
Location
Ghent, Belgium
Printer Model
Epson SC-P800,WF-7840,XP-15000
For those interested to try ArgyllCMS and do not want to type in tidious commands and have a Colormunki device can download the file beneath.

Now: please install ArgyllCMS as described on te website. Download the zip-file and put the makeprofile.bat file in the /bin directory of your argyllCMS installaion.

There is a pdf-file which can printed on a A3 printer to make the ruler (using thick paper, cut the pieces and glue it together to make the ruler).

Put all A4profile files (ti1, ti2, tif) + the AdobeRGB1998.icc file in a directory.

Print the A4profile.tif target on the desired paper, taking care to use borderless printing, but NO expansion (maintain size). All color management disabled (ICM: off/none).

Install the ArgyllCMS driver for the Colormunki (a restart is necessary. Changing back to the X-rite Colormunki driver does not require a restart).

To start reading the chart, go to the directory were all the ti* and AdobeRGB1998.icc files are found.

type: chartread -v -H -T0.4 A4profile

When everything is done, type "d" to write the ti3 file, which is used by ArgyllCMS to create the profile.

Now the most tidious command is the one to generate the profile, for which I have made the batch-file "makeprofile.bat". By just typing "makeprofile" the batch-file will ask you step by step to give the internal name of the proile, copyright data, the name of the ti3 file (A4profile) and the external profile name.

It is based on a 660 patch target, which is more than satisfactory for most RGB-based printers.
 

Attachments

  • ArgyllCMS_Colormunki_ruler_set.zip
    1.9 MB · Views: 872

Emulator

Printer Master
Platinum Printer Member
Joined
Jan 4, 2012
Messages
1,675
Reaction score
1,308
Points
277
Location
UK
Printer Model
Canon Pro9000 II
Hi pharmacist,

Post #15 is most helpful, it will make every users life a great deal easier, I will add a reference to it or copy it into post #1,with due credit, if you have no objection.

There are two questions that I need to ask, your para 4, A4profile files directory, name it A4profile files and place it in the Argyll_V1.6.3 main directory or the bin sub-directory? Presumably the latter.

Your para 5, I printed the target on the Pro9000 II, no PS colour management and none in the printer driver, border-less, no expansion (slider far left), Photo Paper Pro II, 617ppi. The image is offset, left margin 3.5mm, right margin 6.5mm. There are some startling colour differences compared with the monitor image, particularly in the bottom line. May be I'll let the print mature 24 hours!.....Having let the print mature the colours are now much closer to the original.

It will take a little time for me to make the ruler and try the rest of the process. You will have all the PrinterKnowledge community using Argyll soon, even @rodbam.
 
Last edited:

pharmacist

Printer VIP
Platinum Printer Member
Joined
May 29, 2007
Messages
2,565
Reaction score
1,269
Points
313
Location
Ghent, Belgium
Printer Model
Epson SC-P800,WF-7840,XP-15000
No: the A4profile files must be kept were you prefer, like "my_profile_directory", anywhere you like to be working from.

The makeprofile.bat MUST be put in the Argyll_vXXX/bin directory. You have to choose image centered to get a centered image. It should be printed at 600 dpi. The most important thing is that all the colored patches must be on the paper, all the rest is not important.
 
Last edited:

Emulator

Printer Master
Platinum Printer Member
Joined
Jan 4, 2012
Messages
1,675
Reaction score
1,308
Points
277
Location
UK
Printer Model
Canon Pro9000 II
Have you put up an image of the finished ruler anywhere? It is a little difficult to be sure what the objective shape is.
 
Top