- Thread starter
- #11
Hmm. By light usage I meant I would generally print a page or two of text every other day or so. Every time I turned the printer on, there would have been a light cleaning cycle for all of the inks, but it's true that the color ink carts were rarely printed with and therefore would have stayed in the printer for quite a long time. And yes, I was refilling and using the same carts after I put in a new printhead, though I believe only one of the carts would have had a funky air vent (I was cycling through an OEM Canon Cart, a Hobbicolors cart, and a Formulabs cart -- the last having the apparently inadequate air vent design).Keep in mind that it will take a long time for enough water to evaporate out of a cartridge before it becomes a problem. You indicated in your first post that the printer had "a few months of light usage" before the problem happened again after you replaced the printhead. (You didn't indicate, but you may have been using the same cartridges that you were using with your older printhead. Also, not all of your cartridges were of the problem type.) If you had been using your printer often, it probably would have kept the problem from happening.
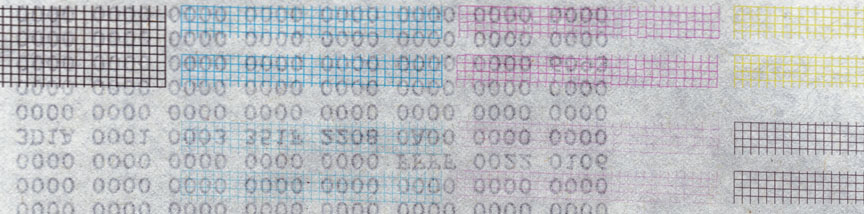
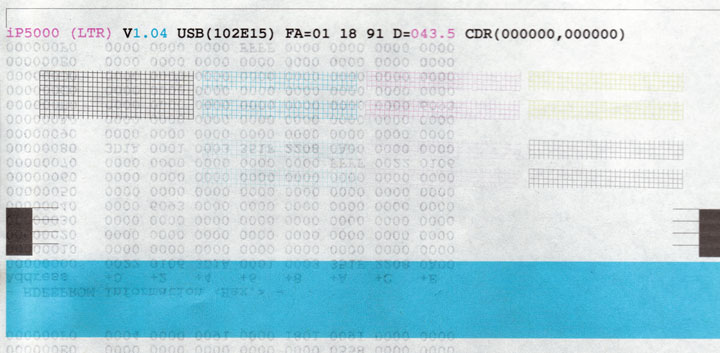
Understood, but the magenta patterns in the test you uploaded look just like the magenta test patterns I was getting before shipping the printer to you (and I was getting similar magenta patterns with the two previous printheads when they went south) - in other words, the ultra-light printing of the 'light' magenta band, and the 'checkerboard' alternating densities of the dark magenta band are almost certainly unrelated to any damage caused to the printhead by the leaked ink getting on to the electrical contacts.The nozzle check pattern that I uploaded was the first time the dark magenta showed anywhere near a solid pattern and the first time any ink showed in the light magenta (at the very bottom). I then removed the printhead and tried to shake some ink out of it but instead I think I shook some ink into the electronics because the printer would no longer recognize the printhead. I agree that there was probably also an electronic problem with the dark magenta, but I think it was caused by the ink contamination during shipping.
Zack

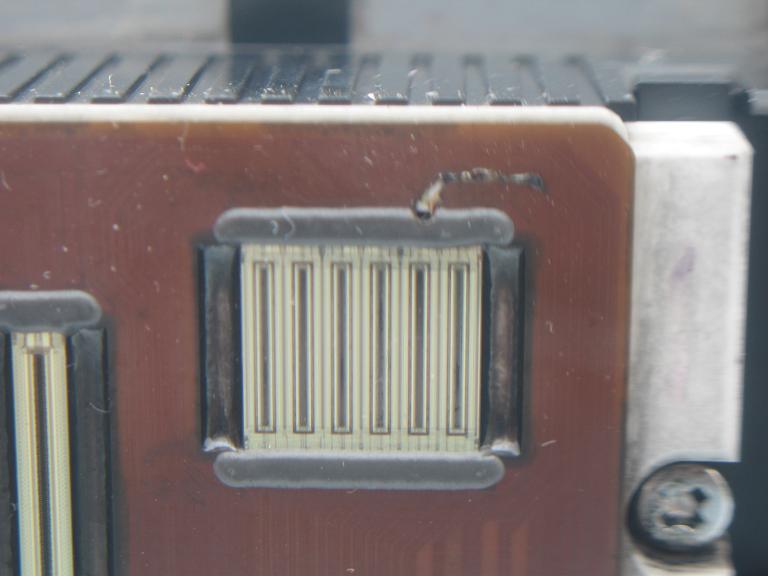
") Here's another shot, backed up with black paper and cropped to show more detail of the crosshatches. Still not great, but you can see a bit more:
Here's another shot, backed up with black paper and cropped to show more detail of the crosshatches. Still not great, but you can see a bit more: