New Printers that are beyond the 225/226 or 525/526. Time to hoard!

InkQuisitive

Getting Fingers Dirty
Joined
Apr 1, 2013
Messages
27
Reaction score
10
Points
36
PeterBJ said:
...marking 2 is an air intake, which I think is impossible to seal off.
Do any of the elements at the front of the cartridge have a purpose? If not then I would investigate drilling a hole at the top of the front and fill that section with hot melt glue or epoxy adhesive (Slow-set Araldite is very fluid if warmed in hot water before mixing :)) to effectively recreate the wall.

But the stats on page 6 of the links show that an XL cartridge only holds 50% more ink than a small one, so is it worth it to save 1 top-up out of 3?
 

ThrillaMozilla

Printer Master
Joined
Jan 18, 2011
Messages
1,189
Reaction score
341
Points
253
PeterBJ said:
marking 2 is an air intake, which I think is impossible to seal off.
I see what they are saying now. But who says it's impossible to seal? Drill the end and fill it from there. They made it a little harder, but surely not impossible?

But I agree, possibly not worth the trouble. Maybe not really worth the trouble for Canon either, but they did it.
 

mikling

Printer VIP
Platinum Printer Member
Joined
Jul 2, 2006
Messages
3,239
Reaction score
1,471
Points
313
Location
Toronto, Canada
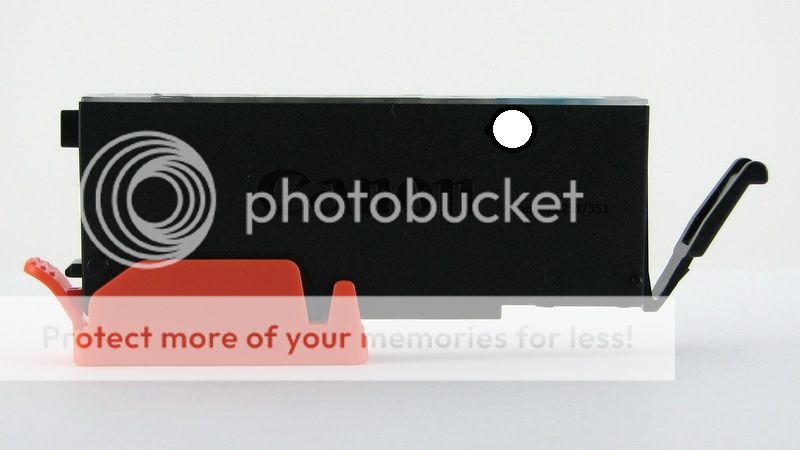
The good news from my testing thus far is that my low clearance plugs (black ones) will clear the printer space above the cartridges. So convenient top fill will be possible. Good and convenient for the XL carts.
Refilling the setup or cartridges that came with the printer at this time has very little area above the reservoir that will allow a 1/8" hole. For these I am recommending my Zero Clearance plugs which reuse the original ball hole.

With that in mind, my plan to enlarge the reservoir mirrors the suggestions here. I would not be concerned about damaging the original ball hole since we will not be reusing it. So drilling through the top appears viable. On the bottom, the spring tab will block the drilling. The chip is not in the front but damage to the clip is to be avoided. I was thinking of drilling diagonally from the side. If you come from the front, you'd need to seal a hole that is internal and that is tricky. Just reaseal the hole on the side.

I was also planning to fill in the top open areas aggressively with some hot melt glue.

Canon was forced to place a second intermediate wall into their setup cartridges so that their optical prism system will still work. This presents an opportunity since at least this provides some kind of reservoir system as opposed to HP's starter cartridge which has a hole at the top of the separating wall and has no reservoir system. Canon's separating wall is still intact.

Looking at how to refill these, the German method may prove to be lacking this time just because there reservoir is very small and the ability of the German method to resaturate the looong sponge might be tricky. Using the top fill, we can resaturate the long sponge in one go.

The other thing to note is that there are now three densities of the sponge. The bottom one appears to be the same density as the outlet sponge in the CLI-8 and 221/226 series. This might prevent the German method from progressing without damaging the bottom layer. In the older cartridges, the layer above the outlet was not as dense.

We shall see as experiments progresses.
 

mikling

Printer VIP
Platinum Printer Member
Joined
Jul 2, 2006
Messages
3,239
Reaction score
1,471
Points
313
Location
Toronto, Canada
I thought about it some more. i.e enlarging the reservoir.

When making the top hole to equalize the tank levels, make sure you make a hole large enough so that surface tension of the ink will not "block" or plug the hole like it does on the air vents. I would this a hole 1/16" in diameter would be sufficient. Too small a hole is blocked with ink.

Here is what I want to do to make it nicer.... I will punch/cut out a couple round clear discs (3/8" dia) from clear packaging. I would then drill a 1/4" hole near the top of the cartridge from SIDE to SIDE. That way I can see through it. The clear packaging must be a thin stiff type. On the bottom, I would drill a 1/8" hole near the wall and enter diagionally with a 1/16" drill. I would reseal the 1/8" hole afterwards.

Using the clear discs, I would reseal the holes using glue ( hot melt) and clear round discs press it as flat as possible to reseal the hole. Now we have Windows 251/551. We can top fill and see when we are full.

Do not put the windows at exactly the same spot. Stagger them on adjacent cartridges to allow clearance.
To seal the hole on the front made by Canon, we may need to remove some of the clear light tunnel. I will have to check into this.

Tomorrow I'll check if my idea is possible.
 

mikling

Printer VIP
Platinum Printer Member
Joined
Jul 2, 2006
Messages
3,239
Reaction score
1,471
Points
313
Location
Toronto, Canada


With the 1/4" hole, you can now access the intermediate wall and make a hole there. For the front hole, we need to be careful since the top of the cartridge seals in the light pipe. Hmm. closer look is warranted.
 

mikling

Printer VIP
Platinum Printer Member
Joined
Jul 2, 2006
Messages
3,239
Reaction score
1,471
Points
313
Location
Toronto, Canada
To experiment I made a similar window on a 226 cartridge and it worked very nicely.
I drilled out a 1/4" diameter hole through both sides. Then using hot melt glue I was able to attach some clear windows on the side. Since a very thin film of glue is required to keep the window as flush as possible to the side, it can cause rapid cooling issues. Let the hot melt glue get as hot as possible so a lot of preheating is necessary. I used some very thin packaging and cut out a window. The issue is that by the time I put the window on, the glue would partially cool. Now the window could not be sealed. So I cleaned off the tip of the glue gun and then pressed it against the window and remelted the glue underneath, I was now able to perfectly seal the window against the side.

After I did it, I then remembered I have some material that might be better. It was thinner, which is better and it could withstand up to 320 degrees .. a hot clothes iron. This material is called TEC200. You use this stuff to make electronic circuit boards. Using a laser printer, you print the plastic toner onto it and then it is placed on a circuit board and using an iron, you melt the toner onto the circuit board and then etch out the circuit pattern using chemicals. Overhead projector film might work equally as good.

Done properly, there is sufficient space between cartridges to apply external windows. I will now try these on the 251 cartridges.
 

The Hat

Printer VIP
Platinum Printer Member
Joined
Jan 18, 2010
Messages
15,628
Reaction score
8,698
Points
453
Location
Residing in Wicklow Ireland
Printer Model
Canon/3D, CR-10, CR-10S, KP-3
It sounds like a good idea alright but I have my reservations as to whether there will be an enough
of a gap between all the cartridges to accomplish this great new invention.

I previously tried sticking self adhesive labels onto the sides of my PGI-9 cartridges and they wouldnt all fit back
into the print head again so space is going to be your biggest headache.

An alternative way would be to use a clear round plastic tube (Like a ball point pen)
glued into your existing hole and have it flush with the sides..
 

barfl2

Print Addict
Joined
Feb 22, 2010
Messages
481
Reaction score
65
Points
168
Location
Hampshire U.K.
I have a similar product sticky clear film/backed which was used to cover the deck of model yachts which you peel off the backing and then any wrinkles you remove with a hair dryer or hot air gun. Once in place completely waterproof.

Another idea to get flush sides but going up the difficulty ladder is to use a counterbore milling cutter which will produce nice flat bottom holes in which to glue your windows. accurate plastic windows could be produced by a hole punch. The possible problem with this idea is the wall thickness probably not much more than 1/16".
 

mikling

Printer VIP
Platinum Printer Member
Joined
Jul 2, 2006
Messages
3,239
Reaction score
1,471
Points
313
Location
Toronto, Canada
I got a muffin from McDonalds today. The bag for the muffin has a clean film window. This stuff is strong. I can try that as well.. What WILL work for sure are Turkey baking bags. These are thin clear bags that can take a LOT of heat without breaking down. So you apply a thin film of hot melt glue around the hole. Apply the clear window around the hole and using the tip of the hot melt glue gun, heat the baking bag film so that the glue underneath bonds to the clear plastic film. Using this method, there will definitely be enough clearance . For even more clearance, stagger the positions of the window so that they interleave and don't collide.
 

pennyblue

Newbie to Printing
Joined
Mar 7, 2012
Messages
5
Reaction score
0
Points
7
Very interesting thread. I have a friend who is considering buying this printer, and I was hoping this group would have ideas on being able to refill it. I wasn't disappointed.

I have two suggestions for clear window material that is quite heat resistant.

The first one is the plastic film sheets used in laminating machines. It is a stiff crystal clear plastic with a heat activated adhesive. The adhesive is cloudy on the sheets, but after heating it turns completely crystal clear. I have also used my home iron set medium high to laminate things with the same stuff. You could possibly laminate 2 sheets together to get an even thicker, stiffer material that is still completely clear.

The second is heat bondable clear vinyl sold in fabric stores. It is designed to be bonded to fabric using the heat of a home iron.

What I dont understand is why the insistence on using heat to glue a window of some sort? Why not just find a suitable stiff clear plastic and use silicone around the hole to stick the window to the cartridge? You'd only need a thin layer, since the tanks don't have any pressure to blow it off.

EDIT: It occurred to me that despite being a pain in the backside, it would be well worth messing around using my dremel to cut a window in a tank, and using silicone to attach a viewing window.
 
Top