- Joined
- Jan 18, 2010
- Messages
- 16,121
- Reaction score
- 9,080
- Points
- 453
- Location
- Residing in Wicklow Ireland
- Printer Model
- Canon/3D, CR-10, CR-10S, KP-3
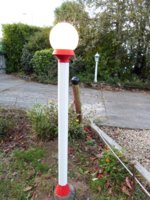
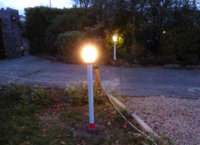
I have now got to stage where I can start putting all the pieces of the lamp together, it’s nice when an idea become a reality, after all the time I’ve spent on this project.
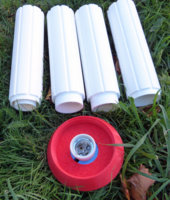 6 pieces
 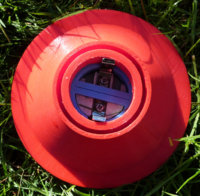 makes for a tight fit.
I made it with four lengths of tube 215 mm high, I started with the tube width at 102 mm but soon realised that it didn’t need to be that large, so I reduced it in size by 45% in the slicer but kept it the original height of 1 Metre.
The whole idea was a sound one but reducing it became a pain in the ass and made getting all the pieces to join together a bit more difficult, but I got there in the end, and saved a load of time and filament.
I plan on sticking the four tube sections together and then fixing the tube section to the base which is already cemented in place, the pieces fit firmly and gluing them together will save having to secure them with a couple of screws.
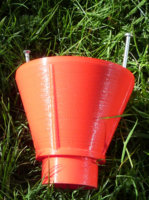 screws to secure to the cement
 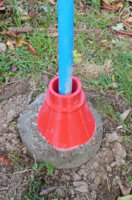 pipe with power cable in it.
The next stage will be to join everything up together and see how she looks, I’ve even got a name for my new light, “ 3D Wilson ” I will be Friggin disappointed if it doesn’t illuminate the garden and driveway properly.
I’ll add in a photo here later when I get it assembled and up working... Phew..
 6 pieces
  makes for a tight fit.
 I made it with four lengths of tube 215 mm high, I started with the tube width at 102 mm but soon realised that it didn’t need to be that large, so I reduced it in size by 45% in the slicer but kept it the original height of 1 Metre.
The whole idea was a sound one but reducing it became a pain in the ass and made getting all the pieces to join together a bit more difficult, but I got there in the end, and saved a load of time and filament.
I plan on sticking the four tube sections together and then fixing the tube section to the base which is already cemented in place, the pieces fit firmly and gluing them together will save having to secure them with a couple of screws.
 screws to secure to the cement
  pipe with power cable in it.
 The next stage will be to join everything up together and see how she looks, I’ve even got a name for my new light, “ 3D Wilson ” I will be Friggin disappointed if it doesn’t illuminate the garden and driveway properly.
I’ll add in a photo here later when I get it assembled and up working... Phew..


