Canon Error message

duncan22

Getting Fingers Dirty
Joined
Dec 30, 2008
Messages
82
Reaction score
0
Points
29
Location
Lancashire UK
Current printer MP610 is several years old and is on it's second Print Head.
Printed several disks ok but then got the following message..........Error, open the inner cover, replace the CD-R Tray and press OK.
Problem is the inner cover was open, tried resetting it to factory settings but the message remains.
Other functions continue to work ok ie normal printing & Scanning.
Must admit I have printed hundreds of disks on this printer.... wonder if it's possible to actually burn that function out ??
Anyone got any ideas or seen this message before ?

NB: Everything displays ok on the software so doubt it's a problem there.
 
Profuse apologies for posting in wrong section this should have been under the Canon topics.
 
Thank you for responding, that link looks interesting sadly I cannot register as the questions asked are beyond my knowledge.
 
You don't need to register to download manuals from electrotanya. Non-members are allowed two downloads daily.
 
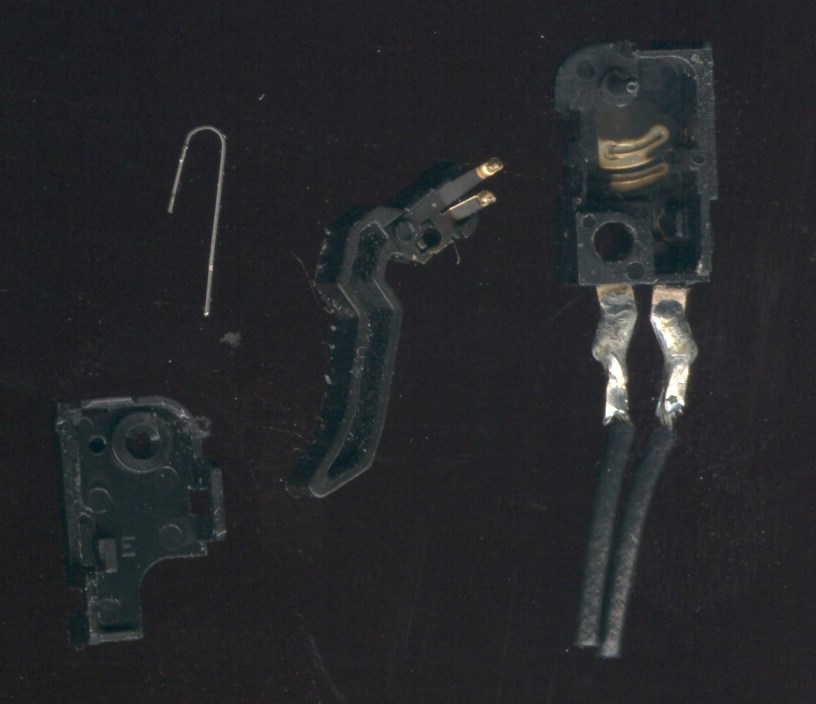
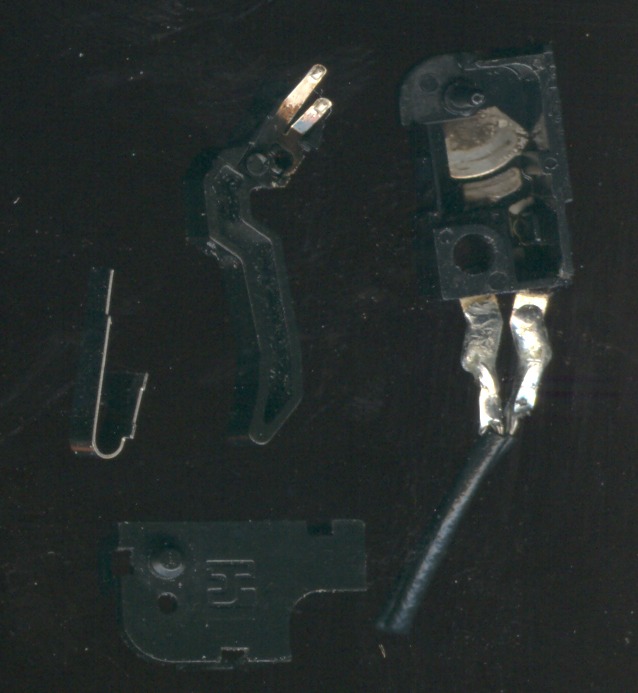
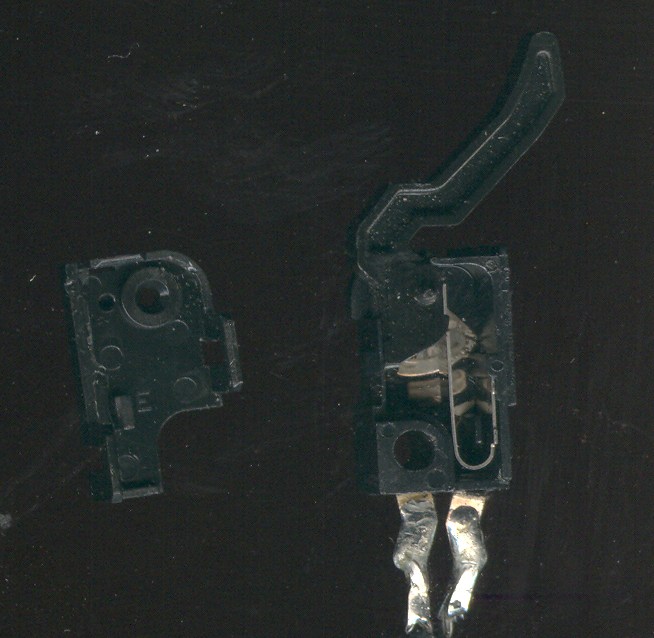
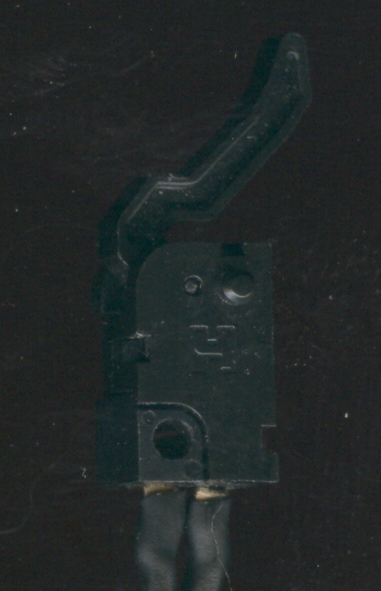
I have had a similar problem with a Pixma 4000. It would sometimes refuse to print or stop in the middle of a print job, giving an error message that the paper output door was closed. The problem was caused by a dirty microswich, giving only intermittent contact, verified by a digital multimeter with a continuity test function. I replaced the switch with one from a defunct Canon printer, after having tested it for proper function. But in case you don't have a spare switch, the switch can be taken apart and cleaned. It is a very fiddly job, and a magnifier lamp and tweezers is a good help in doing this. Here are some images showing how to clean the switch. Click the thumbs to enlarge:

This is a malfunctioning switch taken apart. Note dirty contact surfaces:


This is the switch after cleaning the contact surfaces with a small "Q-tip" made from a wooden toothpick and a little cotton. For cleaning an electronics contact cleaner with lubricant is preferable, but WD-40 also works well. I used WD-40:


This is the inner works of the reassembled switch:


Here is the reassembled switch with the cover in place. Note that heat shrinkable tubing has been added to cover the solder terminals:


The connector from the switch attached to the logic board might be very difficult to detach. Instead cut the wires and resolder them after cleaning the switch and verifying its function. Heat shrinkable tubing should be used to cover the solder joints. If you cut the wires instead of detaching the connector, less disassembly of the printer is required. Don't try to unsolder the wires from the solder terminals. You risk damaging the plastic housing, I made that mistake.

I hope this helps.
 
I loved how you laid out the actions. At times all seems so intimidating but somehow we find out. Many thanks for this info.
 
I have had a similar problem with a Pixma 4000. It would sometimes refuse to print or stop in the middle of a print job, giving an error message that the paper output door was closed. The problem was caused by a dirty microswich, giving only intermittent contact, verified by a digital multimeter with a continuity test function. I replaced the switch with one from a defunct Canon printer, after having tested it for proper function. But in case you don't have a spare switch, the switch can be taken apart and cleaned. It is a very fiddly job, and a magnifier lamp and tweezers is a good help in doing this. Here are some images showing how to clean the switch. Click the thumbs to enlarge:

This is a malfunctioning switch taken apart. Note dirty contact surfaces:


This is the switch after cleaning the contact surfaces with a small "Q-tip" made from a wooden toothpick and a little cotton. For cleaning an electronics contact cleaner with lubricant is preferable, but WD-40 also works well. I used WD-40:


This is the inner works of the reassembled switch:


Here is the reassembled switch with the cover in place. Note that heat shrinkable tubing has been added to cover the solder terminals:


The connector from the switch attached to the logic board might be very difficult to detach. Instead cut the wires and resolder them after cleaning the switch and verifying its function. Heat shrinkable tubing should be used to cover the solder joints. If you cut the wires instead of detaching the connector, less disassembly of the printer is required. Don't try to unsolder the wires from the solder terminals. You risk damaging the plastic housing, I made that mistake.

I hope this helps.
I have the 1851 error with a Pro-1. I have the printer stripped of its panels but cannot find the sensor? Is it out in the open or buried deeply by the CD tray? Daniel
 
Back
Top