- Joined
- Feb 24, 2005
- Messages
- 1,669
- Reaction score
- 182
- Points
- 223
- Location
- North of Boston, USA
- Printer Model
- Canon i9900 (plus 5 spares)
I took a few pictures of the absorbent sponges in my i9900 that might be of interest.
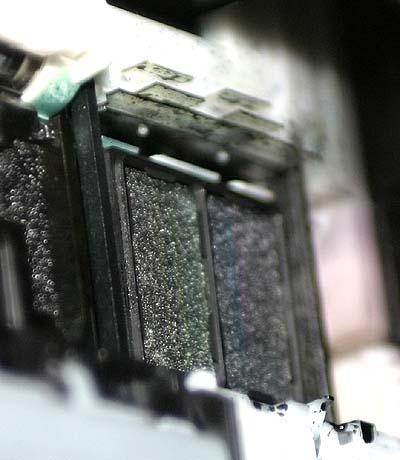
This shows the sponges in the "home" position. These sponges absorb the ink from the cleaning cycles, and explain how the wrong colors sometimes show up in a nozzle test or even on the first print after a period of inactivity. Since a single sponge covers as many as 5 colors, it is easy to see how the colors can migrate through the sponge to other nozzles. These sponges apparently raise into position when the head is parked to cover the discharge of the nozzles and prevent them from drying out. This also shows what appear to be "scrapers" that mechanically clean the bottom of the nozzles during a cleaning cycle by moving back and forth across the bottom surface of the nozzles.
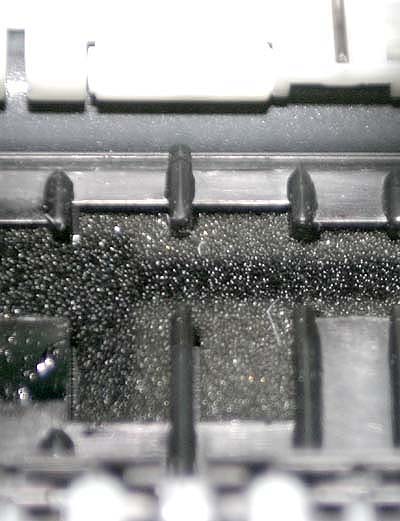
This shows the sponge that runs across the full width of the printer at the 4 inch position. This printer has been used for some borderless prints, and the "end overspray" can be seen across the full length of the sponge. At the 4 inch position it can be seen that the opening over the sponge is enlarged to accept the "edge overspray" from the entire print head (about 15 mm), and the overspray from printing 4x6s can clearly be seen. At the far left edge of the previous photo, you can see the opening for the right edge of all paper sizes. These openings are why only certain paper sizes can be printed borderless even if you could hack the printer software - a full width slot must also be opened above the sponge in that position to avoid ink buildup that will transfer to the bottom of the following prints.
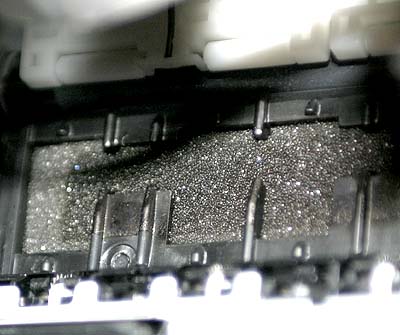
This shows the 13 inch, 11.7 inch (A3) and 11 inch cutouts. It also shows what happens when you mistakenly select a wide print with narrow paper - the ink just sprays onto surfaces where it will be picked up on the bottom of the next few sheets of wide paper. There were similar cutouts at the 5, 8.26 (A4) and 8.5 inch positions, but they are covered by the print head when it moves out when the cover is opened.
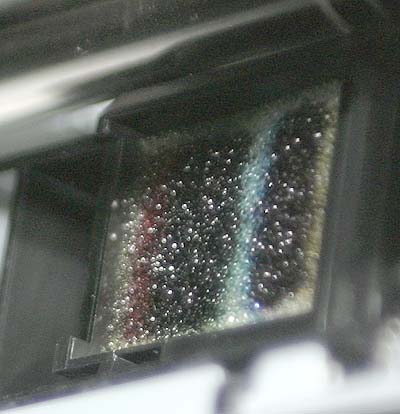
This is a similar photo at the far left - past the max paper width. The printer apparently sometimes elects to spray ink from all of the nozzles at this position. The reason that the left color band is wider is that there are 5 colors sprayed from the left set of nozzles (PM, Red, Black, Green and PC from left to right) while only 3 colors are sprayed from the right set of nozzles (Cyan, Magenta and Yellow).
Conclusions/Conjectures:
1. The overspray ink from borderless printing ends up in a sponge. This ink may or may not be fed to the waste ink tank. If it is, borderless printing will probably shorten the time until the "waste tank full" message appears.
2. Avoiding cleaning cycles will reduce the "ink tank full" problem, but not eliminate it, since ink is sprayed into the sponges even during normal printing. A heavily used printer can be expected to fill the waste tank more quickly than a lightly used printer, even if both have the same number of cleaning cycles.
3. It would not be surprising if the software assumes that there is some evaporation of the water in the waste ink over time, so a lightly used printer might theoretically never get the alarm.
Comments?
This shows the sponges in the "home" position. These sponges absorb the ink from the cleaning cycles, and explain how the wrong colors sometimes show up in a nozzle test or even on the first print after a period of inactivity. Since a single sponge covers as many as 5 colors, it is easy to see how the colors can migrate through the sponge to other nozzles. These sponges apparently raise into position when the head is parked to cover the discharge of the nozzles and prevent them from drying out. This also shows what appear to be "scrapers" that mechanically clean the bottom of the nozzles during a cleaning cycle by moving back and forth across the bottom surface of the nozzles.
This shows the sponge that runs across the full width of the printer at the 4 inch position. This printer has been used for some borderless prints, and the "end overspray" can be seen across the full length of the sponge. At the 4 inch position it can be seen that the opening over the sponge is enlarged to accept the "edge overspray" from the entire print head (about 15 mm), and the overspray from printing 4x6s can clearly be seen. At the far left edge of the previous photo, you can see the opening for the right edge of all paper sizes. These openings are why only certain paper sizes can be printed borderless even if you could hack the printer software - a full width slot must also be opened above the sponge in that position to avoid ink buildup that will transfer to the bottom of the following prints.
This shows the 13 inch, 11.7 inch (A3) and 11 inch cutouts. It also shows what happens when you mistakenly select a wide print with narrow paper - the ink just sprays onto surfaces where it will be picked up on the bottom of the next few sheets of wide paper. There were similar cutouts at the 5, 8.26 (A4) and 8.5 inch positions, but they are covered by the print head when it moves out when the cover is opened.
This is a similar photo at the far left - past the max paper width. The printer apparently sometimes elects to spray ink from all of the nozzles at this position. The reason that the left color band is wider is that there are 5 colors sprayed from the left set of nozzles (PM, Red, Black, Green and PC from left to right) while only 3 colors are sprayed from the right set of nozzles (Cyan, Magenta and Yellow).
Conclusions/Conjectures:
1. The overspray ink from borderless printing ends up in a sponge. This ink may or may not be fed to the waste ink tank. If it is, borderless printing will probably shorten the time until the "waste tank full" message appears.
2. Avoiding cleaning cycles will reduce the "ink tank full" problem, but not eliminate it, since ink is sprayed into the sponges even during normal printing. A heavily used printer can be expected to fill the waste tank more quickly than a lightly used printer, even if both have the same number of cleaning cycles.
3. It would not be surprising if the software assumes that there is some evaporation of the water in the waste ink over time, so a lightly used printer might theoretically never get the alarm.
Comments?
")