- Joined
- Jan 18, 2010
- Messages
- 16,144
- Reaction score
- 9,094
- Points
- 453
- Location
- Residing in Wicklow Ireland
- Printer Model
- Canon/3D, CR-10, CR-10S, KP-3
1. New Insulation for the bottom of the hot-bed..
2. A new bracket called "Fang" for the Hot-end..
3. Whole new Original Creality top for the Extruder..
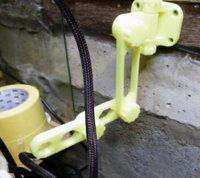
4. Flexible swinging wall bracket...
1. I found this foam floor tile and cut it to fit the underside of my heated platform, I only needed to cut the centre piece out where the heater was positioned, to allow the tile to fit snuggly onto the back of the platform.
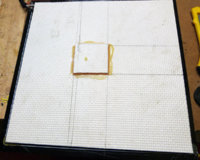
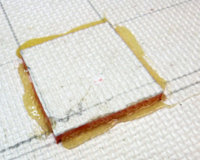
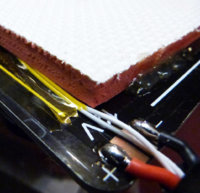
I coated the edges with PVA glue 1 cm width and also applied a little hot glue on the corners and some of the edges I put the cut-out piece in over the heater just to finish off the insulation using hot glue to hold that in place, everything is working nicely, and the bed heats up a bit faster too.
2. I had made this Fang a few weeks ago but didn’t have long enough screws to fit it properly, so I took this opportunity while the printer was out of action to finally install it, the one big advantage of the Fang, you can see the nozzle much better (Clearer view) and the fan air is directed to the hot filament from both sides, instead of the heat block.
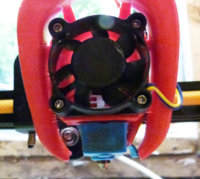
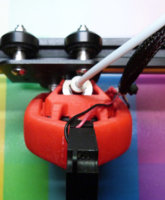
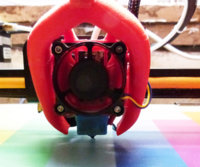
It was not that easy to just screw it in place, I had a couple of refits because it was flopping about too much, (Unsecure) but in the end, I’ve now got it secured tightly.
3. After @Redbrickman highlighted this very cheap extruder upgrade back in November, https://www.printerknowledge.com/threads/creality-cr10-owners-special-factory-upgrade.12101/
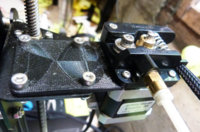
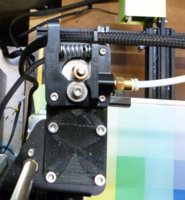
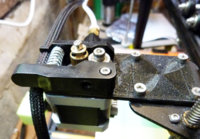
I was late to the table but eventually got mine last week, and I also make a new all plastic extension for the extruder to sit on, and at the same time I fitted the Creality original pieces on top of the extruder, and now all work perfect...
4. I found this odd-looking contraption on Thingiverse.com, it’s a very flexible wall bracket that can be made into any position and can swing round from side to side, I found it great for holding the heat-bed power cable and it stops it hitting the wall...
 click to enlarge photos...
I wanted to load a few more photos but ran out of space (Max 10)
2. A new bracket called "Fang" for the Hot-end..
3. Whole new Original Creality top for the Extruder..
4. Flexible swinging wall bracket...
1. I found this foam floor tile and cut it to fit the underside of my heated platform, I only needed to cut the centre piece out where the heater was positioned, to allow the tile to fit snuggly onto the back of the platform.


I coated the edges with PVA glue 1 cm width and also applied a little hot glue on the corners and some of the edges I put the cut-out piece in over the heater just to finish off the insulation using hot glue to hold that in place, everything is working nicely, and the bed heats up a bit faster too.
2. I had made this Fang a few weeks ago but didn’t have long enough screws to fit it properly, so I took this opportunity while the printer was out of action to finally install it, the one big advantage of the Fang, you can see the nozzle much better (Clearer view) and the fan air is directed to the hot filament from both sides, instead of the heat block.


It was not that easy to just screw it in place, I had a couple of refits because it was flopping about too much, (Unsecure) but in the end, I’ve now got it secured tightly.
3. After @Redbrickman highlighted this very cheap extruder upgrade back in November, https://www.printerknowledge.com/threads/creality-cr10-owners-special-factory-upgrade.12101/


I was late to the table but eventually got mine last week, and I also make a new all plastic extension for the extruder to sit on, and at the same time I fitted the Creality original pieces on top of the extruder, and now all work perfect...
4. I found this odd-looking contraption on Thingiverse.com, it’s a very flexible wall bracket that can be made into any position and can swing round from side to side, I found it great for holding the heat-bed power cable and it stops it hitting the wall...
 click to enlarge photos...
I wanted to load a few more photos but ran out of space (Max 10)


