joseph1949
Getting Fingers Dirty
The easy way to straighten clear vinyl tubingwith pictures!
There are various ways to test printheads for clogs and to flush printheads. Some of the ways involve clear vinyl tubing. A problem with the tubing that you buy at the store is that the tubing comes in curled bundles. When you cut a piece of tubing to be used on a printhead you find that the tubing has a distinct curve to it. You can use the tubing as is but it would be better if it was straight.
The information below will show you how to straighten out the tubing.
What you will need:
1. Clear vinyl tubing
Note: The tubes were purchased at Home Depot. The cost for a roll of tubing is bit more than $4.00 each. Check the diameters of the ink inlets on your printhead before you purchase the tubing.
WATTS (manufactures name)
SVFD20
42143320
watts.com
N. Andover, MA 01845
Made in Mexico
Clear Vinyl Tubing
5/16(O.D.) X 3/16 (I.D.) X 20 ft. Note: This tubing fits the CLI-221 carts inlets on the printhead.
Bar code: 0 48643 10542 3
SVIG10
421436610
45 PSI @ 70F (21C)
1/2(O.D.) X 3/8(I.D.) X 10 ft. Note: This tubing fits the PGI-220BK cart (large black) inlet on the printhead.
Bar code: 0 48643 02554 7
2. A metal coat hanger.
3. Tape. Blue tape works fine.
4. A tea kettle. You want a tea kettle that has a spout that whistles!!!!!!!!
What to do: (see pictures below) Note: The tubing is 5/16 x 3/16.
1. Cut the longest straight piece from the coat hanger as you can.
2. Cut the tubing about an inch and a half shorter than the cut piece of wire.
3. Slip the wire into the tubing and use tape to close off the end of the tubing.
4. At this point you should have about one inch of wire sticking out of the non-closed off end of the tubing.
5. Place a small amount of water in the kettle. Why a small amount? Do you really want to spend all day waiting for the water to come to a boil? You will need to remove the kettle from the burner as soon as you are done with the tubing. You do not want to burn the bottom of the kettlebig time!!!!!!!!!!!!!!!!!!!
6. With the water at full boil (whistle!!!) place the wire into the opening of the spout. I do not think you really need to wear groves, but it would be safer. Go in as far as you can and stop when the tubing reaches the spout opening.
7. Keep the tube end over the opening until you see water condensing inside the tubing and at this point you can remove the tubing from the steam. This will take all of one minute (if that long). If you are not wearing gloves when the wire becomes warm you know that it is time to remove the tubing from the steam.
Note: To get the steam inside the tube and for the steam to stay inside the tube the end of the tube must be cut-off square.
8. After you have removed the tubing from the steam with the wire still inside the tubing place the tubing on a flat surface and let the tubing cool at room temperature. The cool down should take around 10 minutes. When the tubing has reached room temperature you can remove the wire. You now have a straight piece of tubing. It is like magic, Mr. Wizard!!!!!!!!!!!!!!!!!!!!!!!!!!!!!!!!!
Pictures: Note: I know some of the pictures are not really necessary, but if I have learned one thing in my long life it is you do NOT ASSUME anything. The tubing is 5/16 x 3/16.
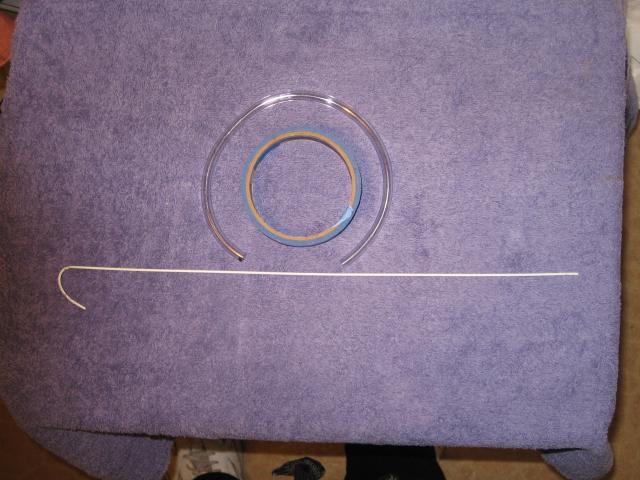
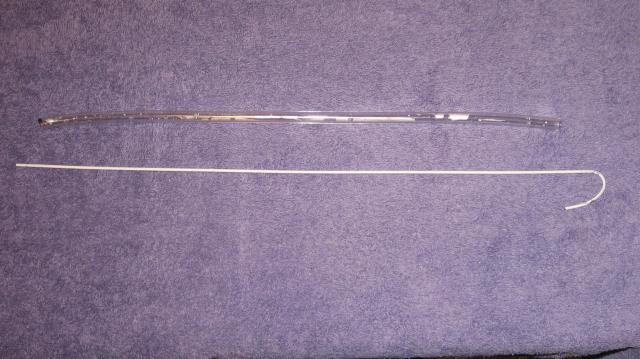
1. This picture shows the wire, the tubing, and the tape. 3178
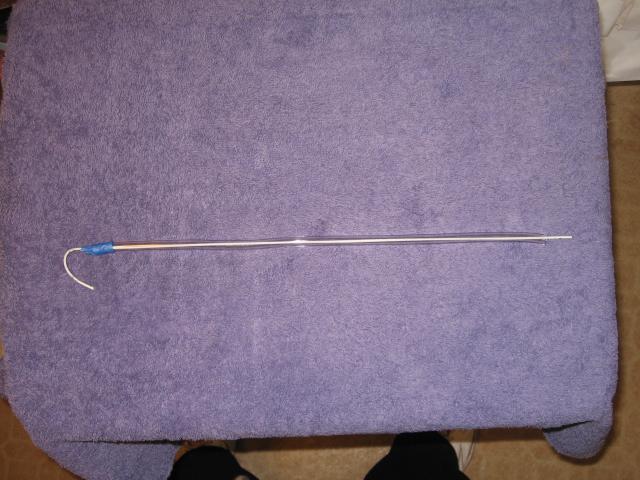
2. This picture shows the wire inside the tubing, the taped off end and one inch of wire showing on the other end. 3182
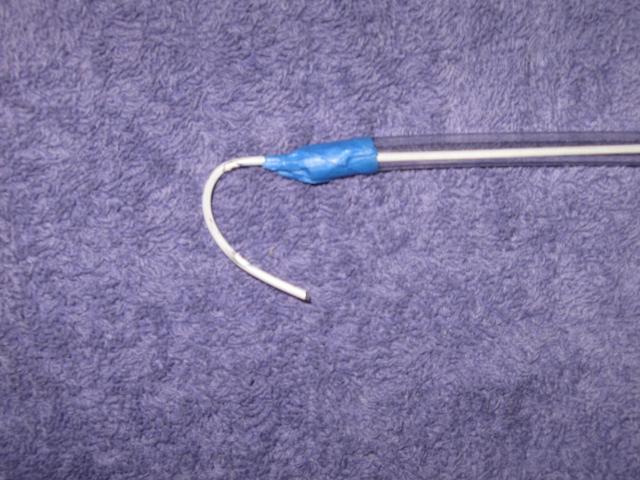
3. This is a close-up of the taped end. 3184
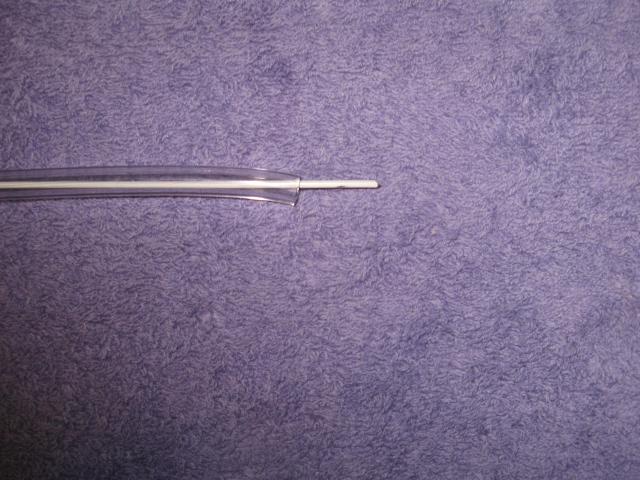
4. This is a close-up of the wire sticking out of the tubing. 3185
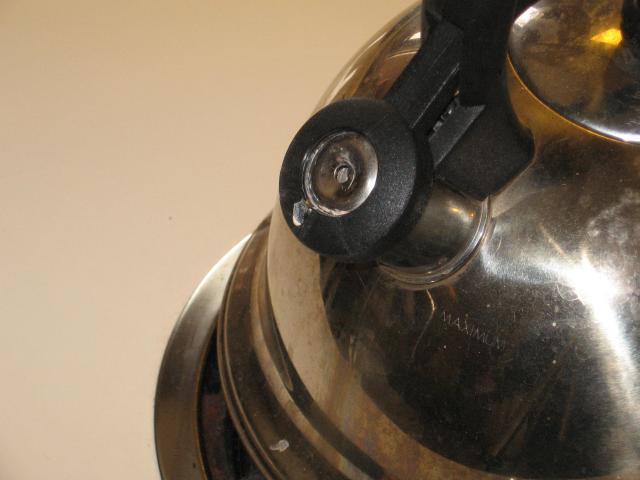
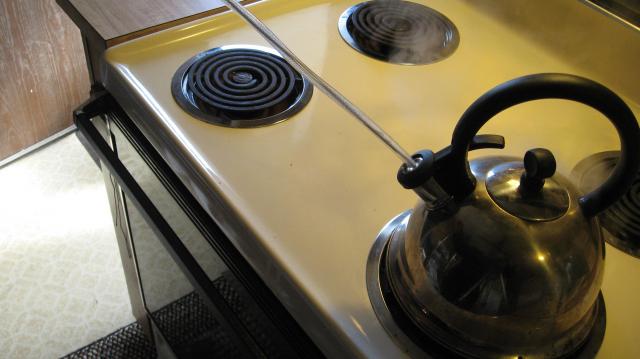
5. This picture shows the opening in the spout. 3177
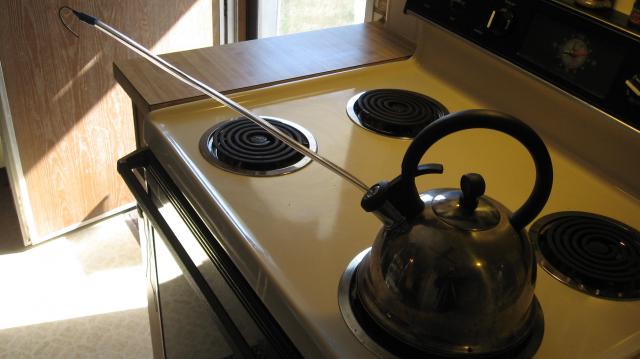
6. This shows the wire inside the spout. Note the make shift handle. 3191
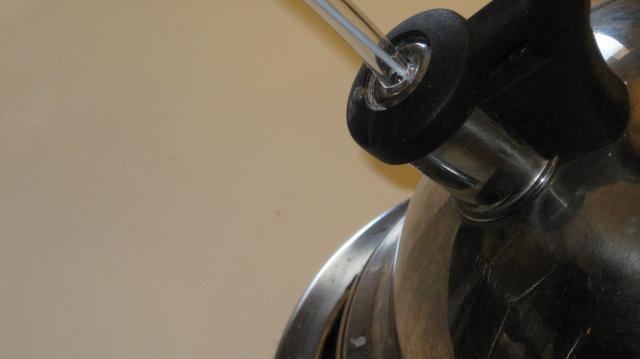
7. This is a close up of the tubing against the opening. It should be a tight fit. To get a tight fit you need to cut the end off square. Whatever way you do this you will need a sharp cutting tool. 3192
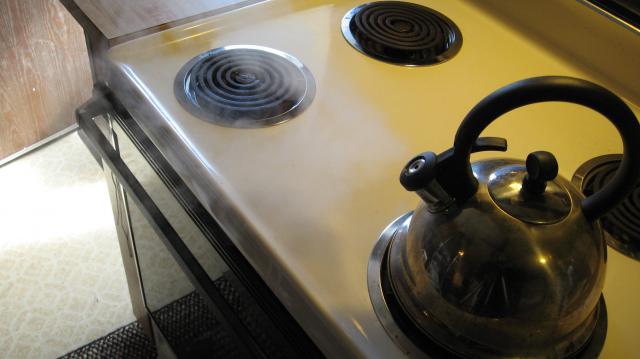
8. This is steam (whistle!!!!) coming from the spout. This is your clue to place the wire end inside the opening. It may be difficult to see the steam in the picture. 3194
9. This picture shows the steam condensing inside the tubing. This is your sign to remove the tubing from the steam. The condensing may be difficult to see in the picture. 3195
10. This shows the tubing all nice and straight. Its magic!!!!!!!!!!!!!!!!!!!!!! 3198
I was not my intent to insult anybody with some of these pictures, but sometimes you cannot assume that everybody will get the message without a nice, simple picture or two or three, etc. Also, steam is not something to play with. It is hot. It will burn. It will leave a mark.
Important note: I would like to thank websnail for showing me the path on how to use steam to straighten tubing.
Thank you.
There are various ways to test printheads for clogs and to flush printheads. Some of the ways involve clear vinyl tubing. A problem with the tubing that you buy at the store is that the tubing comes in curled bundles. When you cut a piece of tubing to be used on a printhead you find that the tubing has a distinct curve to it. You can use the tubing as is but it would be better if it was straight.
The information below will show you how to straighten out the tubing.
What you will need:
1. Clear vinyl tubing
Note: The tubes were purchased at Home Depot. The cost for a roll of tubing is bit more than $4.00 each. Check the diameters of the ink inlets on your printhead before you purchase the tubing.
WATTS (manufactures name)
SVFD20
42143320
watts.com
N. Andover, MA 01845
Made in Mexico
Clear Vinyl Tubing
5/16(O.D.) X 3/16 (I.D.) X 20 ft. Note: This tubing fits the CLI-221 carts inlets on the printhead.
Bar code: 0 48643 10542 3
SVIG10
421436610
45 PSI @ 70F (21C)
1/2(O.D.) X 3/8(I.D.) X 10 ft. Note: This tubing fits the PGI-220BK cart (large black) inlet on the printhead.
Bar code: 0 48643 02554 7
2. A metal coat hanger.
3. Tape. Blue tape works fine.
4. A tea kettle. You want a tea kettle that has a spout that whistles!!!!!!!!
What to do: (see pictures below) Note: The tubing is 5/16 x 3/16.
1. Cut the longest straight piece from the coat hanger as you can.
2. Cut the tubing about an inch and a half shorter than the cut piece of wire.
3. Slip the wire into the tubing and use tape to close off the end of the tubing.
4. At this point you should have about one inch of wire sticking out of the non-closed off end of the tubing.
5. Place a small amount of water in the kettle. Why a small amount? Do you really want to spend all day waiting for the water to come to a boil? You will need to remove the kettle from the burner as soon as you are done with the tubing. You do not want to burn the bottom of the kettlebig time!!!!!!!!!!!!!!!!!!!
6. With the water at full boil (whistle!!!) place the wire into the opening of the spout. I do not think you really need to wear groves, but it would be safer. Go in as far as you can and stop when the tubing reaches the spout opening.
7. Keep the tube end over the opening until you see water condensing inside the tubing and at this point you can remove the tubing from the steam. This will take all of one minute (if that long). If you are not wearing gloves when the wire becomes warm you know that it is time to remove the tubing from the steam.
Note: To get the steam inside the tube and for the steam to stay inside the tube the end of the tube must be cut-off square.
8. After you have removed the tubing from the steam with the wire still inside the tubing place the tubing on a flat surface and let the tubing cool at room temperature. The cool down should take around 10 minutes. When the tubing has reached room temperature you can remove the wire. You now have a straight piece of tubing. It is like magic, Mr. Wizard!!!!!!!!!!!!!!!!!!!!!!!!!!!!!!!!!
Pictures: Note: I know some of the pictures are not really necessary, but if I have learned one thing in my long life it is you do NOT ASSUME anything. The tubing is 5/16 x 3/16.
1. This picture shows the wire, the tubing, and the tape. 3178
2. This picture shows the wire inside the tubing, the taped off end and one inch of wire showing on the other end. 3182
3. This is a close-up of the taped end. 3184
4. This is a close-up of the wire sticking out of the tubing. 3185
5. This picture shows the opening in the spout. 3177
6. This shows the wire inside the spout. Note the make shift handle. 3191
7. This is a close up of the tubing against the opening. It should be a tight fit. To get a tight fit you need to cut the end off square. Whatever way you do this you will need a sharp cutting tool. 3192
8. This is steam (whistle!!!!) coming from the spout. This is your clue to place the wire end inside the opening. It may be difficult to see the steam in the picture. 3194
9. This picture shows the steam condensing inside the tubing. This is your sign to remove the tubing from the steam. The condensing may be difficult to see in the picture. 3195
10. This shows the tubing all nice and straight. Its magic!!!!!!!!!!!!!!!!!!!!!! 3198
I was not my intent to insult anybody with some of these pictures, but sometimes you cannot assume that everybody will get the message without a nice, simple picture or two or three, etc. Also, steam is not something to play with. It is hot. It will burn. It will leave a mark.
Important note: I would like to thank websnail for showing me the path on how to use steam to straighten tubing.
Thank you.