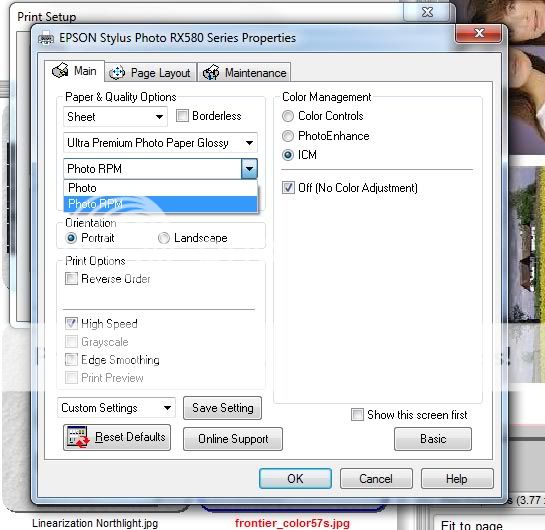
Now notice the dropdown window I have intentionally brought up when I click on the PhotoRPM selection.
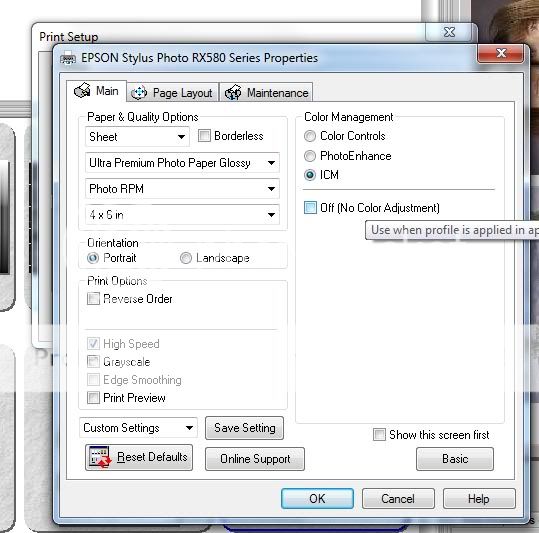
In this area we are able to sometimes further choose the resolution settings. In this case the PhotoRPM is selected by default. On other models, Best Photo is selected by default and we will need to change it to PhotoRPM by further selecting it.
This selection is important within the driver as well with respect to profiles. Some profiles can be used both with Best Photo and Photo RPM and some profiles are made specific to what the profile was created with.
We then click on OK and then OK again and we are now back in the Qimage workspace.
We can now use the explorer style window on the left and choose the images we want to print. Pay attention to the print size vs the paper size as Qimage will allow you to print multiple images on the same sheet of paper at the same time.
To print the image, we then choose File and then select Print and go through the confirmation dialog.
Next installment will show how we can print using Photoshop.
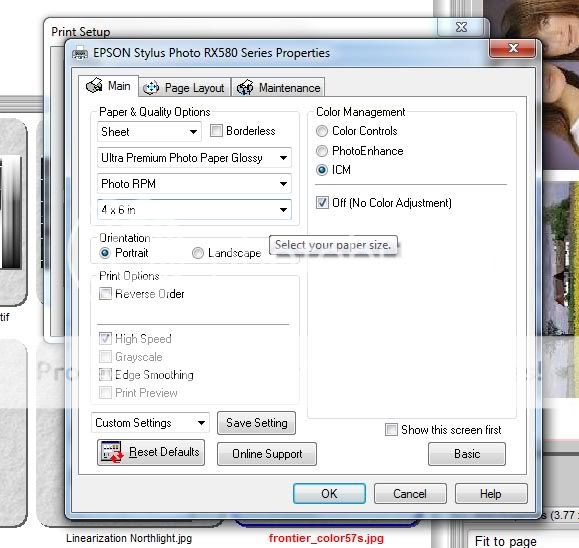
In the above instance by selecting the profile within Qimage, we have Qimage managing color and we then turned OFF ( No Color Adjustment) color management within the driver. That means that color is managed at ONE level alone. If we had not turned OFF the color adjustment withing the driver, then we would have managed color at two levels and the colors printed would be dark and look very wrong. This is sometimes referred to as double color managed and is a frequent error by those attempting to print with color management.
Towards the end I will show how with certain models of the Epson printers geared towards the graphic artist, the driver itself can manage color. This is not available on Canon desktop printers. This means that Qimage or Photoshop or any color managed software does not have to be used to get accurate colors with custom ICC profiles.