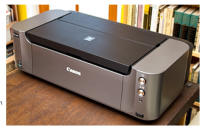
Reusing Pro-100 Print Head

BarryN

Getting Fingers Dirty
Joined
Jul 5, 2014
Messages
13
Reaction score
2
Points
24
Printer Model
Canon Pro-100
I inadvertently inserted a sheet of paper with a crease or bend in one edge into the manual feed tray of into my Canon Pro-100. Although it fed and printed onto the paper, it seems to have damaged the printer somehow. Because there was ink smeared at the location of the crease, I ran a tray cleaning operation and got a severe paper jam which dislodged a plastic spring-loaded strip behind the print head. As it is probably cheaper to replace rather than repair the printer, I was wondering if I can use the print head in the new printer, keeping the new print head as a spare.
 

palombian

Printer Master
Joined
Feb 4, 2014
Messages
1,869
Reaction score
2,244
Points
297
Location
Belgium
Printer Model
PRO10,PRO9500II,MB5150,MG8250
...which dislodged a plastic spring-loaded strip behind the print head...

Must be the timing strip, no idea how to put this in place again.

Of coarse you can keep the old head as spare, but you have to rinse the ink out and get some preservation fluid in.
IMO the easiest way is to bath to head in a few mm's of the fluid until no color comes out and drip some more from above.
Pack the head in a zip bag with air removed.

Recent discussion:

http://www.printerknowledge.com/threads/how-to-store-a-print-head.6343/page-4#post-87989
 

PeterBJ

Printer VIP
Platinum Printer Member
Joined
Nov 27, 2010
Messages
5,060
Reaction score
4,905
Points
373
Location
Copenhagen Denmark
Printer Model
Canon MP990
Maybe the printer will work again if the timing strip is put back in place? I think it is worth giving a try before giving up on the printer.

I don't know the Canon Pro models, only some home use models, but these models all have the timing strip attached the same way. Here is a post with photos showing how the timing strip is attached in an MP540.
 

The Hat

Printer VIP
Platinum Printer Member
Joined
Jan 18, 2010
Messages
15,622
Reaction score
8,694
Points
453
Location
Residing in Wicklow Ireland
Printer Model
Canon/3D, CR-10, CR-10S, KP-3
Maybe the printer will work again if the timing strip is put back in place? I think it is worth giving a try before giving up on the printer.

I don't know the Canon Pro models, only some home use models, but these models all have the timing strip attached the same way. Here is a post with photos showing how the timing strip is attached in an MP540.
+ one also..:thumbsup
 

BarryN

Getting Fingers Dirty
Joined
Jul 5, 2014
Messages
13
Reaction score
2
Points
24
Printer Model
Canon Pro-100
Thanks, for the great info.

It is the timing strip and I think I see where the end attaches. I could probably re-attach it, if I could get the cover off. I found instructions for the Pro 9500, but I do not see where the tabs are to remove the side covers on the Pro-100.
 

The Hat

Printer VIP
Platinum Printer Member
Joined
Jan 18, 2010
Messages
15,622
Reaction score
8,694
Points
453
Location
Residing in Wicklow Ireland
Printer Model
Canon/3D, CR-10, CR-10S, KP-3
Most of the Pro printers have very similar locations for the tab clips, it’s only a matter of spotting the positions.

Here is a section of a PDF from a 9500, see if that helps you..
 

Attachments

  • Top cover Removel for 9500.pdf
    541.3 KB · Views: 467

BarryN

Getting Fingers Dirty
Joined
Jul 5, 2014
Messages
13
Reaction score
2
Points
24
Printer Model
Canon Pro-100
That is helpful. I now see there are a couple of marks on the top of the printer that seem to match the locations of the circles in Fig. 3. I've tried both a flat head screwdriver and a putty knife, but haven't been able to release the claws. Seems to be a really tight fit, and I'm hesitant to force anything.
 

The Hat

Printer VIP
Platinum Printer Member
Joined
Jan 18, 2010
Messages
15,622
Reaction score
8,694
Points
453
Location
Residing in Wicklow Ireland
Printer Model
Canon/3D, CR-10, CR-10S, KP-3
If you want to win the hand of the fair maiden then you’ll have to be more gallant, I’m afraid.. :woot
 

BarryN

Getting Fingers Dirty
Joined
Jul 5, 2014
Messages
13
Reaction score
2
Points
24
Printer Model
Canon Pro-100
After attacking the claws more forcefully I seem to have finally released them but still no luck in budging the side covers. and After looking again at the photos from the pro-9500 instructions, I now see that the side covers on the Pro-100 are different. The top of the side cover appears to be thinner than on the Pro 9500 and is differently shaped. It is hard to describe, but it is not rectangular like the 9500 but is rounded where it abuts the front cover. The front cover wraps around forming corners that are rounded in contrast to the rectangular corners of the 9500. The figures also suggest the 9500 side cover is hinged at the bottom while the side cover on the pro-100 abuts a separate curved cover that extends between the bottom of the side cover and bottom of the printer.
 

The Hat

Printer VIP
Platinum Printer Member
Joined
Jan 18, 2010
Messages
15,622
Reaction score
8,694
Points
453
Location
Residing in Wicklow Ireland
Printer Model
Canon/3D, CR-10, CR-10S, KP-3
It would seem the pro 100 case is designed somewhat differently than the 9500, but you still can find where all the claws are by carefully going round the case slowly, especially now you know what to look for..
Capture7.PNG click to enlarge..


It was the Pro 9000 that was similar to the 9500 case, sorry..
 

BarryN

Getting Fingers Dirty
Joined
Jul 5, 2014
Messages
13
Reaction score
2
Points
24
Printer Model
Canon Pro-100
Removed the small rectangular cover from the bottom without a problem. The side cover is another matter. I got the right side cover off but broke off several of the attachment fixtures in the process. Do not see how to release the front covers. There are no claws that I can see. I think the Pro-100 cover is a significantly different beast than the Pro 9500.
 
Top