- Joined
- Feb 24, 2005
- Messages
- 1,669
- Reaction score
- 182
- Points
- 223
- Location
- North of Boston, USA
- Printer Model
- Canon i9900 (plus 5 spares)
I would like to propose some theories to try and explain some of the strange printing problems that have been reported. It is also the purpose of this discussion to develop better operating procedures to minimize the dreaded "clogged nozzle" problem, especially with refilled carts. These are only theories - please feel free to post your experience or knowledge on any of the subjects covered below.
First, some background. When I do a head cleaning on my i9900, I can clean all colors at once, the cyan, magenta and yellow as a group, or the black, PM, PC, Red and Green as a group. I also seem to remember reading somewhere that the head cleaning operations use air to clean the heads. What makes the most sense is that the printer pulls a slight vacuum on the discharge of one or both of the groups of nozzles in the print head. This also explains how a cleaning cycle gets ink to start flowing - it is difficult to understand how wiping the heads or activating the thermal elements alone could do this. Does anyone know if this is the case? Has anyone taken a Canon apart to see how it works? In any case, let's start with the theories (remember that these are just conjecture at this time).
My print head is divided into two sets of nozzles. The cyan, magenta and yellow are ejected from one set of nozzles, and the other 5 colors are ejected from the other set of nozzles. This is why these colors must be cleaned as a group.
When the print head is off-line, some sort of soft rubber-like material comes up against the print head and seals the exits of the nozzles so that they don't drip or dry out.
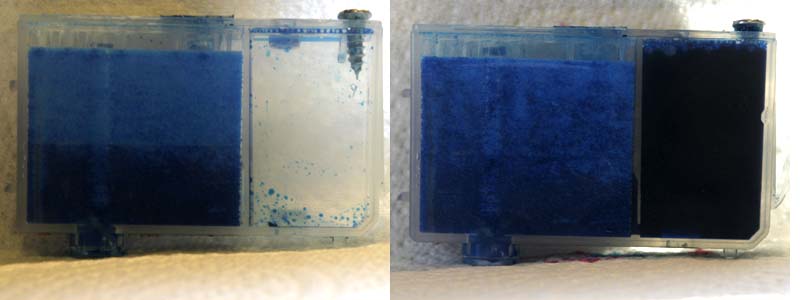
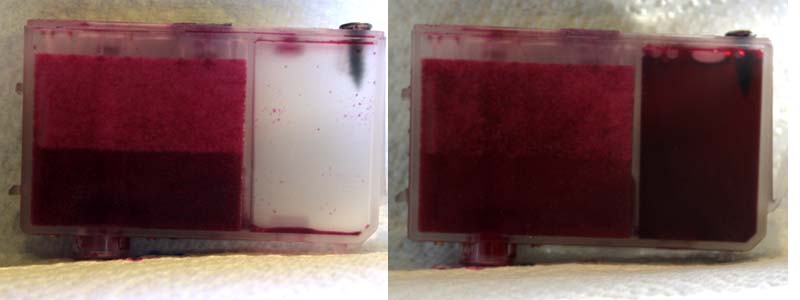
Suppose that one of the carts in a color group has a pressure mismatch such that it is pulling a slight vacuum at the print head's ink pickup. This vacuum will tend to pull ink for that color back through the nozzles. If the seal covering the nozzles provides a good seal to the outside, but a not-so-good seal between adjacent colors, ink will be pulled from the other colors back into nozzles with the vacuum. When you print a nozzle check pattern, you will get the wrong color (or maybe even a mixture of colors) in that nozzle. This would also explain the post (that I can't find) where someone reported seeing the wrong color ink on the print head's pickup when the cart was removed.
Suppose that one of the carts in a color group has a pressure mismatch such that it is has a slight positive pressure at the print head's ink pickup. This pressure will tend to push ink for that color out through the nozzles. If the seal covering the nozzles provides a good seal to the outside, but a not-so-good seal between adjacent colors, ink will be pushed from the high pressure color into the nozzles for the other colors. When you print a nozzle check pattern, you will get the wrong color (or maybe a mixture of two colors) in the other nozzles. Ref - Nifty-Stuff's post (http://www.nifty-stuff.com/forum/viewtopic.php?id=103) shows a scan of a nozzle check pattern where it looks like cyan got pushed into the other nozzles.
I am coming to the conclusion that you should never remove a cart unless it is to replace it, and that the new cart should be ready to drop in ASAP to keep the top of the print head pickup wet with the proper ink. If the ink film between the print head and the filter on the cart is lost, at least one cleaning cycle must be run to pull ink from the cart all the way through to the nozzle exit, as any air that gets into the pickup on the print head will break the capillary action that pulls ink from the filter. When my printer was new, I never touched the carts and never had a "clogged nozzle" problem (I began to wonder what everyone was talking about). After successfully replacing three OEM carts when the printer gave me a "low ink" warning, I replaced all 8 carts with a complete set of new (old formulation) InkGrabber carts, did a single cleaning cycle and never had a problem. It was only when I started to change carts a lot to test various refill techniques that I started to have "clogged nozzle" problems, often with colors that I didn't touch.
I am currently running a test where I won't touch the carts for any reason to see how often I have to run a cleaning cycle. I recently refilled a complete set (using the second vacuum technique) to get every cart completely full at the start of the test. I have printed 12 8.5x11 sheets of photos so far with no problems.
When I was testing various refill techniques, I noticed that the Canon carts seem to take more pressure to blow ink through the exit (to make sure that there is a continuous ink path to the bottom of the filter and that the bottom of the filter is "wet" when the cart is installed). I attributed this difference to a difference in the sponge or filter used in the two carts. This implies that there could be a pressure differential between carts from different suppliers, and that perhaps carts should always be kept in matched sets to keep the pressures better matched, even when refilling.
There is a recent post (http://www.nifty-stuff.com/forum/viewtopic.php?id=140) that discusses a common approach of periodically pulling the carts to visually inspect the ink levels so that the carts can be refilled before the ink chamber becomes empty. My OEM and InkGrabber carts have always tripped the alarm when they are empty - and I mean EMPTY. Up to that point, the indicated levels on the status monitor display can not be relied on to give an accurate ink level (how does the printer know how much ink is in the upper sponge when the cart is installed?). The sponge needs to hold enough ink after the ink chamber becomes empty to print a few extra pages if you are going to rely on this sensor. I think that I remember reading that the printer will continue printing until it calculates that the sponge is almost empty before refusing to print any more (please correct me if this is wrong). This is fine if you will be replacing the empty cart with a new cart, as you will get more usable ink out of the old cart and you just throw away the empty cart (the OEM's plan).
The problem arises if you refill your carts and wait for the sensor to tell you when the cart is empty. If you happen to be running a large print job when the ink chamber empties and you aren't constantly watching your computer for a low ink level alarm, you can end up with a lot of air in the sponge before the printer stops printing. If the sponge wasn't almost completely filled during the last refill, you may even run out of ink. Refilling carts with nearly empty sponges requires unusual techniques to get the air out so that they will print properly when refilled (http://www.nifty-stuff.com/forum/viewtopic.php?id=124).
The inspect and refill technique seems to be a good solution to this problem, but pulling carts for inspection seems to bring an increased occurrence of ink feeding problems. Which is the lesser of the two evils? What are your experiences? If you refill, please post which technique you use and the problems that you encounter (if any).
First, some background. When I do a head cleaning on my i9900, I can clean all colors at once, the cyan, magenta and yellow as a group, or the black, PM, PC, Red and Green as a group. I also seem to remember reading somewhere that the head cleaning operations use air to clean the heads. What makes the most sense is that the printer pulls a slight vacuum on the discharge of one or both of the groups of nozzles in the print head. This also explains how a cleaning cycle gets ink to start flowing - it is difficult to understand how wiping the heads or activating the thermal elements alone could do this. Does anyone know if this is the case? Has anyone taken a Canon apart to see how it works? In any case, let's start with the theories (remember that these are just conjecture at this time).
My print head is divided into two sets of nozzles. The cyan, magenta and yellow are ejected from one set of nozzles, and the other 5 colors are ejected from the other set of nozzles. This is why these colors must be cleaned as a group.
When the print head is off-line, some sort of soft rubber-like material comes up against the print head and seals the exits of the nozzles so that they don't drip or dry out.
Suppose that one of the carts in a color group has a pressure mismatch such that it is pulling a slight vacuum at the print head's ink pickup. This vacuum will tend to pull ink for that color back through the nozzles. If the seal covering the nozzles provides a good seal to the outside, but a not-so-good seal between adjacent colors, ink will be pulled from the other colors back into nozzles with the vacuum. When you print a nozzle check pattern, you will get the wrong color (or maybe even a mixture of colors) in that nozzle. This would also explain the post (that I can't find) where someone reported seeing the wrong color ink on the print head's pickup when the cart was removed.
Suppose that one of the carts in a color group has a pressure mismatch such that it is has a slight positive pressure at the print head's ink pickup. This pressure will tend to push ink for that color out through the nozzles. If the seal covering the nozzles provides a good seal to the outside, but a not-so-good seal between adjacent colors, ink will be pushed from the high pressure color into the nozzles for the other colors. When you print a nozzle check pattern, you will get the wrong color (or maybe a mixture of two colors) in the other nozzles. Ref - Nifty-Stuff's post (http://www.nifty-stuff.com/forum/viewtopic.php?id=103) shows a scan of a nozzle check pattern where it looks like cyan got pushed into the other nozzles.
I am coming to the conclusion that you should never remove a cart unless it is to replace it, and that the new cart should be ready to drop in ASAP to keep the top of the print head pickup wet with the proper ink. If the ink film between the print head and the filter on the cart is lost, at least one cleaning cycle must be run to pull ink from the cart all the way through to the nozzle exit, as any air that gets into the pickup on the print head will break the capillary action that pulls ink from the filter. When my printer was new, I never touched the carts and never had a "clogged nozzle" problem (I began to wonder what everyone was talking about). After successfully replacing three OEM carts when the printer gave me a "low ink" warning, I replaced all 8 carts with a complete set of new (old formulation) InkGrabber carts, did a single cleaning cycle and never had a problem. It was only when I started to change carts a lot to test various refill techniques that I started to have "clogged nozzle" problems, often with colors that I didn't touch.
I am currently running a test where I won't touch the carts for any reason to see how often I have to run a cleaning cycle. I recently refilled a complete set (using the second vacuum technique) to get every cart completely full at the start of the test. I have printed 12 8.5x11 sheets of photos so far with no problems.
When I was testing various refill techniques, I noticed that the Canon carts seem to take more pressure to blow ink through the exit (to make sure that there is a continuous ink path to the bottom of the filter and that the bottom of the filter is "wet" when the cart is installed). I attributed this difference to a difference in the sponge or filter used in the two carts. This implies that there could be a pressure differential between carts from different suppliers, and that perhaps carts should always be kept in matched sets to keep the pressures better matched, even when refilling.
There is a recent post (http://www.nifty-stuff.com/forum/viewtopic.php?id=140) that discusses a common approach of periodically pulling the carts to visually inspect the ink levels so that the carts can be refilled before the ink chamber becomes empty. My OEM and InkGrabber carts have always tripped the alarm when they are empty - and I mean EMPTY. Up to that point, the indicated levels on the status monitor display can not be relied on to give an accurate ink level (how does the printer know how much ink is in the upper sponge when the cart is installed?). The sponge needs to hold enough ink after the ink chamber becomes empty to print a few extra pages if you are going to rely on this sensor. I think that I remember reading that the printer will continue printing until it calculates that the sponge is almost empty before refusing to print any more (please correct me if this is wrong). This is fine if you will be replacing the empty cart with a new cart, as you will get more usable ink out of the old cart and you just throw away the empty cart (the OEM's plan).
The problem arises if you refill your carts and wait for the sensor to tell you when the cart is empty. If you happen to be running a large print job when the ink chamber empties and you aren't constantly watching your computer for a low ink level alarm, you can end up with a lot of air in the sponge before the printer stops printing. If the sponge wasn't almost completely filled during the last refill, you may even run out of ink. Refilling carts with nearly empty sponges requires unusual techniques to get the air out so that they will print properly when refilled (http://www.nifty-stuff.com/forum/viewtopic.php?id=124).
The inspect and refill technique seems to be a good solution to this problem, but pulling carts for inspection seems to bring an increased occurrence of ink feeding problems. Which is the lesser of the two evils? What are your experiences? If you refill, please post which technique you use and the problems that you encounter (if any).