- Joined
- Jan 18, 2010
- Messages
- 16,185
- Reaction score
- 9,134
- Points
- 453
- Location
- Residing in Wicklow Ireland
- Printer Model
- Now have 3 Ender-3 V3 Plus SE/
I decided a good while ago to change the way the Print platform was sitting on its rails and to use 4 screws/springs on the underside of the hot plate instead of the current 3.
I started by pulling the whole machine apart which enabled me to begin with a blank canvas, I had previous moved the control unit 5 cm to the left which made working on the printer that much better, and less cluttered.


This is how it looks now and what I need to do is to cover this surface with 2mm of plastic as I did before but this time by adding another 6cm on the righthand side to extend and open it up and have it the same thickness as the base board is now.
Here’s a look at the current base platform holder, Fig 1 and this is the one I’m replacing it with Fig 2, as you can see it’s much bigger and hopefully it will provide an easier area to work in, it also gives me the space I need to add a fourth support spring.
Fig 1. Fig 2..
  click to enlarge..
As this upgrade is on going because I’ve just started, there’s a lot more to do, and I will update the thread when I have made more progress, the new parts are currently been printed on the CR-10, and I still haven’t figured out how to extend the overhead gantry carrying the hot-end..

This is the hot-bed (plate) now that I’ve drilled four new holes around the sides, the previous fixing points are to the middle of the plate..
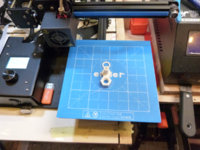
This is what she looked like before I start out on her..

P.S. I'm going to need a new blue adhesive cover..
To Be Continued on another Thread...
I started by pulling the whole machine apart which enabled me to begin with a blank canvas, I had previous moved the control unit 5 cm to the left which made working on the printer that much better, and less cluttered.
This is how it looks now and what I need to do is to cover this surface with 2mm of plastic as I did before but this time by adding another 6cm on the righthand side to extend and open it up and have it the same thickness as the base board is now.
Here’s a look at the current base platform holder, Fig 1 and this is the one I’m replacing it with Fig 2, as you can see it’s much bigger and hopefully it will provide an easier area to work in, it also gives me the space I need to add a fourth support spring.
Fig 1.
Fig 2.. click to enlarge..As this upgrade is on going because I’ve just started, there’s a lot more to do, and I will update the thread when I have made more progress, the new parts are currently been printed on the CR-10, and I still haven’t figured out how to extend the overhead gantry carrying the hot-end..
This is the hot-bed (plate) now that I’ve drilled four new holes around the sides, the previous fixing points are to the middle of the plate..
This is what she looked like before I start out on her..
P.S. I'm going to need a new blue adhesive cover..
To Be Continued on another Thread...