Epson 1500W (1430 USA) Paper feed Problems

Chris N

Getting Fingers Dirty
Joined
Jun 4, 2022
Messages
14
Reaction score
10
Points
33
Printer Model
Epson 1500W
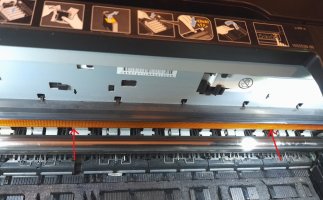
When the printer was new I seldom had paper feed issues. Now I get a lot of misfeeds. When I clean the pick up roller it is good for about 10 sheets, then misfeeds again. I have tried everything including isopropyl alcohol, rubber rejuvenator, paint thinner, sandpaper etc. After a few sheets it starts misfeeding again. I don't know if the roller needs replacing or if it needs some other adjustment.

Has anyone else had this problem and found a solution?

Kind regards
Chris
 

Chris N

Getting Fingers Dirty
Joined
Jun 4, 2022
Messages
14
Reaction score
10
Points
33
Printer Model
Epson 1500W
In the meantime, I took the printer apart and discovered that the lower roller also plays an important role in paper feeding. So I will try and replace that as well. My local authorised Epson supplier did not have the parts so I ordered online.

Lower roller
Paper Rollers A.jpg


View from underneath after the paper feeding mechanism is removed.

Lower Roller.jpg


Inside the lower roller is a small spring wrapped around a central metal spindle that causes some friction when moving forward with the paper motion and but if moved backwards will lock to prevent the lower roller from moving in reverse. This spring is actually inside the lower roller. Its not the one that causes the lower roller to make contact with the upper roller.

I decided to remove the spring inside the lower roller to see if that would help. The paper stopped misfeeding but caused another problem of feeding 5 or 10 sheets at a time. So I had to put the tension spring back in. But I filed the inside of the spring and greased the spindle to lower the friction. I also rotated the rubber on the upper pick up roller about 90 degrees so that a less worn part of the rubber would connect with the paper. That probably helped as well.

Evidently if the friction spring inside the lower roller is too tight (too much friction) is will cause misfeeding because it opposes the forward motion of the paper feed. However, if the tension spring is too loose (low friction) it will cause multiple paper feeds. So a fine balance is needed.


While I am waiting for my ordered parts arrive, I have found an effective workaround that has stopped the misfeeds.

I have made a sandwich of 3 thin strips of packaging plastic stuck with double sided tape for added strength. I cut a hole with a paper punch to allow me to apply isopropyl alcohol. I stuck a self adhesive felt pad to the strip and fastened it to the printer as shown so that the felt pad continuously rubs against the main rubber paper feed roller. Only a drop of alcohol is needed. As the roller turns, it is constantly cleaned and feeds the paper without any problems. If too much alcohol is applied it will have the opposite effect and cause the roller to slip against the paper and cause misfeeds. Only the slightest amount of alcohol is needed.

I have printed hundreds of sheets of very thin paper like this with hardly any misfeeds.

Felt Pad A.jpg
Felt Pad.jpg
 
Last edited:

Chris N

Getting Fingers Dirty
Joined
Jun 4, 2022
Messages
14
Reaction score
10
Points
33
Printer Model
Epson 1500W
Update. I replaced the main rubber roller and the retard rubber roller. In fact I replaced the whole retard roller assembly. Thankfully, the parts were cheap from Ali Express.

However, after replacing them, there were still paper misfeeds. According to pages 89 and 90 of the service manual, an important adjustment needs to be made to prevent misfeeds. 2 screws have to be adjusted that affect the amount of force the main roller exerts on the paper and the lower retard roller. I made the adjustment and now the paper feeds just fine.

According to the manual, "In order to maintain the paper feed accuracy, when installing the Guide Roller LDs, the position of the Guide Roller LDs must be adjusted so that the positions of the LD Roller Shaft and Retard Roller are optimized".

According to the manual, if the adjustment is set too high, you will get misfeeds. If its too low you will get multiple paper feeds.

The adjustment can be done using a short 8 cm cross head screwdriver and removing the right and rear panels of the printer. A flashlight and maybe a small mirror might be useful. In practice though, I just loosened and adjusted the screws by trial and error without removing the right side and back panels. I just lifted the lid of the printer and accessed the 2 screws above the bar that the carriage moves across. I loosened them both and then retightened in the fully down position. I suppose there are only 3 practical positions to set the adjustment screws. Fully up, fully down or in the middle.

In hindsight, I should have made this adjustment first, then maybe I would not have needed to change the rubber rollers!

I hope this information will be useful to someone who experiences a similar problem.

Kind regards
Chris
 

Attachments

  • Paper Roller Adjustment Screws.jpg
    Paper Roller Adjustment Screws.jpg
    173.5 KB · Views: 42
  • Adjustment Screw.jpg
    Adjustment Screw.jpg
    95 KB · Views: 36
Last edited:

bplaman

Getting Fingers Dirty
Joined
Jan 7, 2021
Messages
10
Reaction score
3
Points
28
Printer Model
Epson Stylus Photo 1500W
Hi.Super. Well done. Thank you for sharing your invaluable experience.
 
Top