CISS for Canon IP3000

ocular

Printer Guru
Joined
Feb 20, 2005
Messages
132
Reaction score
6
Points
131
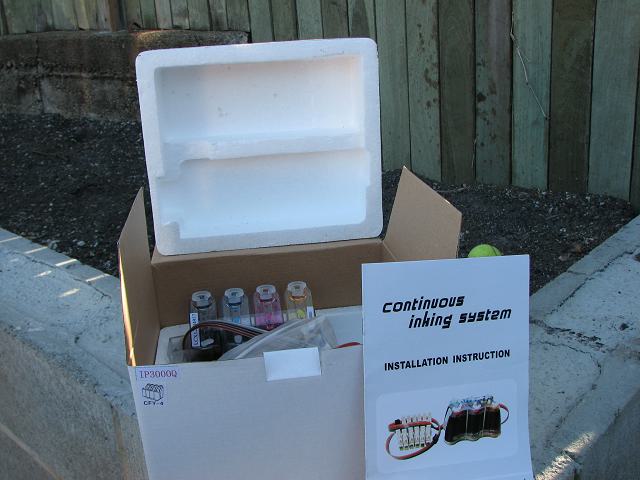
Here's some pictures of a CISS for the Canon IP3000 that I have just purchased from www.selectiveimage.com.au

The unit comes well boxed. The manual is made by a non native english speaker.

SI_Box.jpg


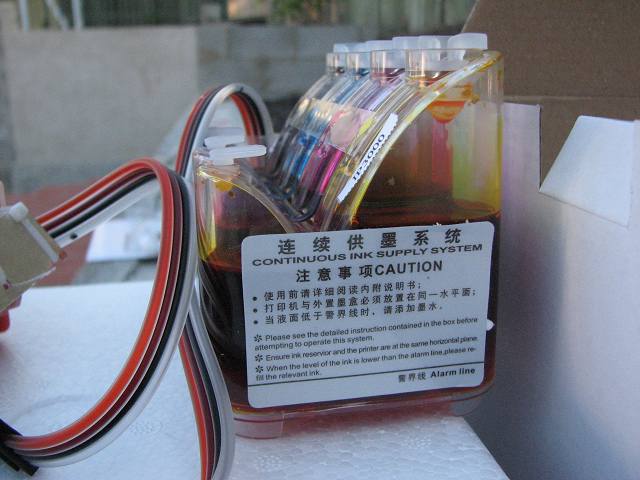
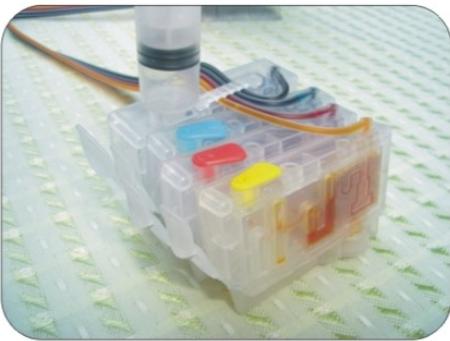
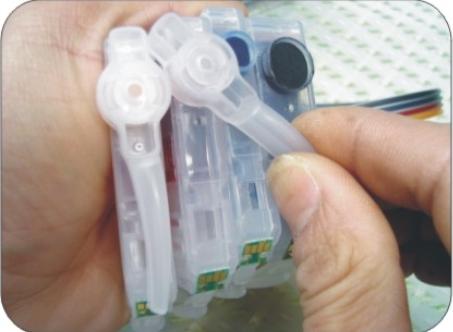
The tanks are see thru and have a main plug for refilling and a smaller hole for air filter ( not fitted in the photo)

SI_Inktank.jpg


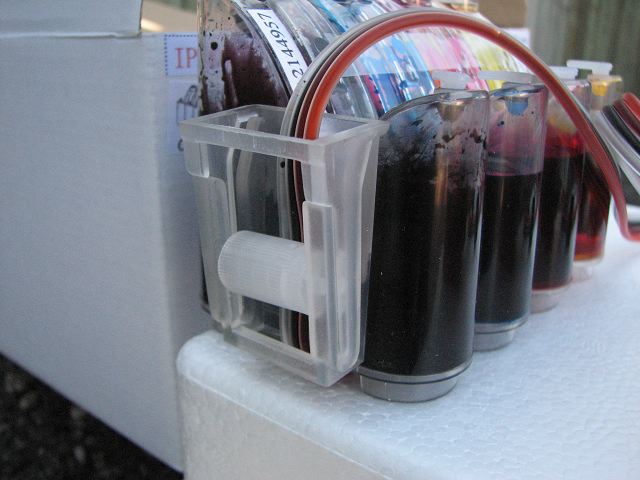
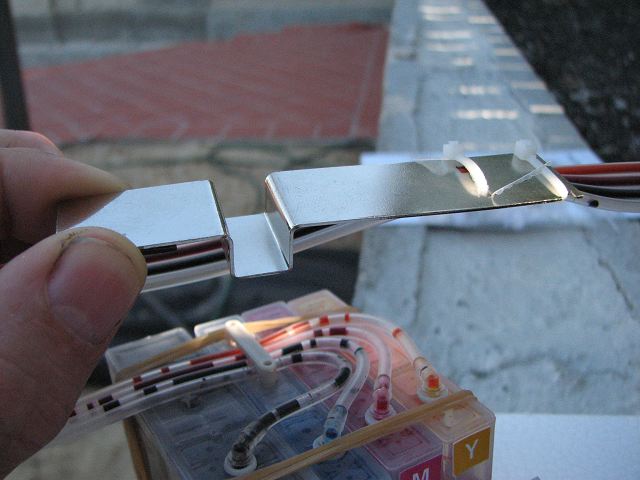
At one end is a handy pinch roller to clamp of the tubes.

SI_Inktank1.jpg


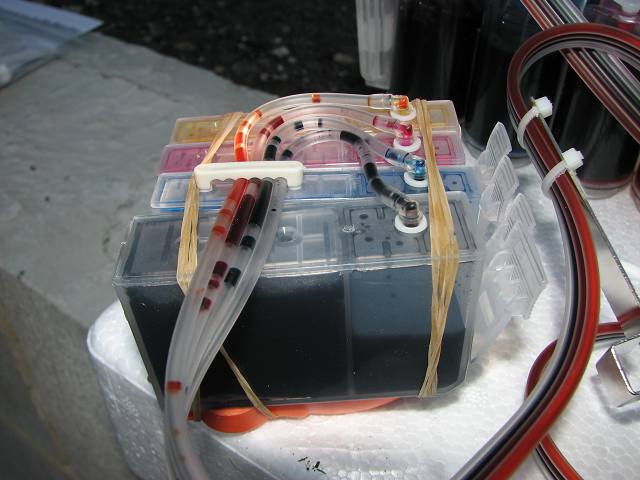
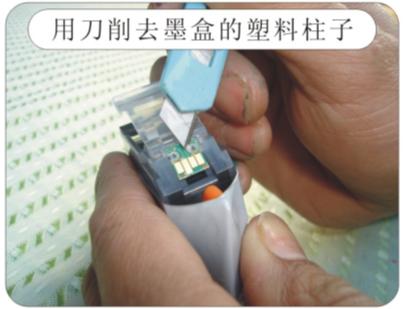
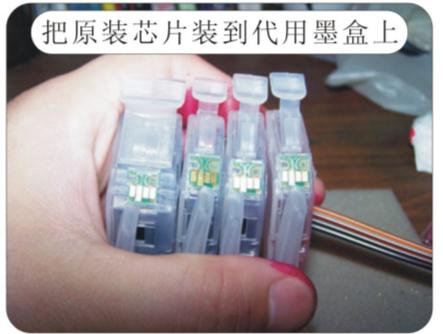
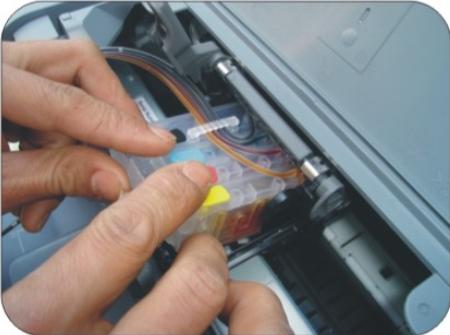
The cartridges are similar to OEM in design with the tube connected over the non sponged compartment with a push fit elbow. There is a neat modular bar to hold the tubes in place. Also the exit port clips twist off, but can be put back on the exit port and twisted so they lock in place - resealing the exit port - I haven't seen this feature before.

SI_cartridge.jpg


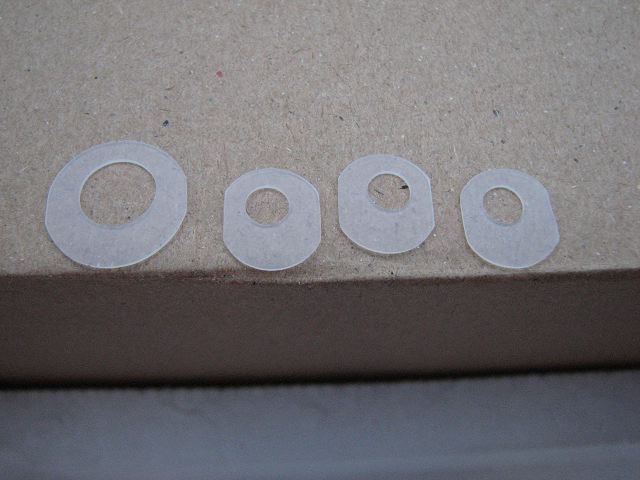
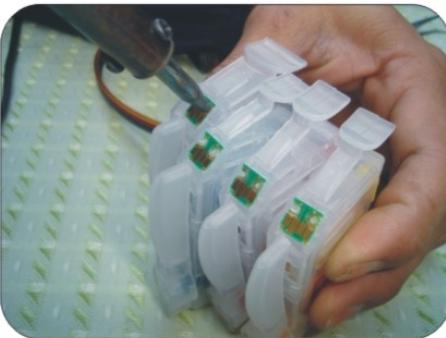
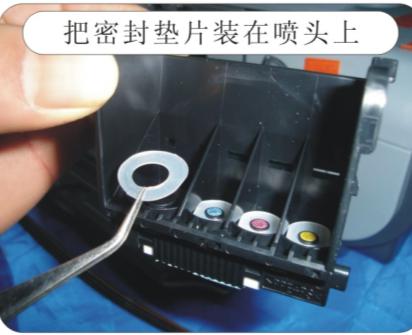
The silastic seals that are placed in the base of the print are provided pre-cut.

SI_seal.jpg


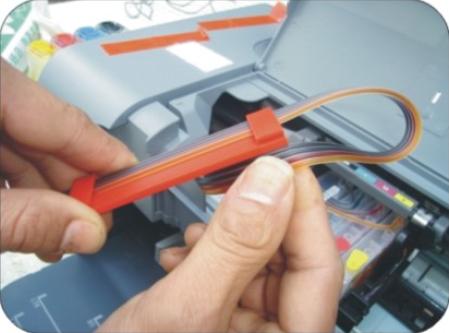
There is an arm attachment to support the tubes that uses double sided tape to attach.

SI_arm.jpg


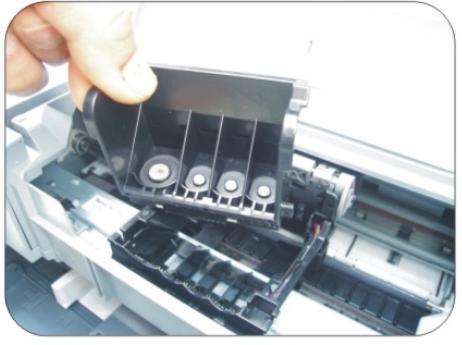
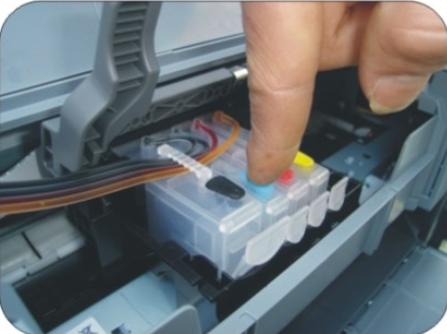
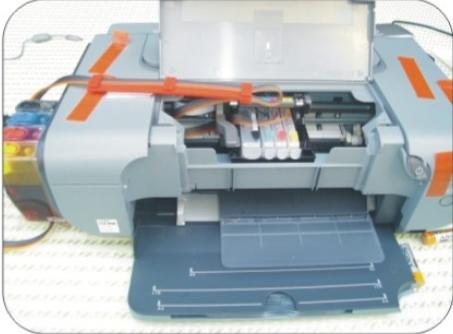
The cartridges are now in place.

SI_printer.jpg


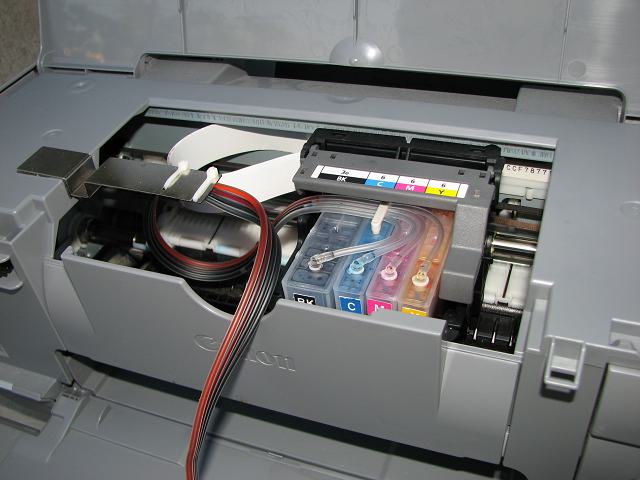
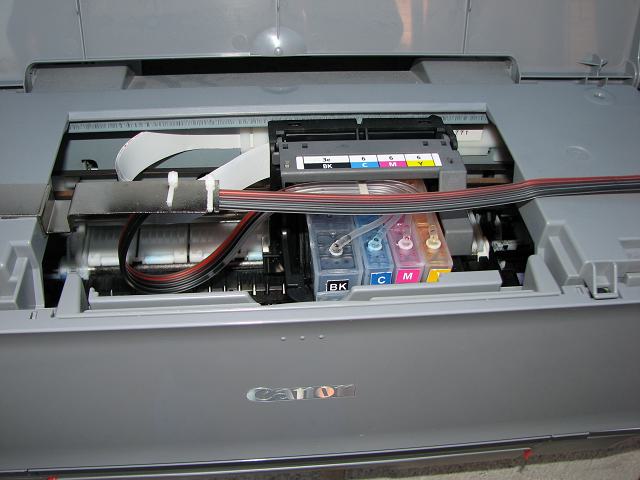
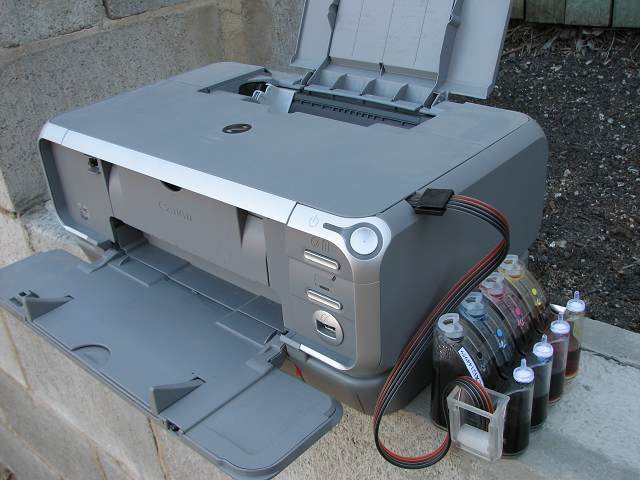
This is the path of the tubes when installed in the printer.

SI_Printer2.jpg


I did have to make a cut in the lid with my dremel to get the lid to close.

SI_Printer1.jpg


Also comes with some syringes/ needles and double sided adhesive and spare elbows and silastic sleeves.
No problems with operation of the unit so far. The retailer provides prompt email support.
 

alexandereci

Printing Ninja
Joined
Feb 12, 2006
Messages
231
Reaction score
1
Points
99
Nice photos! Wish I had the cash to invest in a quality printer like this and a CIS system. Been wanting to ask: how does the CIS system "refill" your ink carts?
 

ocular

Printer Guru
Joined
Feb 20, 2005
Messages
132
Reaction score
6
Points
131
I have been pleased with this system. It has been well thought out. I even let the black run out inadvertently and as the exit port clip could be easily attached and the tube easily removed from the ink cartridge it was easy to reprime without getting ink everywhere.

To answer your question, the negative pressure created in the ink cartridge as ink is used draws ink in via the long tube from the reservoir. In a non CISS when the negative pressure is created by using the ink air is drawn into the cartridge and eventually it runs dry.
 

canonfodder

Printer Guru
Joined
Sep 24, 2006
Messages
267
Reaction score
1
Points
109
Location
New Hampshire, USA
In your photos number 4 and 6, I notice lots of air in the tubing. Does this seem to affect the operation, or was that just a temporary condition right at the start?

Also in shot numbers 7 and 8 showing a longer view, the ink seems to have backed away from the cartridges. Is that a normal condition?

I wish I could understand the apparent double ink tanks, with the shorter ones in front of the taller ones. Can you tell me exactly what air vents are at the tanks, and are the two tanks for a color directly connected or do they have some special connection system?

Any detail information will certainly be appreciated.

canonfodder
 

ocular

Printer Guru
Joined
Feb 20, 2005
Messages
132
Reaction score
6
Points
131
Very observant.

The uninstalled system is not the same CISS set as the installed system. I have 5 of these and when they arrive after shipping there is often air in the line. If it is greater than a few inches then it pays to reprime these lines. I took the photo of a CISS just removed from its packaging and then one I had already installed in a IP3000. Priming can be done by having the cartridges exit ports sealed and the ink reservoirs at the same height, pinch roller not engaged and remove the elbow from the top of the cartridge and elevate the reservoir slightly until the ink runs along the line and drips out the end into a dish. When all the air is bled then replace the elbow into the top of the cartridge. (They are a push fit). Then do the same for each line that needs bleeding. Have used the selective image CISS in MP730 and IP3000, and it works well as long as you are meticulous with setup and then the beauty of CISS is that you don't have to keep fiddling, just keep the reservoir topped up.


With the pinch roller engaged - photo 3 - you can them move the reservoirs relative to the printer unit. A few inches of air will often make its way into the lines above the cartridges but this doesn't seem to matter. After periods of inactivity (days) often a few inches of air is observed. One thing I have done with regards the IP3000 and this CISS unit is to elevate the CISS reservoir about 40mm above the desktop. The reason for this is to minimise the pressure needed to draw ink into the cartridges from the reservoirs. Thus the seal between the cartridge exit ports and printhead is minimally stressed. This is an area that is problematic with the canon cartridge/printhead design. care must be taken not to over elevate or ink may well siphon continuously out of the reservoirs into the cartridges! I have the feeling that elevation of the reservoir is tolerated by the sponge cartridges but the spongeless CISS maybe less tolerant of this. I have a MP730 with the same CISS and only elevate the reservoir 20mm. The CISS suppliers advise putting the reservoirs in a universal position - ie. the desktop, but the distance from the desktop to top of cartridge is not the same distance in different printers even though the CISS units are the same, ie MP730 and IP3000. I try to estimate the top of the ink in the cartridge and the top of the ink when the reservoir is full and keep the reservoir level a little below.

I wish I could understand the apparent double ink tanks, with the shorter ones in front of the taller ones. Can you tell me exactly what air vents are at the tanks, and are the two tanks for a color directly connected or do they have some special connection system?
The physics of these cartridges are simple. They are modified from the same type of cartridges as the Canon OEM. There is a big sponge compartment and a smaller adjacent compartment these are connected via a hole in the bottom of the separating partition. Normally there is an air hole above the sponge compartment in the OEM non CISS cartridge to allow air into the cartridges as ink leaves. The sponge acts as resistance to the outflow of ink. In the CISS setup this air hole is closed and the ink line from the CISS is connected to the top of one of the compartments. ( In this setup it is over the smaller non sponge compartment , but can be over the sponged compartment. ) When negative pressure is created in the cartridge then ink is drawn in from the external reservoir via the connecting tube. The height of the ink in the smaller non sponged compartment should remain constant. You can vary this height when you prime the initial setup. My judgement is that filling this compartment about 2/3 full but not greater is best. There is no doubt that having the cartridge near full allows it to last much longer than the refillable cartridge setup.

There is another supplier here in Australia that seem to take on CISS with good research and support ( though I haven't used their systems). I was turned away from them because their CISS setup uses "spongeless" cartridges and I have tried other various other refillable and CISS "spongeless" setups with no long term success. Take a look at - http://www.rihac.com.au/

All this should be able to be applied to the IP4200 but you have an extra cartridge and the dimension of chipped cartridges. I haven't taken this leap as it's a case of being satisfied and knowing my current setup well.
 

diana

Printing Apprentice
Joined
May 3, 2007
Messages
6
Reaction score
0
Points
12
hi,all.this is my experience of Canon CISS IP3300 installation

1)using a sanely knife or sharp blade remove the plastic logs.

2)taking out the original chip one by one.

3)Filling ink into the cartridge from the ink tank of CISS.

4)Placing the chips onto the new cartridge one by one.

5)Using a soldering iron gently melt the plastic lugs.

6)taking out the cover of ink cartridge.

7)moving the printer-head out.

8)placing the sillicon nozzle seals into the printer heads.

9)Loading the inner cartridge into the printer head.

10)Pressing down the cartridge until hearing a"click "meanwhile the light is red

11)Adjust the tube to the suitable length.

12)Last,Fix the splint onto the printer,installaton is finished.


GOOD LUCK FOR EVERYONE
 

ocular

Printer Guru
Joined
Feb 20, 2005
Messages
132
Reaction score
6
Points
131
Well the above reply from diana displays a number of concerns.

The printer illustrated is not an IP3000
IP3000 cartridges are not chipped.
The unit is poorly installed if the lid of the printer has to remain open.


My experience of sourcing CISS bits and pieces from Asia/China has been a disaster. They just have not lived up to the claims.
 

diana

Printing Apprentice
Joined
May 3, 2007
Messages
6
Reaction score
0
Points
12
Sorry,ocular
Make wrong with the number ,
Thank you very much!:)

:)
 
Top