Canon Pro-10 uneven border

kcgoatboy

Getting Fingers Dirty
Joined
Jul 23, 2017
Messages
30
Reaction score
6
Points
28
Printer Model
Epson XP-950
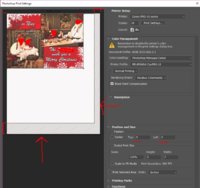
I am attempting to make prints with an even border around all 4 sides. The border on the top is coming out 1/16 of an inch too short, the bottem is 1/16th too large and the left and right margins are off by about 1mm (not as concerned). On a large print it's not soo noticeable but on 8x10 and 5x7 it stands out. I am not printing borderless, and have those options turned off. I have seen several people online have similar issues with the pro-10 and pro-100 but not resolutions. I am using lightroom and photoshop to make the prints. I tried an alignment.
 

The Hat

Printer VIP
Platinum Printer Member
Joined
Jan 18, 2010
Messages
15,618
Reaction score
8,691
Points
453
Location
Residing in Wicklow Ireland
Printer Model
Canon/3D, CR-10, CR-10S, KP-3
Try putting in your paper and doing your print, but as you say it’s slightly off centre in both directions, then wait for a few minutes for the print to dry and then put the paper back through again.

This will give you an inclination as to where to best place your image the next time you print, the printed image should never be more than 1 mm out of position...
 

kcgoatboy

Getting Fingers Dirty
Joined
Jul 23, 2017
Messages
30
Reaction score
6
Points
28
Printer Model
Epson XP-950
I think it maybe margin settings in the printer driver causing the issue. The preview in photoshop even looks off center. If I use a custom paper size of 5x7 the preview looks centered. If I use default 5x7 built into the driver the preview and actual prints are off center. Is there a way to adjust the margins for default sizes in the driver? The custom paper size function in the driver doesn't allow you to set margins for the pro-10 like canon does for other models plus it is just silly and annoying to always have to create a custom paper size if I want centered 5x7 prints.
 

Attachments

  • print schreenshot.JPG
    print schreenshot.JPG
    126.3 KB · Views: 13,073

Ink stained Fingers

Printer VIP
Platinum Printer Member
Joined
Dec 27, 2014
Messages
5,838
Reaction score
6,964
Points
363
Location
Germany
Printer Model
L805, WF2010, ET8550
Use a program like Qimage offering you layout options - start off with the borderless option and add
small margins around the borders to your requirements.
 

The Hat

Printer VIP
Platinum Printer Member
Joined
Jan 18, 2010
Messages
15,618
Reaction score
8,691
Points
453
Location
Residing in Wicklow Ireland
Printer Model
Canon/3D, CR-10, CR-10S, KP-3
If I use default 5x7 built into the driver the preview and actual prints are off center. Is there a way to adjust the margins
Take control of your own output more, by using the tools that Photoshop provides, uncheck the centre box and move you image to the desired position...
Untitled-1.jpg
 

kcgoatboy

Getting Fingers Dirty
Joined
Jul 23, 2017
Messages
30
Reaction score
6
Points
28
Printer Model
Epson XP-950
Take control of your own output more, by using the tools that Photoshop provides, uncheck the centre box and move you image to the desired position...
View attachment 8285

Forgive me if I'm using the wrong terminology here but this method only adjusts the position of the image inside of the frame, it does not adjust the position of the frame itself. I adjusted the scale to make showing how this only moves the image not the frame more visible. What I am calling the frame is the white area inside the hash marks. The hash marks from what I can tell is what the printer driver is telling photoshop where you cannot print. So the white printable area is not centered.
 

Attachments

  • Capture2.JPG
    Capture2.JPG
    77.4 KB · Views: 532

The Hat

Printer VIP
Platinum Printer Member
Joined
Jan 18, 2010
Messages
15,618
Reaction score
8,691
Points
453
Location
Residing in Wicklow Ireland
Printer Model
Canon/3D, CR-10, CR-10S, KP-3
Looking at your latest screen shot, I can see the white area is off centre all right, but you have made it so yourself, by moving the position 4 mm to the left.

Try replacing the “4” with “2” and you’ll see that the white area will then be centred nicly... ;)
Capture.PNG click to enlarge...
 

kcgoatboy

Getting Fingers Dirty
Joined
Jul 23, 2017
Messages
30
Reaction score
6
Points
28
Printer Model
Epson XP-950
Looking at your latest screen shot, I can see the white area is off centre all right, but you have made it so yourself, by moving the position 4 mm to the left.

Try replacing the “4” with “2” and you’ll see that the white area will then be centred nicly... ;)
View attachment 8352 click to enlarge...

I don't think you are getting what I am trying to say. I am not talking about the image being centered in the middle of the white area, I'm talking about the printable area being centered on the paper. Changing 4-2 or zero just moves the image around inside the white area. I attached another image to try to show what I am talking about. The position is 0, 0 which puts the image in the top left. But I am talking about the diagonal hatched marks. Those are what the driver is telling photoshop you cannot print there. I cannot get the printable area centered. If you mark centered in photoshop it just moves the image in the center of the white area, not the center of the PAGE.

The problem is if I do double sided printing on a 5x7 card stock (verified spot on 5x7) the printable area is not centered so the image is not centered. When you flip the card back and forth it's very noticeable that the border is not even all the way around.
 

Attachments

  • Capture3.JPG
    Capture3.JPG
    113.5 KB · Views: 546
  • Capture4.JPG
    Capture4.JPG
    114.7 KB · Views: 597

The Hat

Printer VIP
Platinum Printer Member
Joined
Jan 18, 2010
Messages
15,618
Reaction score
8,691
Points
453
Location
Residing in Wicklow Ireland
Printer Model
Canon/3D, CR-10, CR-10S, KP-3
@kcgoatboy, You are perfectly right, I don’t get what your trying to say, you are being totally confused by your paper size, the printable area and image size, and until you can figure that out you will continue to go around in circles..

The size of paper you wish to print on must first be set in the printer paper set-up, then photoshop will reflect that same size, the next step is to place you image in the area displayed, just disregard all else and it will print correctly for you..
 

kcgoatboy

Getting Fingers Dirty
Joined
Jul 23, 2017
Messages
30
Reaction score
6
Points
28
Printer Model
Epson XP-950
@kcgoatboy, You are perfectly right, I don’t get what your trying to say, you are being totally confused by your paper size, the printable area and image size, and until you can figure that out you will continue to go around in circles..

The size of paper you wish to print on must first be set in the printer paper set-up, then photoshop will reflect that same size, the next step is to place you image in the area displayed, just disregard all else and it will print correctly for you..

I've been using photoshop for over 10 years. I know the difference between paper size, canvas size and image size. I know you have to set the paper size in the printer driver first. I am just new to canon printers, I've only used Epson in the past so I didn't know if there was an option to change the border sizes in the printer drivers.

Posted several times on the canon community site the Canon Pro-10 and 100 having a larger trailing edge border is a known issue. If you are not using the pro series canon drivers than you won't be able to recreate the issue.

I was able to find 3 work arounds. #1 select a custom paper size in the driver and it will ignore the default canon driver border restrictions. #2 Jose posted a workaround for this in lightroom for the same problem. Thank Jose. https://youtu.be/tI-J2cZapdo #3 https://youtu.be/KKw70cY5xFE . I was still hoping for a permanent fix instead of a workaround because it's just one more step in the workflow you have to remember to do.
 
Top