- Thread starter
- #31
mrelmo
Print Addict
ok here we go again
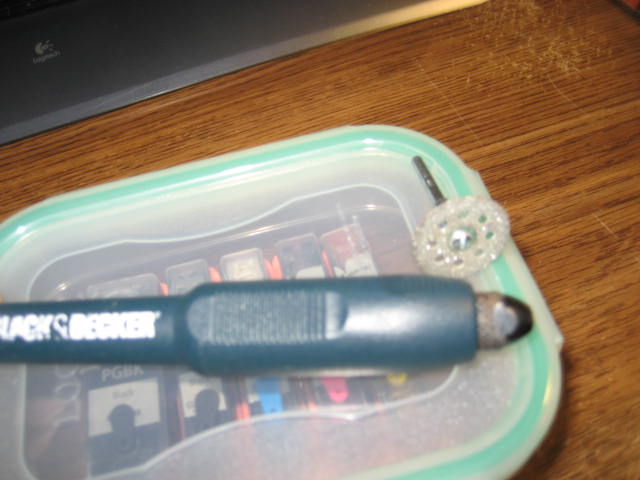
the cutting wheel i used was bought at the local home depot for $3.00 it is called a diamond wheel and it was attached to a pencil like attachment for my black and decker dremel type tool, the cutting wheel didn't so much cut the plastic as it melted the plastic so when the slot pieces were removed there was a lot of plastic attached to the bottom side of the case that you can pull off now for the procedure
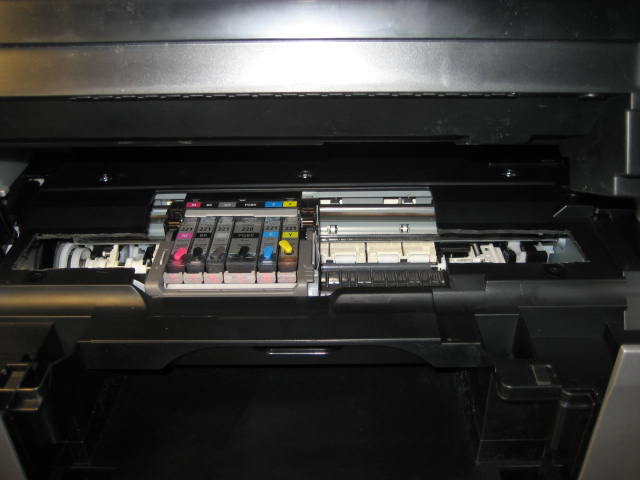
first with the printer on lift the cover so the printhead is centered, unplug the power cord this allows you to move the printhead carriage from side to side
i placed refilled carts with plugs in the printhead so i could see how wide the slot would have to be
then you take masking tape and run it from the opening in the center of the cover to the far edge approximately 3 1/2" i used 2 pieces of tape to mark a slot on top of the cover, i was able to follow the tape with my cutting wheel
now for the actual cutting
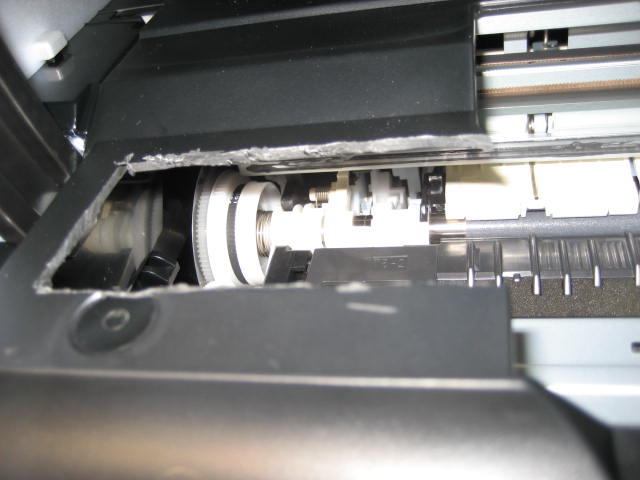
i first cut the left side as there is less chance to do "damage" on that side and there is a little more clearance for your tool
move the printhead carriage all the way to the right after you remove the printhead
take a small piece of cotton cloth and stuff it under the left side of the cover, try to keep it a single layer of cloth so it will sit below the cover and the cutting wheel will not grab it, when the cloth is in place it should be long enough that the remainder of the cloth will stick out of the middle opening and cover the right side of the cover so no debris gets in the right side
when you are cutting be very aware or the white flat ribbon that is attached to the printhead carriage
when you are done cutting lift the plastic from the slot out and then you can grab pieces of plastic from the case that are attached to the bottom of the cover and pull them off as i said it was more melted than cut
slide the printhead carriage to the left side repeat for the right side
put your cloth in place and follow the masking tape that you marked the top of the cover with again be aware of the white ribbon
the right side is a little tighter to work with the dremel tool
the cutting wheel i used is 7/8" in diameter or 22mm
the slot on the left side is 1 1/2" by 3 1/4" or 38mm by 82mm
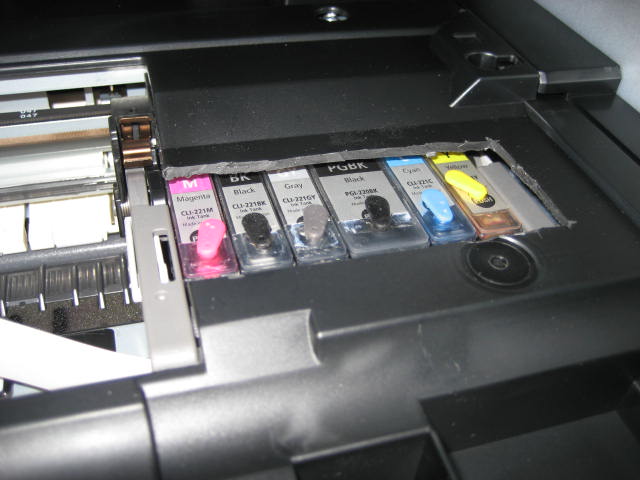
the slot on the right side is 1 1/2" by 3 1/2" or 38mm by 89mm
the slots can be narrower but i wanted to cut once and be done with it
the slot on the right was made a little longer to insure all cartridges cleared the case when parked
i have done this on a 560, 640 and these pics are from my 990 (that i was going to throw out the window but that is another story)
i have a friend that is getting ready to use refilled cartridges, before i cut his case apart i am going to try the plugs that are referred in post #16 of this thread as they look like they may be flush with the top or the cartridges when inserted and then dig them out with a pin when they need to be removed that would solve a lot of things but then you still need to make sure the plugs are flush with the top of the cartridge after refilling
the pics below in this order are if there are any other questions feel free to ask and i will try to answer
1 cutting wheel
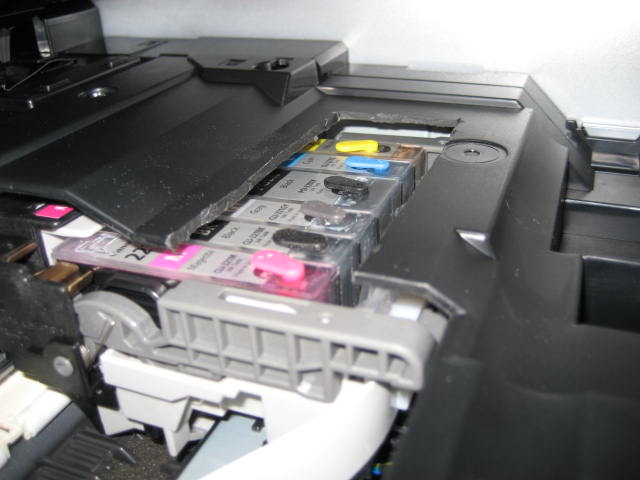
2 printhead centered
3 left side slot
4 right side slot
5 right side slot


the cutting wheel i used was bought at the local home depot for $3.00 it is called a diamond wheel and it was attached to a pencil like attachment for my black and decker dremel type tool, the cutting wheel didn't so much cut the plastic as it melted the plastic so when the slot pieces were removed there was a lot of plastic attached to the bottom side of the case that you can pull off now for the procedure
first with the printer on lift the cover so the printhead is centered, unplug the power cord this allows you to move the printhead carriage from side to side
i placed refilled carts with plugs in the printhead so i could see how wide the slot would have to be
then you take masking tape and run it from the opening in the center of the cover to the far edge approximately 3 1/2" i used 2 pieces of tape to mark a slot on top of the cover, i was able to follow the tape with my cutting wheel
now for the actual cutting
i first cut the left side as there is less chance to do "damage" on that side and there is a little more clearance for your tool
move the printhead carriage all the way to the right after you remove the printhead
take a small piece of cotton cloth and stuff it under the left side of the cover, try to keep it a single layer of cloth so it will sit below the cover and the cutting wheel will not grab it, when the cloth is in place it should be long enough that the remainder of the cloth will stick out of the middle opening and cover the right side of the cover so no debris gets in the right side
when you are cutting be very aware or the white flat ribbon that is attached to the printhead carriage
when you are done cutting lift the plastic from the slot out and then you can grab pieces of plastic from the case that are attached to the bottom of the cover and pull them off as i said it was more melted than cut
slide the printhead carriage to the left side repeat for the right side
put your cloth in place and follow the masking tape that you marked the top of the cover with again be aware of the white ribbon
the right side is a little tighter to work with the dremel tool
the cutting wheel i used is 7/8" in diameter or 22mm
the slot on the left side is 1 1/2" by 3 1/4" or 38mm by 82mm
the slot on the right side is 1 1/2" by 3 1/2" or 38mm by 89mm
the slots can be narrower but i wanted to cut once and be done with it
the slot on the right was made a little longer to insure all cartridges cleared the case when parked
i have done this on a 560, 640 and these pics are from my 990 (that i was going to throw out the window but that is another story)
i have a friend that is getting ready to use refilled cartridges, before i cut his case apart i am going to try the plugs that are referred in post #16 of this thread as they look like they may be flush with the top or the cartridges when inserted and then dig them out with a pin when they need to be removed that would solve a lot of things but then you still need to make sure the plugs are flush with the top of the cartridge after refilling
the pics below in this order are if there are any other questions feel free to ask and i will try to answer
1 cutting wheel
2 printhead centered
3 left side slot
4 right side slot
5 right side slot