- Joined
- May 6, 2011
- Messages
- 505
- Reaction score
- 202
- Points
- 183
- Location
- Cluj-Napoca, Romania
- Printer Model
- Epson L800, 1400; ML-2165W
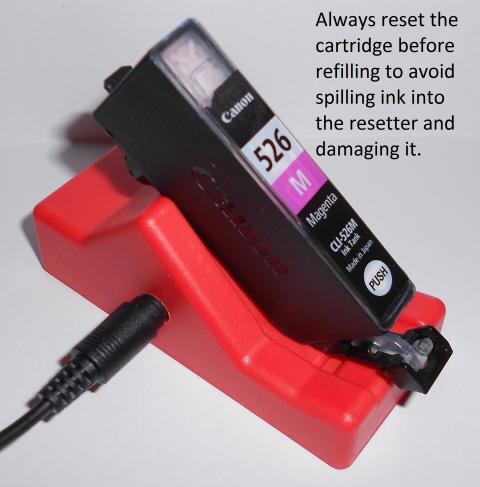
Although it is better to move the chips from 526 to 521 (525 to 520) and refill the windowed cartridges, the CLI-526 and PGI-525 can be refilled using any of the methods specific to this type of cartridge. My personal choice is the Top Filling Method.
Because my printer has a clearance problem I used a low profile plug (bought from OctoInkjet) and aluminium tape (just to be extra safe") ). Clip and resetter also from OctoInkjet.
). Clip and resetter also from OctoInkjet.
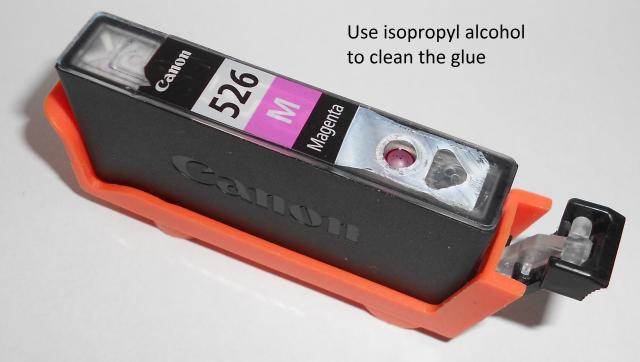
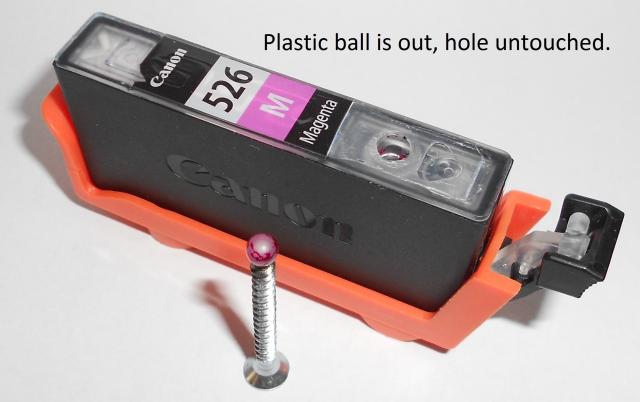
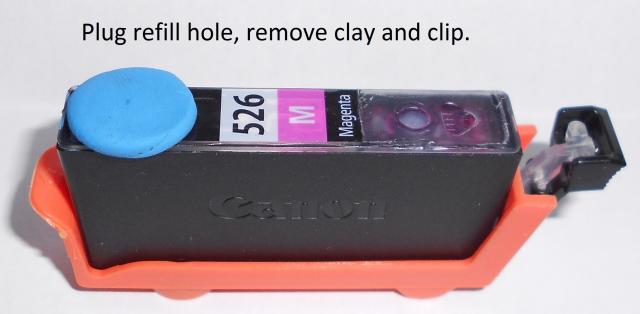
1. Preparing the cartridge for Top Filling:
a. <--- click to enlarge
b. <--- click to enlarge
c. <--- click to enlarge
d.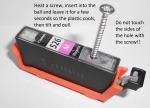 <--- click to enlarge
e. <--- click to enlarge
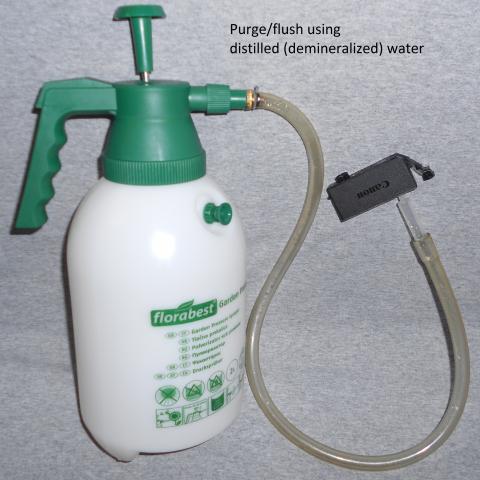
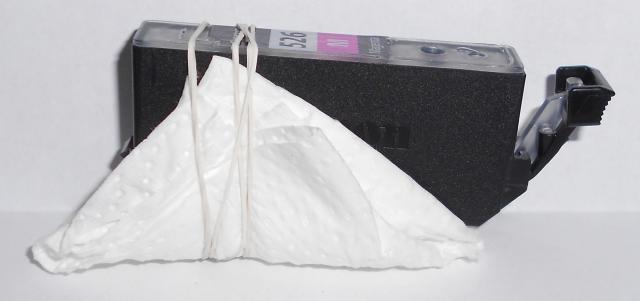
2. Purging and drying (if needed):
a. <--- click to enlarge
b.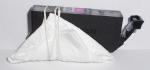 <--- click to enlarge
http://www.nifty-stuff.com/forum/viewtopic.php?id=5382
3. Refilling:
a.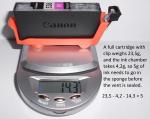 <--- click to enlarge
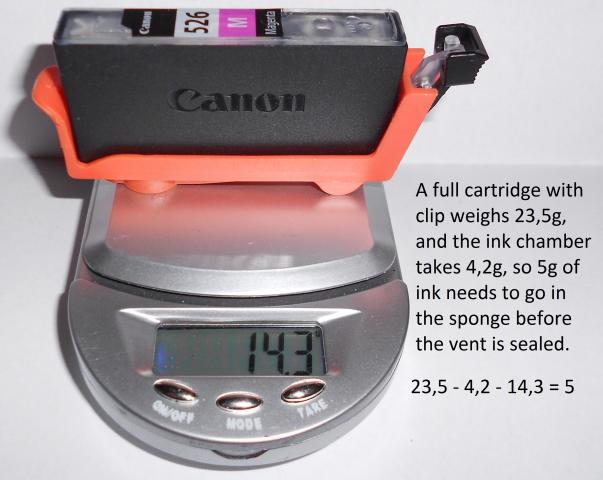
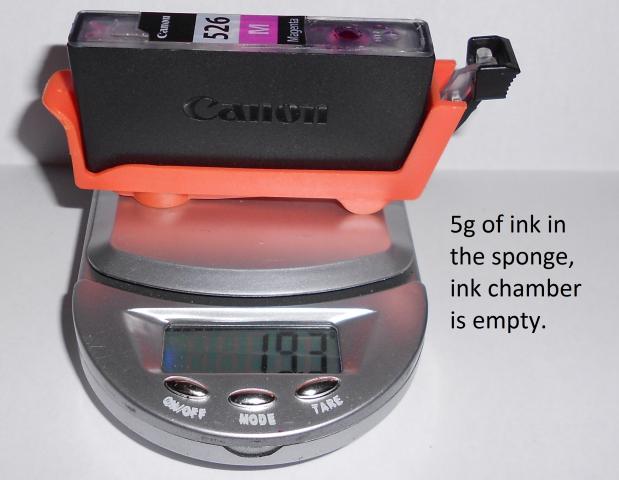
A cartridge with enough ink in the sponge and empty ink chamber weighs 15,8g (without clip). Measure the weight of the cartridge you want to refill ( x grams). In this step you will need to fill with 15,8-x ml of ink and let the cartridge sit for 1-2 minutes.
Here's an Excel calculator, if you use syringes: http://rapidshare.com/files/967513830/Refill calculator.xls . All you have to do is input the weight of the cartridge to be refilled in the "Initial weight without clip" column and you get the amount of ink needed for the sponge.
b.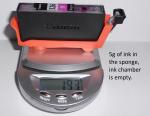 <--- click to enlarge
c. <--- click to enlarge
d. <--- click to enlarge
e.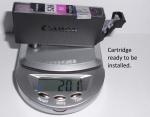 <--- click to enlarge
Cartridge weight before refill (label off, ball removed, flushed, dryed) - 10,8 g
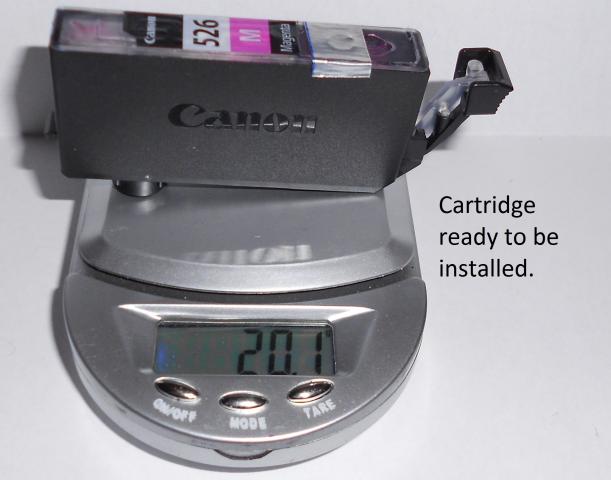
Cartridge weight after refill (with plug and aluminium tape) - 20,1 g
Because my printer has a clearance problem I used a low profile plug (bought from OctoInkjet) and aluminium tape (just to be extra safe
). Clip and resetter also from OctoInkjet.1. Preparing the cartridge for Top Filling:
a.
 <--- click to enlarge
b.
 <--- click to enlarge
c.
 <--- click to enlarge
d.
 <--- click to enlarge
e.
 <--- click to enlarge
2. Purging and drying (if needed):
a.
 <--- click to enlarge
b.
 <--- click to enlarge
http://www.nifty-stuff.com/forum/viewtopic.php?id=5382
3. Refilling:
a.
 <--- click to enlarge
A cartridge with enough ink in the sponge and empty ink chamber weighs 15,8g (without clip). Measure the weight of the cartridge you want to refill ( x grams). In this step you will need to fill with 15,8-x ml of ink and let the cartridge sit for 1-2 minutes.
Here's an Excel calculator, if you use syringes: http://rapidshare.com/files/967513830/Refill calculator.xls . All you have to do is input the weight of the cartridge to be refilled in the "Initial weight without clip" column and you get the amount of ink needed for the sponge.
b.
 <--- click to enlarge
c.
 <--- click to enlarge
d.
 <--- click to enlarge
e.
 <--- click to enlarge
Cartridge weight before refill (label off, ball removed, flushed, dryed) - 10,8 g
Cartridge weight after refill (with plug and aluminium tape) - 20,1 g
