Tandberg
Getting Fingers Dirty
- Joined
- Jan 13, 2013
- Messages
- 23
- Reaction score
- 11
- Points
- 39
- Location
- Sweden
- Printer Model
- Pixma Pro 9500 Mk II
This short story will describe the "intestines" of the purge unit on a Canon S750.
Hopefully some facts about other printers using a similar purge unit can be drawn from this.
Background:
The printer has been unused for at least three years and it had a bad track record
when it was used. Lots of cleaning cycles without any real improvment led to it being
replaced by a laser printer and a Canon 9600 Mk II. The S750 was opened to see if
there were any useful components inside for use in other projects.
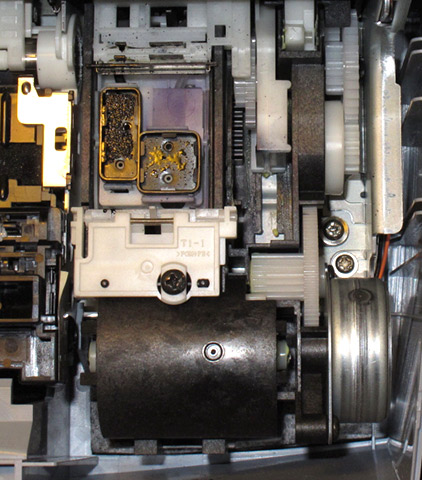
The troubleshooting was really simple - once the cover was off the "parking place"
for the print head had no visible parts, only big pile of black, messy stuff.
The purging unit actually did the opposite, it smeared old dried ink all over the print head.
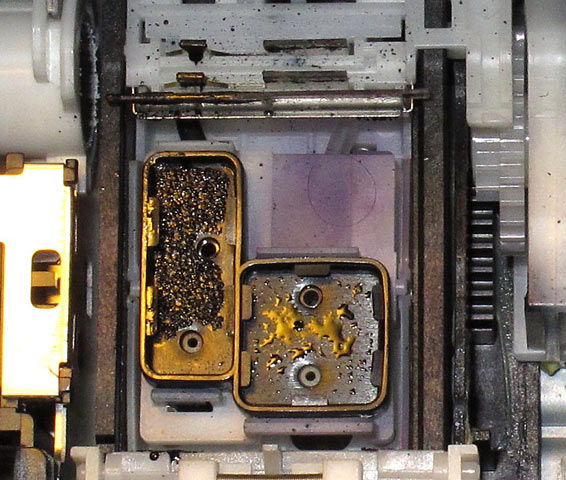
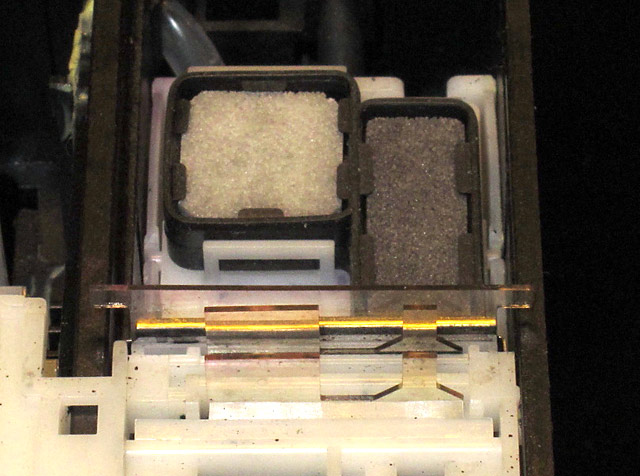
This picture shows the landing zone with the messy stuff removed. Two porous plates
have also been removed. Lots of dried ink in the black compartment. Some black ink had also
leaked into the compartment for the color nozzles.
The "windscreen wipers" were also messy, they had a hopeless job when the pump was not
working.
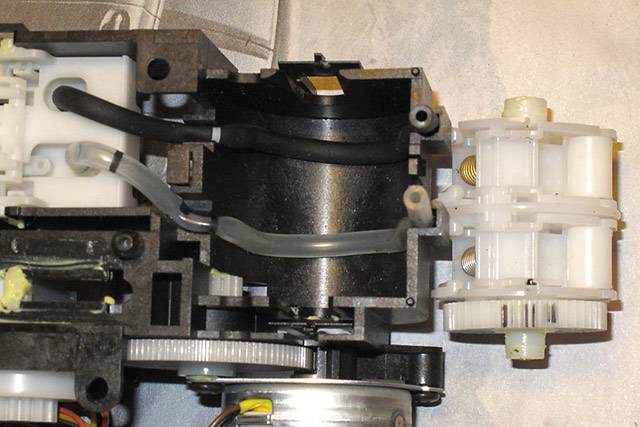
Turning the purge unit over the lower part of the black tube was completely clogged with dried ink.
After removing the rotary part of the peristaltic pump the tube could be cleaned. The marks are
for matching the position of the cogs to what is was before disassembly. I don't know if that
is really necessary but I did not try to figure out what the function was for all the bits and bobs
inside the unit.
The waste ink pad was saturated with black ink around the area where the pump outlet was
and the chassis was firmly glued to the bottom of the plastic cover by this.
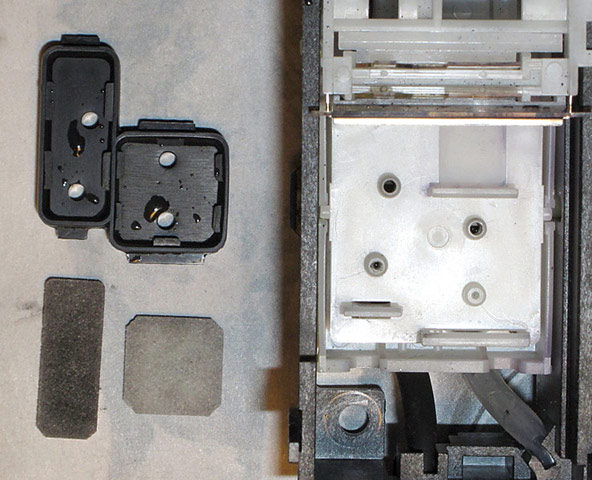
Cleaned parts and assembled unit.
After a very thorough and brutal cleaning of the print head itself the printer is in good working order.
The "pharmacist" recipie was used with NaOH instead of ammonia. An ultrasonic cleaner,
a vacuum pump and long soaking in the cleaning fluid were used.
Some conclusions:
Spitting old ink on the floor is bad manners and lead to early death by constipation.
The cure is painful and can lead to other problems.
Cleaning cycles do no good if the purging unit is faulty.
The inks can find their way into other nozzles if the "spitoon" is flooded.
A saturated waste ink pad can lead to clogging of the outlet tube from the pump.
( which is what I think happened in my case )
The outlet tube should end close to (or on) the waste ink pad.
( to avoid any ink left on the end of the tube where it can dry and clog the tube )
Other printers have a similar purge unit, the details might differ but I have seen this type of
pump in service manuals for other printer models.
Hopefully some facts about other printers using a similar purge unit can be drawn from this.
Background:
The printer has been unused for at least three years and it had a bad track record
when it was used. Lots of cleaning cycles without any real improvment led to it being
replaced by a laser printer and a Canon 9600 Mk II. The S750 was opened to see if
there were any useful components inside for use in other projects.
The troubleshooting was really simple - once the cover was off the "parking place"
for the print head had no visible parts, only big pile of black, messy stuff.
The purging unit actually did the opposite, it smeared old dried ink all over the print head.
This picture shows the landing zone with the messy stuff removed. Two porous plates
have also been removed. Lots of dried ink in the black compartment. Some black ink had also
leaked into the compartment for the color nozzles.
The "windscreen wipers" were also messy, they had a hopeless job when the pump was not
working.
Turning the purge unit over the lower part of the black tube was completely clogged with dried ink.
After removing the rotary part of the peristaltic pump the tube could be cleaned. The marks are
for matching the position of the cogs to what is was before disassembly. I don't know if that
is really necessary but I did not try to figure out what the function was for all the bits and bobs
inside the unit.
The waste ink pad was saturated with black ink around the area where the pump outlet was
and the chassis was firmly glued to the bottom of the plastic cover by this.
Cleaned parts and assembled unit.
After a very thorough and brutal cleaning of the print head itself the printer is in good working order.
The "pharmacist" recipie was used with NaOH instead of ammonia. An ultrasonic cleaner,
a vacuum pump and long soaking in the cleaning fluid were used.
Some conclusions:
Spitting old ink on the floor is bad manners and lead to early death by constipation.
The cure is painful and can lead to other problems.
Cleaning cycles do no good if the purging unit is faulty.
The inks can find their way into other nozzles if the "spitoon" is flooded.
A saturated waste ink pad can lead to clogging of the outlet tube from the pump.
( which is what I think happened in my case )
The outlet tube should end close to (or on) the waste ink pad.
( to avoid any ink left on the end of the tube where it can dry and clog the tube )
Other printers have a similar purge unit, the details might differ but I have seen this type of
pump in service manuals for other printer models.
