- Joined
- Jun 16, 2006
- Messages
- 3,645
- Reaction score
- 85
- Points
- 233
- Location
- La Verne, California
- Printer Model
- Epson WP-4530
I have finally found what I consider to be the best way to refill the popular Canon cartridges. By "best" I mean a method that does not compromise the cartridge in any way and ends up with cartridges looking just like OEM, that is with a little bit of white sponge material at the top and no holes, plugs, screws or tape anywhere. I'm introducing it on American Independence Day, July 4, 2011 and calling it the Freedom Refill Method--freedom from high prices. This method was inspired by information posted on this thread called A new way to fill but I had to come up with some of my own ideas to make it actually work at a cheap price. Although I haven't tried it, I believe this would be a perfect refill method for the new opaque cartridges.
First, watch this video.
PLEASE NOTE: Although it may look like I'm pushing on the plunger, I am not. Don't push on the plunger at any time. The plunger will go back in all by itself. In fact, you have to restrain it from going in too fast. If you let go of it, it will snap in so fast that it will jar the cartridge off the adapter.
The materials I used were:
1) a 60 cc syringe which I bought from a local medical supply store for $3.
2) vinyl tubing 5/16" ID x 7/16" OD available from a local hardware store for a couple dollars depending on length
3) rubber fuel line hose 3/8" ID x 5/8" OD available from a local auto supply store for a couple dollars.
4) rubber heater hose 1/2" ID x 3/4" OD available from a local auto supply store for a couple dollars.
5) a small piece of vinyl tape.
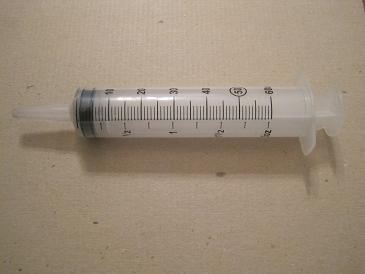
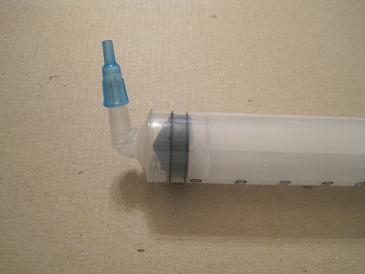
Here is a picture of the large syringe:
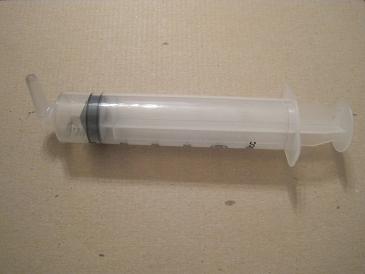
What I do next is use the flame of a small candle to heat the post of the nozzle, rotating it until it becomes pliable and then I bend it at 90 degrees in the direction away from the lettering on the side of the syringe:
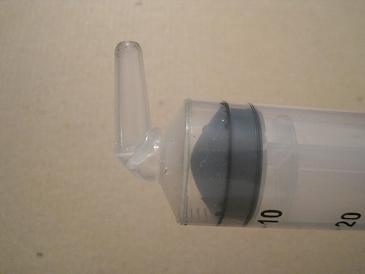
Here is a closeup of the bend:
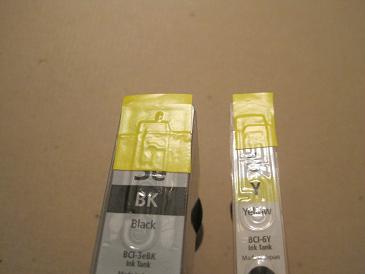
I actually took a BCI-6 and BCI-3e cartridge into the auto supply store and tried a bunch of different sized rubber hoses until I found some that fit very snuggly on the outlet ports of the cartridges. It is important that these be very hard to fit because we want the hose to make an air-tight seal with the outlet port. I cut short pieces (less than an inch) of each type of tubing. I fit the vinyl tubing half way into the smaller rubber hose, making two of these. For one of them, I fit the smaller rubber hose halfway into the larger rubber hose.
Here is a picture of the two adapters for the two different sized cartridges:
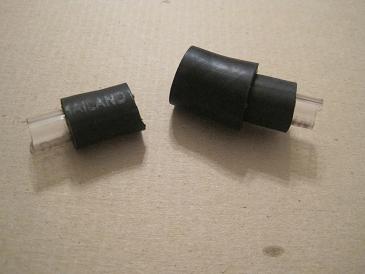
And here are pictures of the two adapters attached to a BCI-6 and a BCI-3e cartridges:
Notice how the rubber hoses are tapered as they go on to the outlet ports. This is necessary because there are four ribs around the outside of the outlet ports making a complete tight seal impossible. The taper allows the inside of the hose to ride over the ribs but still make tight contact with the edge of the port. We depend on this tight seal to not only keep air from getting in but also to mechanically hold the cartridge onto the adapter.
Before you can start refilling, you must seal off the air vent on the top of the cartridge. Use a piece of vinyl tape making sure you cover all the groves in the air vent and pressing the tape down firmly:
Next you should test the air tightness of your apparatus. Do this by starting with the syringe fully depressed before you attach it to the adapter. Now pull back quickly on the plunger until it is near the 60 cc mark then allow the vacuum in the cartridge to pull the plunger back into the syringe. Whatever you do, don't let go of the plunger because it will snap back in and probably knock the cartridge off the adapter. The plunger should return to within about 5 cc of its original position, hopefully even closer. The longer you leave the plunger out, the farther away it will return to its starting point and you don't want that to happen.
You will likely spill ink with this method so you should wear gloves and work over a sink or other area where you won't care about ink splattered about.
I recommend you practice with water instead of ink until you get the hang of it. With the syringe removed from the adapter, you can just pull the plunger out of the syringe and put water into it. When you want to fill the cartridge with water, you position the apparatus so the cartridge is down. While you are pulling on the plunger, make sure the hole between the two chambers is at the top so that air can escape. When you are letting the plunger back in, rotate the apparatus so that the ink can flow under gravity from the outlet port to the hole between the chambers and enter the tank. Watch the video closely to see how I am doing this.
After you fill a cartridge with water, you can remove the water by starting with the syringe not fully depressed but with maybe 20 cc of air in it. Then you hold the apparatus with the cartridge on top and repeatedly pull on the plunger and slowly let it back in until all of the water has been milked out of the cartridge and into the syringe. If you want to pour the dirty water out, detach the syringe from the adpater.
When you get ready to try ink, there are several methods of getting it into the syringe. You can use a needle adapter that comes with the syringe:
In this case you would attach a long needle to it so that you can insert it into your ink supply and pull back on the plunger until you have 15 to 30 cc of ink. I recommend 20 cc for the smaller dye ink cartridges and 30 cc for the larger pigment black ink cartridges. You may have to repeat the whole process to get a complete fill.
Another method is to pour some of your ink supply into a wide mouth jar so that you can insert the bent syringe into it to draw up whatever amount of ink you want.
A third method is to attach a length of vinyl tubing which you insert into your ink supply and draw up the ink into the syringe.
Whatever method you use, be careful to cap your ink supply bottles when not using them to reduce the risk of a spilling them.
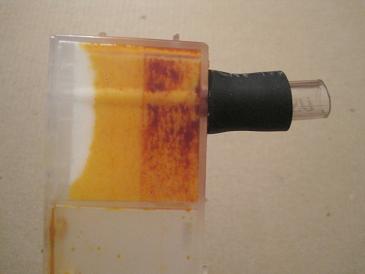
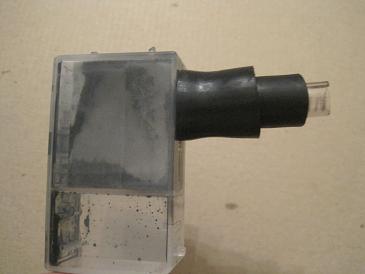
At this point you attach the syringe to the adapter so that the tank in the cartridge is at the lowest point. When you are drawing on the plunger, hold the apparatus so that the hole between the two chambers is uppermost so that air can escape. When you are allowing the vacuum in the cartridge to pull the plunger back in, tip the apparatus back so that the ink has a greater chance to flow down to the hole between the chambers. Keep your eye on the area between the sponge and the air vent because you don't want to get any ink in there. If you see that starting to happen, slow down the rate that the plunger is going in.
You can repeat the cycle of pulling on the plunger and letting it back in as long as there remains ink in the bottom of the syringe. But eventually, you will run out of any distance to pull on the plunger because the syringe has gotten full of air. At this point, if you want to continue refilling, you can detach the syringe from the adapter, hold the syringe with the outlet on top, make sure there is no residual ink in the nozzle, and then depress the plunger until there is a minimal amount of air in it. Then if you want you can put more ink in the syringe and repeat the whole process.
When you finally get the cartridge refilled to your heart's content, remove the tape over the air vent and use a fresh piece of tape stretched across the outlet port to seal it until use.
Happy Freedom Refilling!!!
First, watch this video.
PLEASE NOTE: Although it may look like I'm pushing on the plunger, I am not. Don't push on the plunger at any time. The plunger will go back in all by itself. In fact, you have to restrain it from going in too fast. If you let go of it, it will snap in so fast that it will jar the cartridge off the adapter.
The materials I used were:
1) a 60 cc syringe which I bought from a local medical supply store for $3.
2) vinyl tubing 5/16" ID x 7/16" OD available from a local hardware store for a couple dollars depending on length
3) rubber fuel line hose 3/8" ID x 5/8" OD available from a local auto supply store for a couple dollars.
4) rubber heater hose 1/2" ID x 3/4" OD available from a local auto supply store for a couple dollars.
5) a small piece of vinyl tape.
Here is a picture of the large syringe:
What I do next is use the flame of a small candle to heat the post of the nozzle, rotating it until it becomes pliable and then I bend it at 90 degrees in the direction away from the lettering on the side of the syringe:
Here is a closeup of the bend:
I actually took a BCI-6 and BCI-3e cartridge into the auto supply store and tried a bunch of different sized rubber hoses until I found some that fit very snuggly on the outlet ports of the cartridges. It is important that these be very hard to fit because we want the hose to make an air-tight seal with the outlet port. I cut short pieces (less than an inch) of each type of tubing. I fit the vinyl tubing half way into the smaller rubber hose, making two of these. For one of them, I fit the smaller rubber hose halfway into the larger rubber hose.
Here is a picture of the two adapters for the two different sized cartridges:
And here are pictures of the two adapters attached to a BCI-6 and a BCI-3e cartridges:
Notice how the rubber hoses are tapered as they go on to the outlet ports. This is necessary because there are four ribs around the outside of the outlet ports making a complete tight seal impossible. The taper allows the inside of the hose to ride over the ribs but still make tight contact with the edge of the port. We depend on this tight seal to not only keep air from getting in but also to mechanically hold the cartridge onto the adapter.
Before you can start refilling, you must seal off the air vent on the top of the cartridge. Use a piece of vinyl tape making sure you cover all the groves in the air vent and pressing the tape down firmly:
Next you should test the air tightness of your apparatus. Do this by starting with the syringe fully depressed before you attach it to the adapter. Now pull back quickly on the plunger until it is near the 60 cc mark then allow the vacuum in the cartridge to pull the plunger back into the syringe. Whatever you do, don't let go of the plunger because it will snap back in and probably knock the cartridge off the adapter. The plunger should return to within about 5 cc of its original position, hopefully even closer. The longer you leave the plunger out, the farther away it will return to its starting point and you don't want that to happen.
You will likely spill ink with this method so you should wear gloves and work over a sink or other area where you won't care about ink splattered about.
I recommend you practice with water instead of ink until you get the hang of it. With the syringe removed from the adapter, you can just pull the plunger out of the syringe and put water into it. When you want to fill the cartridge with water, you position the apparatus so the cartridge is down. While you are pulling on the plunger, make sure the hole between the two chambers is at the top so that air can escape. When you are letting the plunger back in, rotate the apparatus so that the ink can flow under gravity from the outlet port to the hole between the chambers and enter the tank. Watch the video closely to see how I am doing this.
After you fill a cartridge with water, you can remove the water by starting with the syringe not fully depressed but with maybe 20 cc of air in it. Then you hold the apparatus with the cartridge on top and repeatedly pull on the plunger and slowly let it back in until all of the water has been milked out of the cartridge and into the syringe. If you want to pour the dirty water out, detach the syringe from the adpater.
When you get ready to try ink, there are several methods of getting it into the syringe. You can use a needle adapter that comes with the syringe:
In this case you would attach a long needle to it so that you can insert it into your ink supply and pull back on the plunger until you have 15 to 30 cc of ink. I recommend 20 cc for the smaller dye ink cartridges and 30 cc for the larger pigment black ink cartridges. You may have to repeat the whole process to get a complete fill.
Another method is to pour some of your ink supply into a wide mouth jar so that you can insert the bent syringe into it to draw up whatever amount of ink you want.
A third method is to attach a length of vinyl tubing which you insert into your ink supply and draw up the ink into the syringe.
Whatever method you use, be careful to cap your ink supply bottles when not using them to reduce the risk of a spilling them.
At this point you attach the syringe to the adapter so that the tank in the cartridge is at the lowest point. When you are drawing on the plunger, hold the apparatus so that the hole between the two chambers is uppermost so that air can escape. When you are allowing the vacuum in the cartridge to pull the plunger back in, tip the apparatus back so that the ink has a greater chance to flow down to the hole between the chambers. Keep your eye on the area between the sponge and the air vent because you don't want to get any ink in there. If you see that starting to happen, slow down the rate that the plunger is going in.
You can repeat the cycle of pulling on the plunger and letting it back in as long as there remains ink in the bottom of the syringe. But eventually, you will run out of any distance to pull on the plunger because the syringe has gotten full of air. At this point, if you want to continue refilling, you can detach the syringe from the adapter, hold the syringe with the outlet on top, make sure there is no residual ink in the nozzle, and then depress the plunger until there is a minimal amount of air in it. Then if you want you can put more ink in the syringe and repeat the whole process.
When you finally get the cartridge refilled to your heart's content, remove the tape over the air vent and use a fresh piece of tape stretched across the outlet port to seal it until use.
Happy Freedom Refilling!!!